
In deze uitgebreide gids nemen we samen de stappen door om IPv6 uit te schakelen op Windows 11 of Windows 10. Hoewel IPv6 standaard is ingeschakeld op beide besturingssystemen voor een vlotte internetervaring, zijn er situaties waarin u het misschien wilt uitzetten.
Bijvoorbeeld, u kunt problemen ondervinden met bepaalde VPN’s die niet goed overweg kunnen met IPv6. Als u de voorkeur geeft aan een internetverbinding die uitsluitend gebruikmaakt van IPv4, dan bied ik u hier verschillende manieren om IPv6 uit te schakelen op uw Windows computer.
IPv6 uitschakelen in Windows 11 of Windows 10
Om te beginnen is de makkelijkste manier om IPv6 uit te schakelen via het Configuratiescherm.
Meld u dan aan voor onze nieuwsbrief.
IPv6 uitschakelen via Configuratiescherm
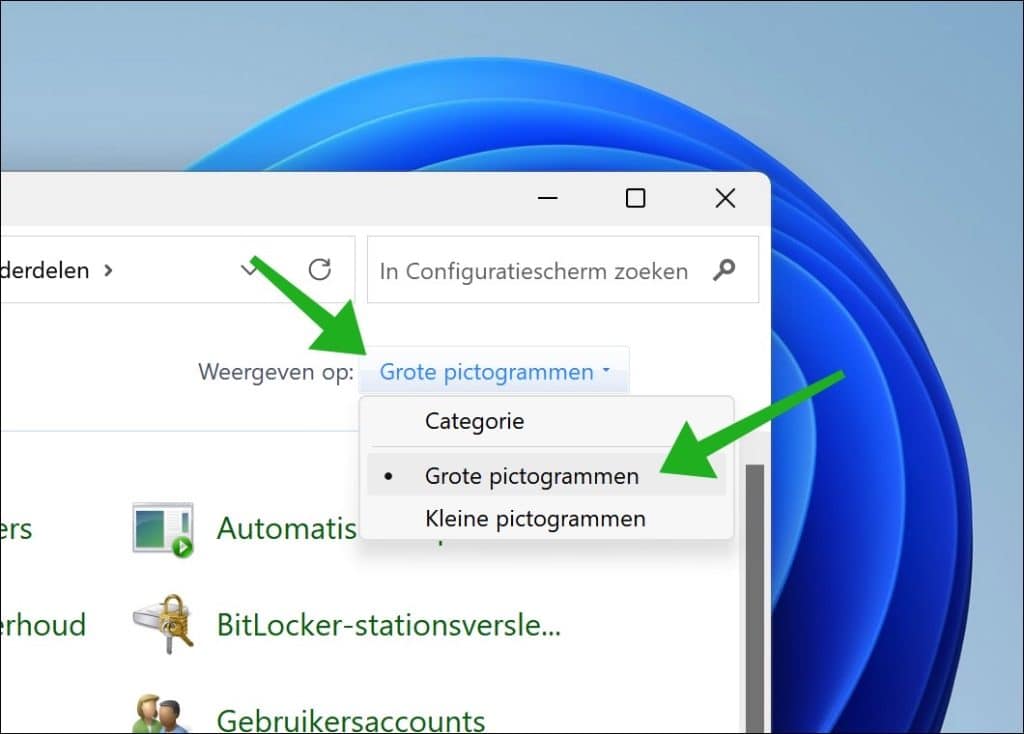
Open het Configuratiescherm. Wijzig de pictogrammen naar “Grote pictogrammen” om het werken met Configuratiescherm makkelijker te maken.
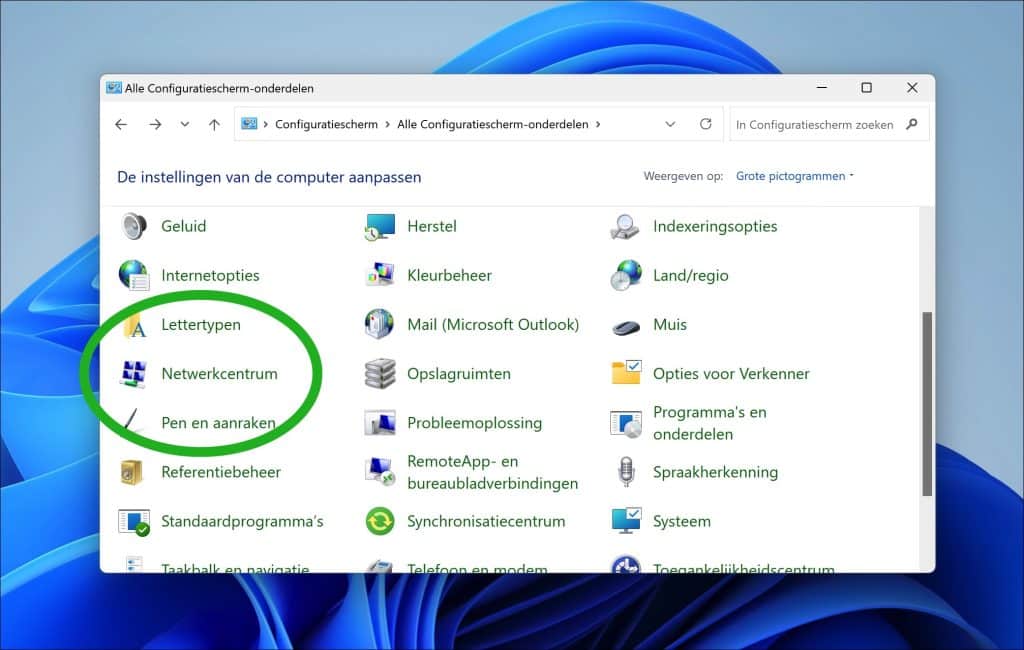
Klik vervolgens in het Configuratiescherm op “Netwerkcentrum”.
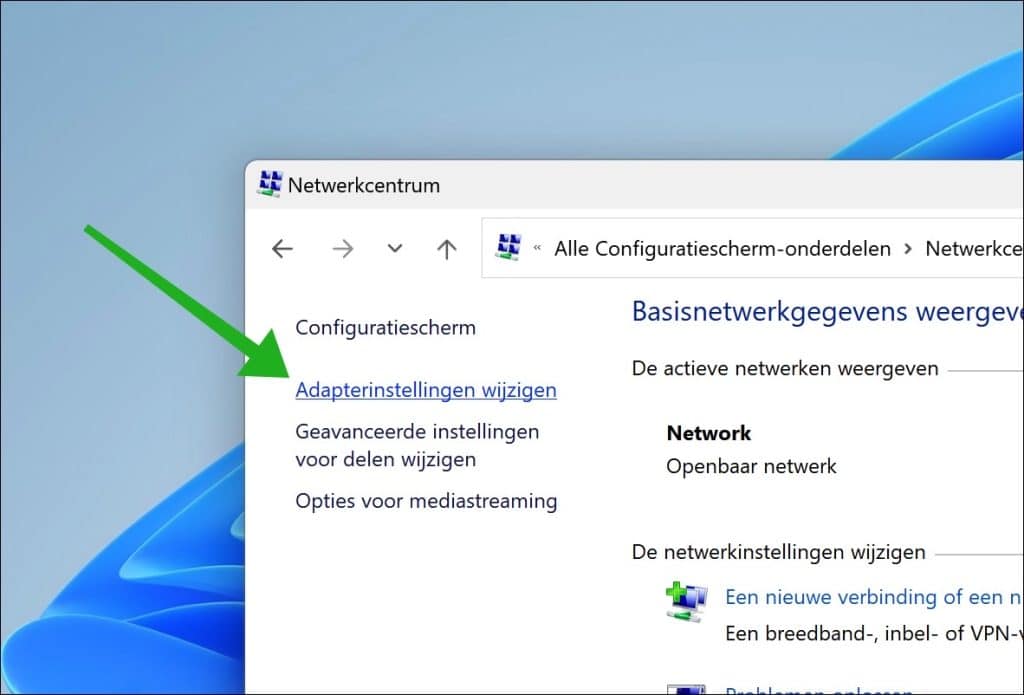
Klik links bovenin op “Adapter instellingen wijzigen”.
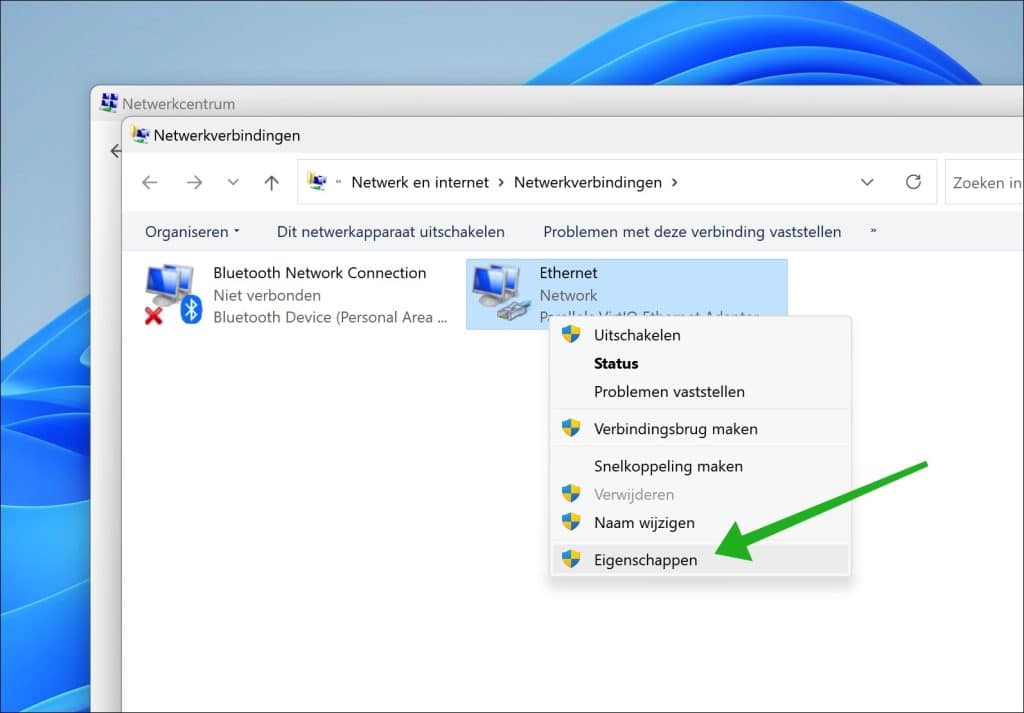
Klik met de rechtermuisknop op de actieve verbinding waar u IPv6 wilt uitschakelen. Dit kan “Ethernet” zijn voor een netwerkverbinding via kabel of “Wi-Fi” voor een draadloze verbinding. Klik op “Eigenschappen” in het menu.
U schakelt “Internet Protocol Version 6 (TCP/IPv6)” uit door de selectie uit te schakelen.
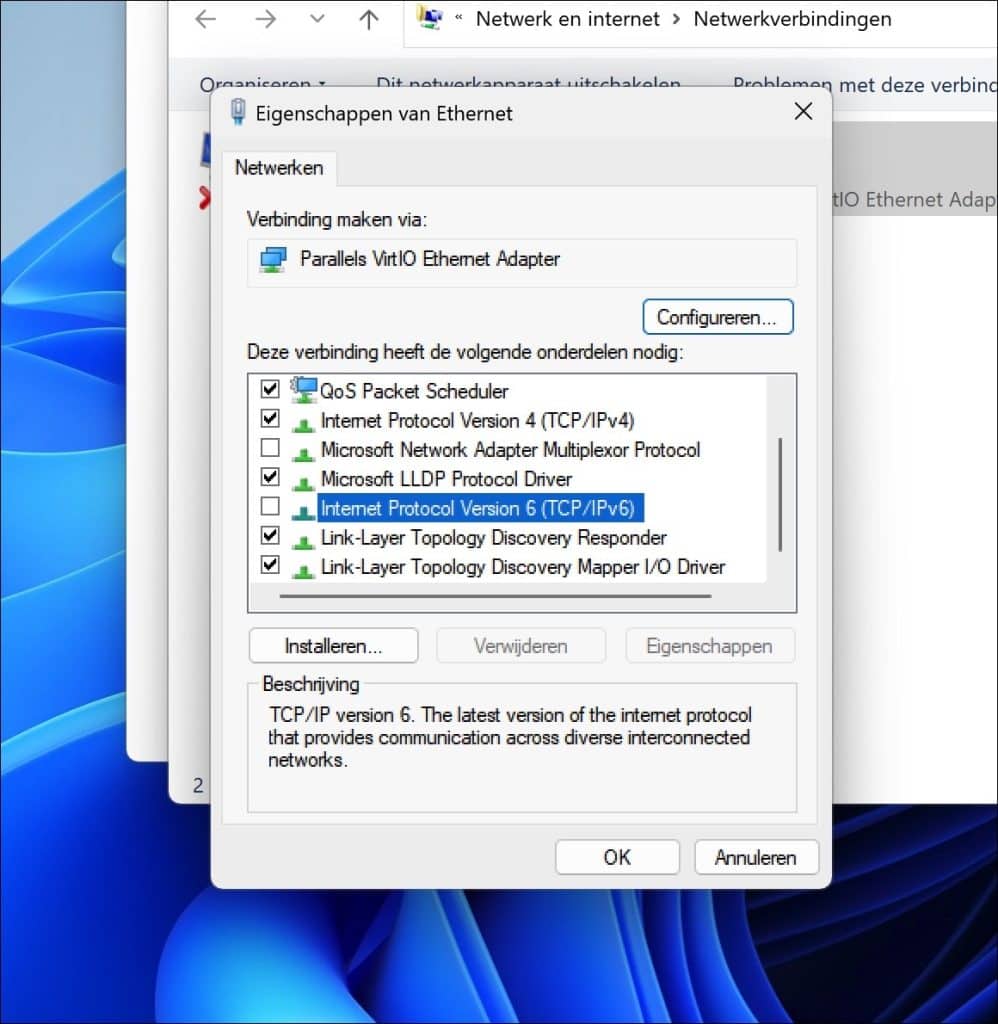
Klik op “OK” om te bevestigen. U heeft nu IPv6 uitgeschakeld.
IPv6 uitschakelen via Opdrachtprompt of PowerShell
Een tweetal alternatieven om IPv6 uit te schakelen is via het Opdrachtprompt of PowerShell.
Open een Opdrachtprompt als administrator. Geef het volgende commando in om IPv6 uit te schakelen:
reg add "HKEY_LOCAL_MACHINE\SYSTEM\CurrentControlSet\Services\Tcpip6\Parameters" /v DisabledComponents /t REG_DWORD /d 0xffffffff /f
Open een Terminal (PowerShell) venster als administrator. Geef het volgende commando in om IPv6 uit te schakelen:
Set-ItemProperty -Path "HKLM:\SYSTEM\CurrentControlSet\Services\Tcpip6\Parameters" -Name DisabledComponents -Value 0xffffffff
Beide voegen een waarde toe in het Windows register om IPv6 uit te schakelen. Ik hoop u hiermee geïnformeerd te hebben. Bedankt voor het lezen!
Help mee
Mijn computertips zijn gratis en bedoeld om andere mensen te helpen. Door deze pc-tip te delen op een website of social media, helpt u mij meer mensen te bereiken.Overzicht met computertips
Bekijk ook mijn uitgebreide overzicht met praktische computertips, overzichtelijk gesorteerd per categorie.Computerhulp nodig?
Loopt u vast met uw pc, laptop of software? Stel uw vraag op ons computerforum en krijg gratis computerhulp van ervaren leden en experts.