
Wanneer u op een Windows 11 computer de Skype app installeert, wordt deze automatisch gestart telkens wanneer u aanmeldt op een Windows 11 computer.
U kunt het altijd sluiten door met de rechtermuisknop op het pictogram op de taakbalk te klikken, maar de volgende keer dat u zich weer aanmeldt, start Skype weer automatisch mee op. Als u niet wilt dat Skype elke weer mee wordt opgestart in Windows, dan zal deze tip u helpen.
Skype niet mee opstarten in Windows 11
Er zijn drie manieren om te voorkomen dat Skype opstart wordt in Windows 11. Voer iedere stap uit om te voorkomen dat Skype met Windows opstart. Elke manier is voor een andere manier waarop Skype is geïnstalleerd op de computer.
Meld u dan aan voor onze nieuwsbrief.
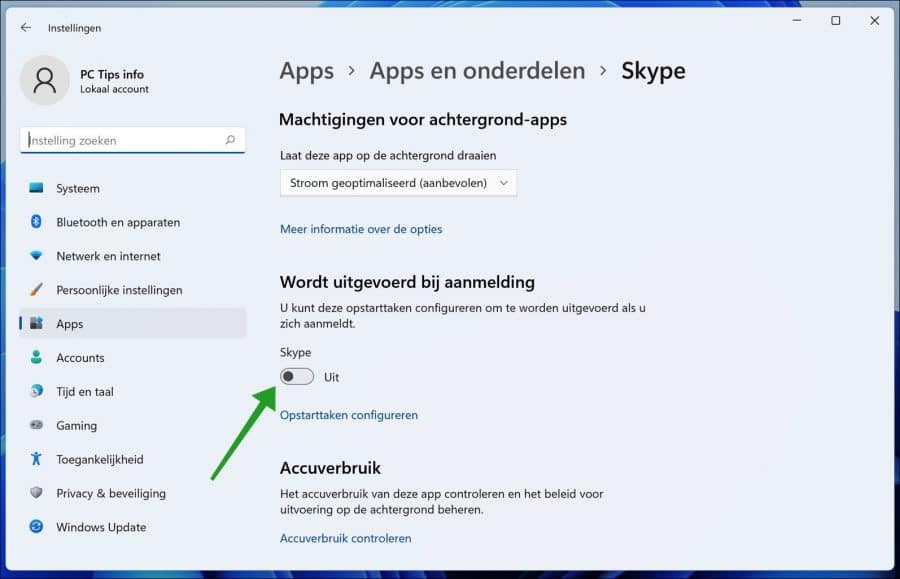
Klik op het vergrootglas in de taakbalk. In het zoekvenster type: Skype. Klik met de rechtermuisknop op het Skype resultaat en klik op App-instellingen.

In de “Wordt uitgevoerd bij aanmelding” instellingen schakel de optie Skype uit.
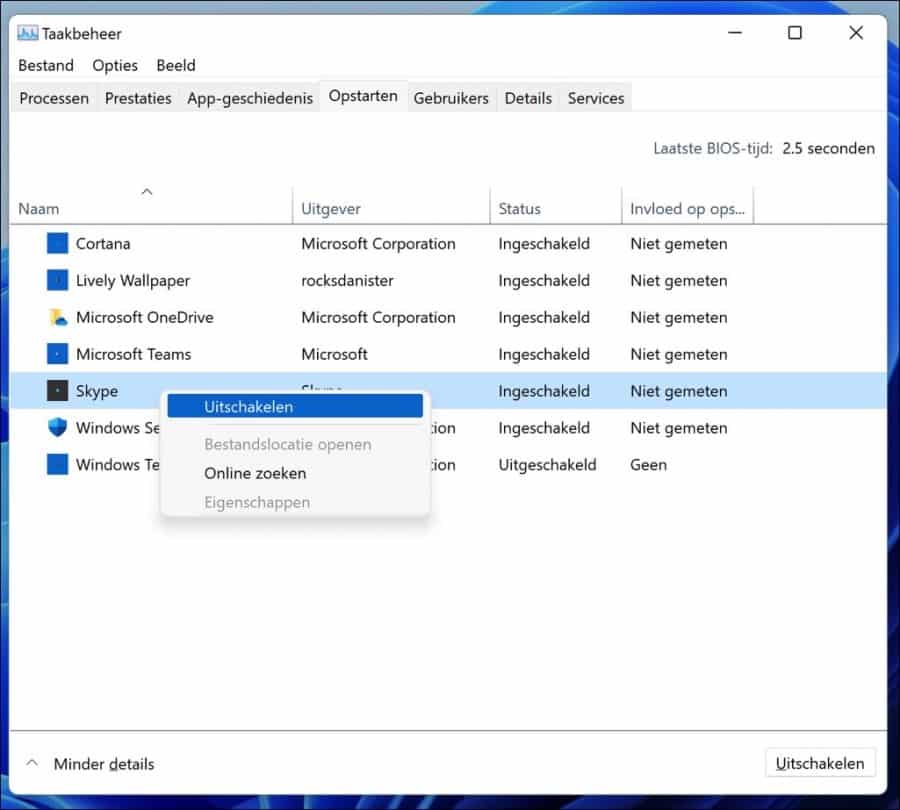
De tweede manier om te voorkomen dat Skype wordt opgestart is door taakbeheer te openen. Dit doet u door op CTRL + ALT + DEL te drukken op uw toetsenbord en daarna Taakbeheer in het menu te openen.
Klik op tabblad Opstarten, klik met de rechtermuisknop op Skype en klik op Uitschakelen. Skype wordt niet meer opgestart tijdens het aanmelden in Windows 11.
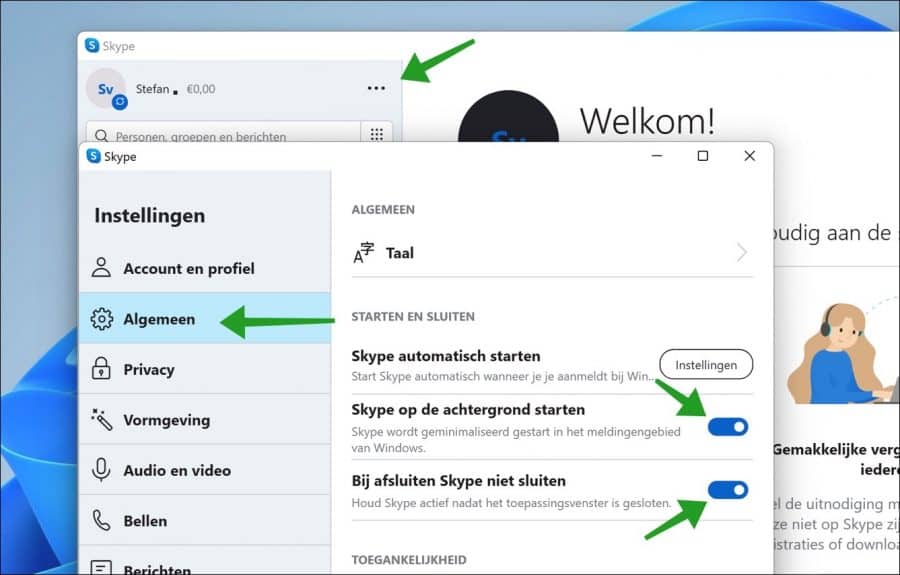
De derde manier om voorkomen dat Skype opstart is door Skype te openen. Klik rechts naast de naam op de drie horizontale puntjes. Klik op tabblad Algemeen en schakel de opties “Skype op de achtergrond starten” en “Bij afsluiten Skype niet sluiten” uit.
Lees meer: Opstart apps uitschakelen in Windows 11.
Ik hoop u hiermee geholpen te hebben. Bedankt voor het lezen!
Help mee
Mijn computertips zijn gratis en bedoeld om andere mensen te helpen. Door deze pc-tip te delen op een website of social media, helpt u mij meer mensen te bereiken.Overzicht met computertips
Bekijk ook mijn uitgebreide overzicht met praktische computertips, overzichtelijk gesorteerd per categorie.Computerhulp nodig?
Loopt u vast met uw pc, laptop of software? Stel uw vraag op ons computerforum en krijg gratis computerhulp van ervaren leden en experts.