
Wanneer u Windows installeert, krijgt u een optie om de taal van uw voorkeur te selecteren. Als u dat doet, gebruikt Windows uw voorkeurstaal voor Windows-functies zoals Instellingen en Windows verkenner.
Nadat u Windows op uw apparaat hebt geïnstalleerd, kunt u ook extra taalpakketten installeren om uw lijst met Windows vertoningstalen uit te breiden. Taalpakketten kunnen functies bevatten ter ondersteuning van tekst-naar-spraak, spraakherkenning, handschrift, toetsenbord, optische tekenherkenning en meer.
Als een taal wordt vermeld onder voorkeurstalen, maar niet voorkomt in de lijst met Windows weergave talen, moet u eerst het bijbehorende taalpakket installeren. Dit kan alleen als het talenpakket beschikbaar is.
Meld u dan aan voor onze nieuwsbrief.
Taal pakket installeren in Windows 11
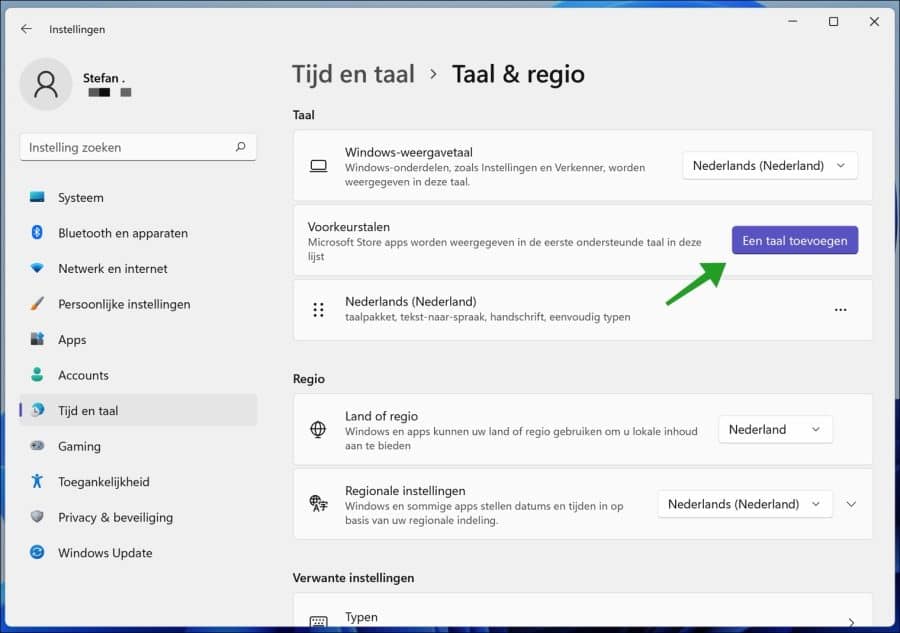
Klik met de rechtermuisknop op de Startknop. Klik op Instellingen in het menu. Klik links op Tijd en taal en daarna op Taal & regio.
Onder voorkeurstalen kunt u een taal pakket toevoegen door op de “Taal toevoegen” te klikken.
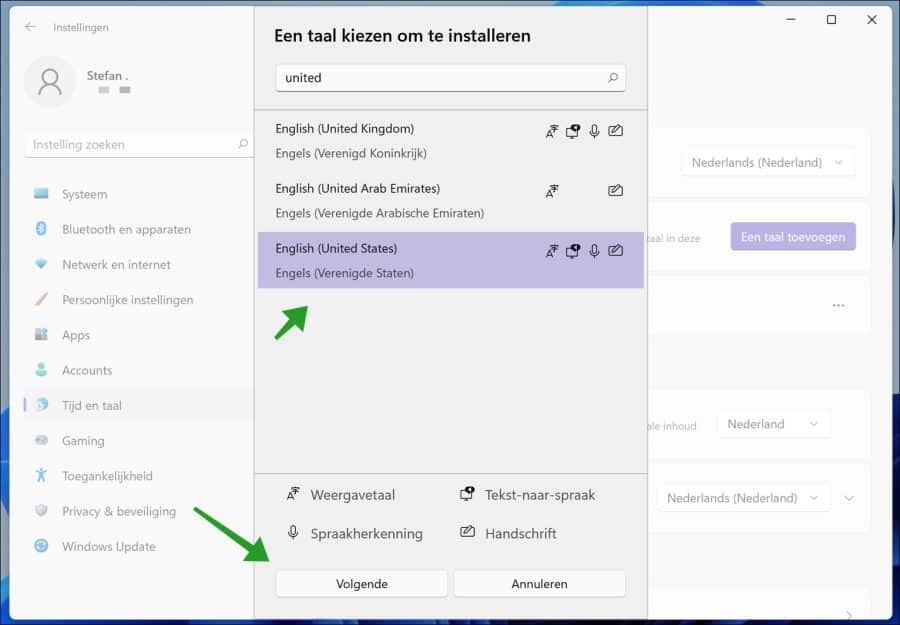
Selecteer vervolgens de taal die u wenst te installeren. Klik daarna op volgende.
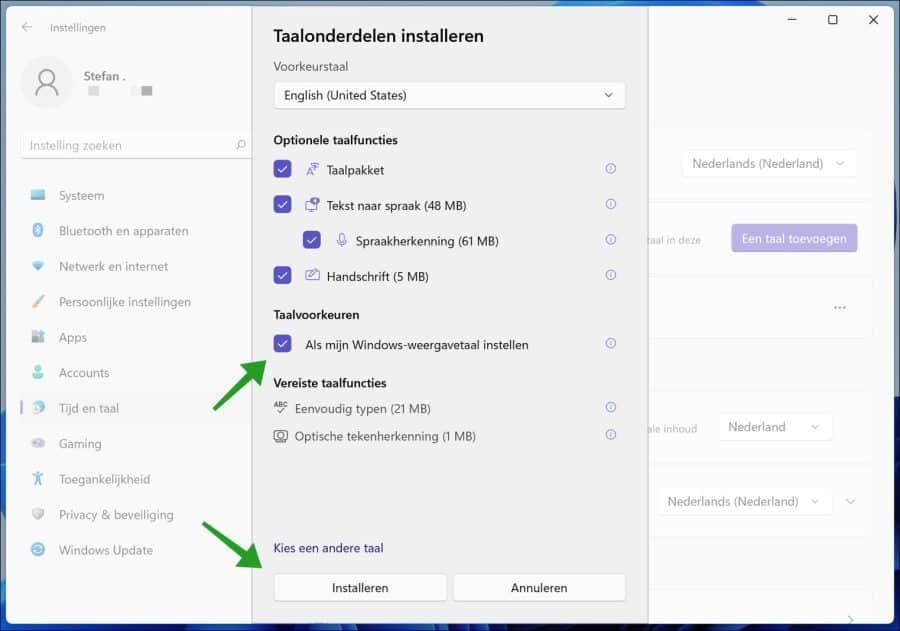
Selecteer de taalonderdelen die geïnstalleerd dienen te worden. U heeft een aantal optionele keuzes, zoals, taalpakket, tekst naar spraak, spraakherkenning, handschrift.
Als u de weergave taal van Windows 11 wilt aanpassen, zorg er dan voor dat “Als mijn Windows-weergavetaal instellen” is ingeschakeld. Klik op Installeren.
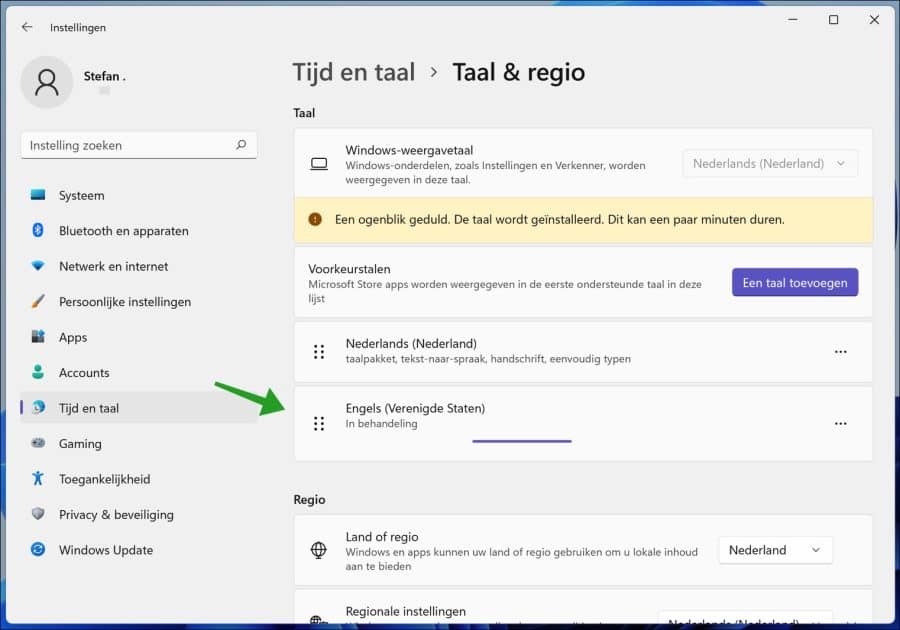
U ziet in de Taal & regio instellingen in Windows 11 dat de nieuwe taal wordt geïnstalleerd. Dit duurt niet lang.
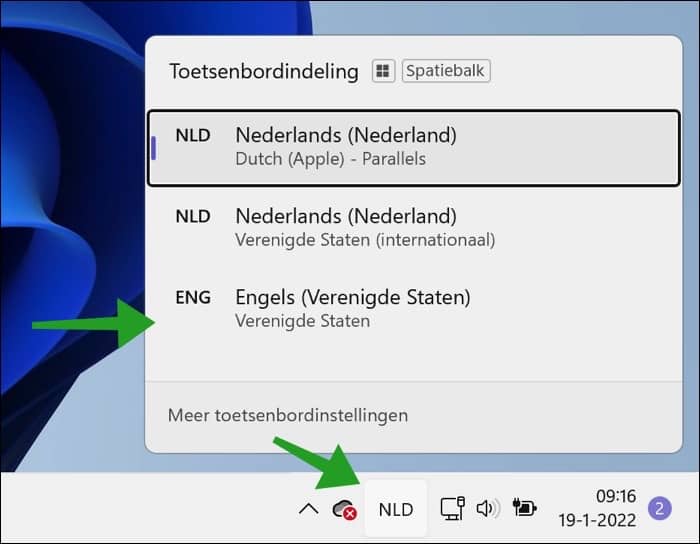
Rechts onderin in de taakbalk bij de systeempictogrammen en het overloopmenu kunt u de toetsenbordindeling aanpassen naar de nieuwe taal instellingen.
Lees ook: Windows 10 weergave taal wijzigen.
Ik hoop u hiermee geholpen te hebben. Bedankt voor het lezen!
Hartelijk dank, ga ik proberen
Ik krijg bij het instaleren van Flight sim fsx aan het einde van de installatie foutcode 1722. Hoe kan ik dit oplossen?
Hallo, hier leest u mogelijk de oplossing:
https://support.microsoft.com/en-us/topic/error-1722-when-reinstalling-flight-simulator-x-de4cfd63-4900-874d-5fc5-020555e62be2Succes!