

If you are doing something on your Windows 11 or 10 PC, it doesn't help if the PC just shuts down after a period of time. goes into sleep mode.
The possible consequence of hibernation is that you may lose work because it has not been saved. Fortunately, there are some simple steps you can take to prevent your Windows computer from going into sleep mode so you can work uninterrupted. By understanding how to adjust your power settings and use power management tools, you can ensure that your PC never goes into sleep mode again. I am also introducing an app to prevent the PC from going into sleep mode.
Prevent your Windows 11 or 10 PC from going into sleep mode
As mentioned, there are several ways to prevent your Windows PC from going into sleep mode.
For starters, you can change when the PC goes into sleep mode via the control panel. You can then enable wake-up timers to automatically wake the PC from sleep mode or use an app to prevent sleep mode.
Change when the PC goes into sleep mode
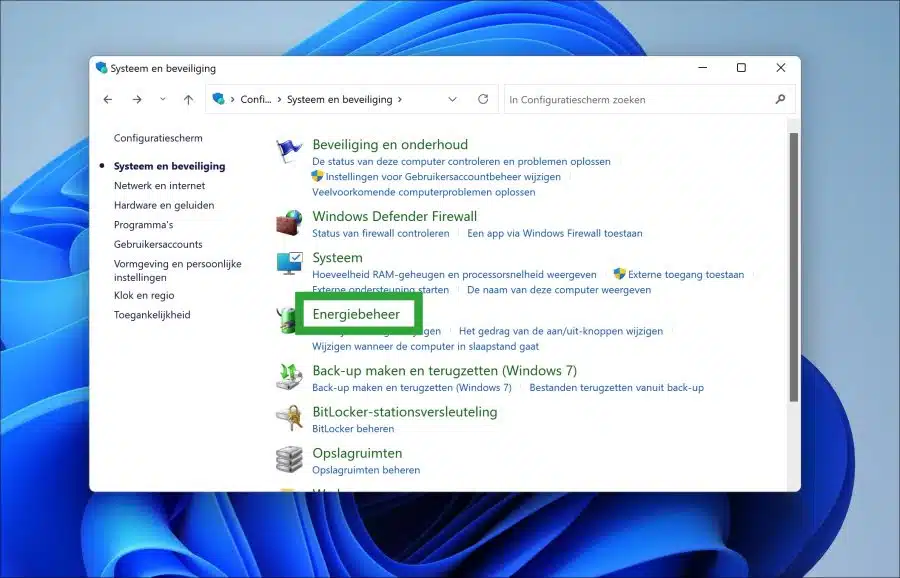
To change the sleep mode settings, open the control panel. Then click on “System and Security”.

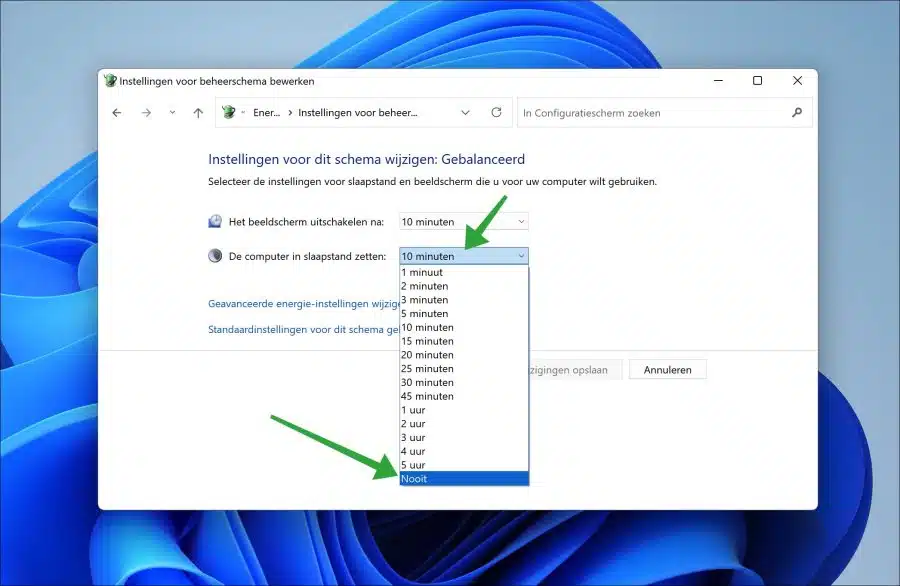
In the “Power Management” settings, click “Change when the computer goes to sleep”.

Change the “Put the computer to sleep” option to “Never” to prevent the computer from entering sleep mode. You can also change this for the display by changing the “Turn off the display after” option to “Never”.
Click the “Save changes” button to confirm.
Enable activation timers
A activation timer is a timed event that wakes the computer from sleep or hibernation at a specified time to perform scheduled tasks. Important activation timers include things like a required restart after a Windows update. I recommend enabling wake timers to allow apps to wake the computer from sleep.
To enable the activation timers, open the control panel. Then click on “System and Security”.
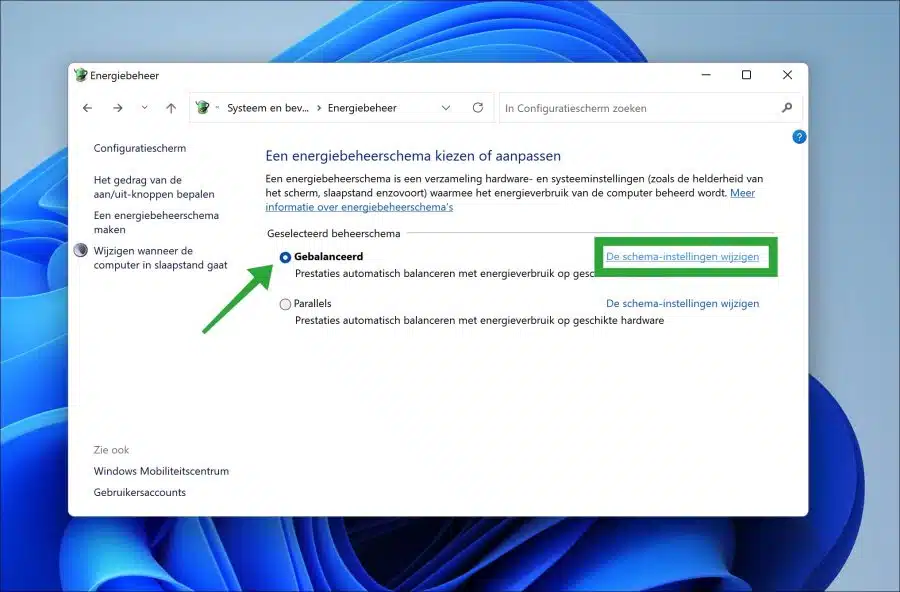
Then click on “Power Management”.
In the active management plan, click on “Change the plan settings”.
Open the advanced power settings by clicking “Change advanced power settings.”
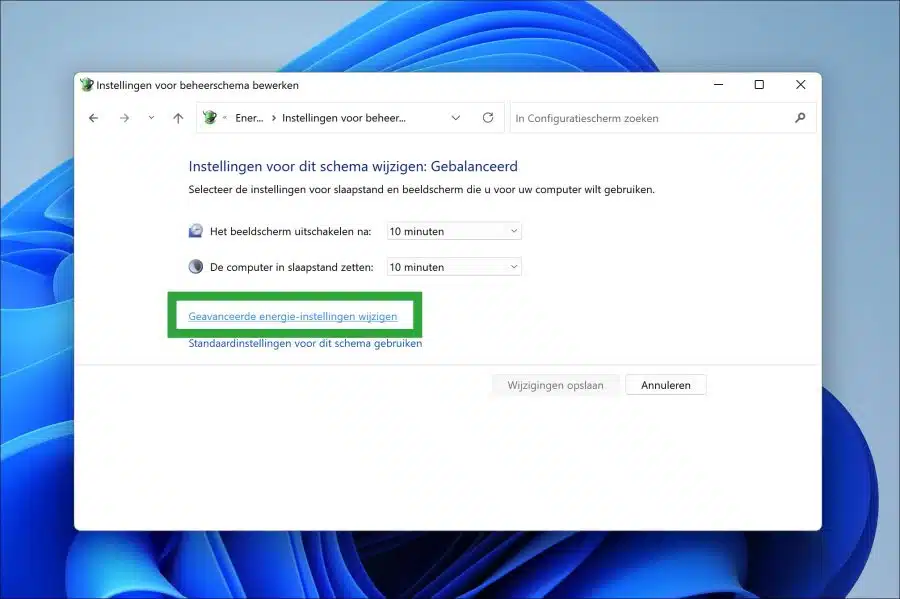
Open the “Sleep Mode” setting and then “Allow Wake-up Timers”. Change the setting to “enable”.
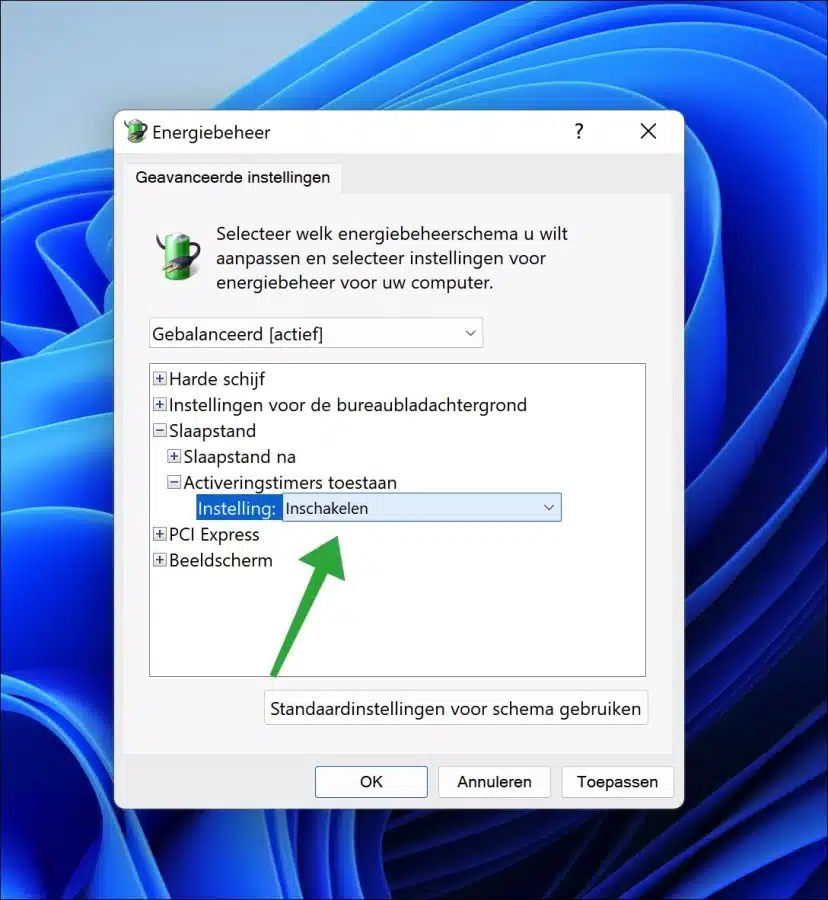
Click “Apply” and “OK” to confirm.
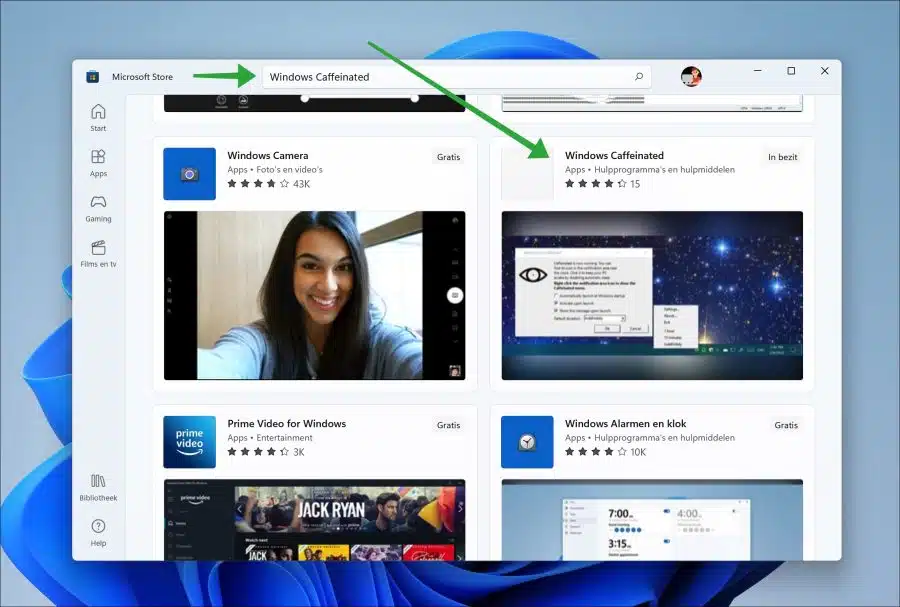
Windows Caffeinated
To prevent your computer from going into sleep mode, you can also install a free app from the Microsoft Store.
Open the Microsoft Store via the taskbar.

In the search bar, search for “Windows Caffeinated”. Click on the result.
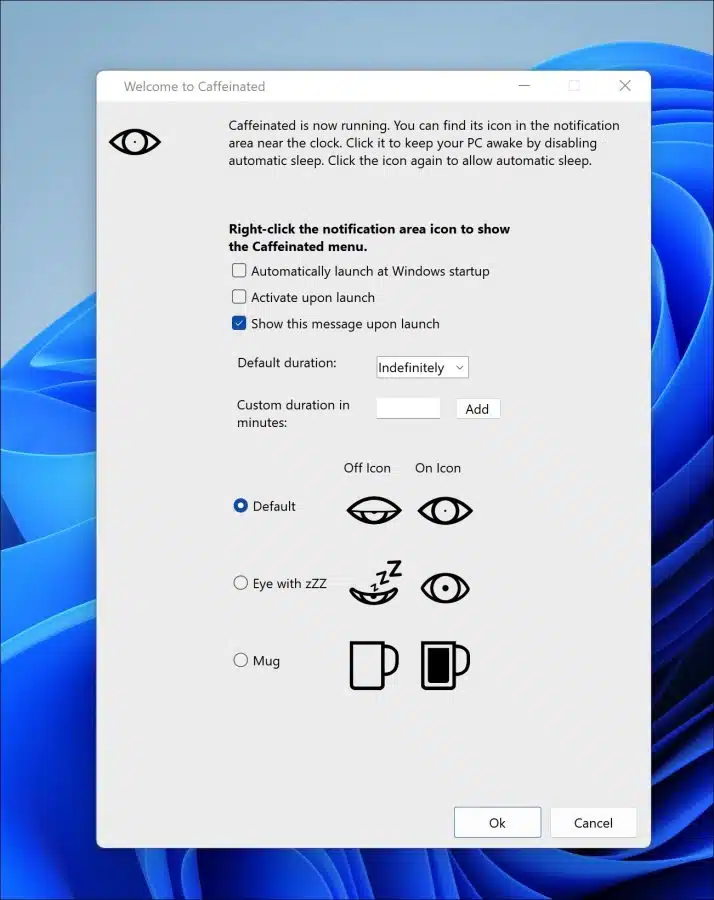
Download and install this free app. Once installed, open it on your computer.
You will now immediately see that the computer no longer goes into sleep mode. You can optionally change a different time settings, a desired time or the icon in the system tray.
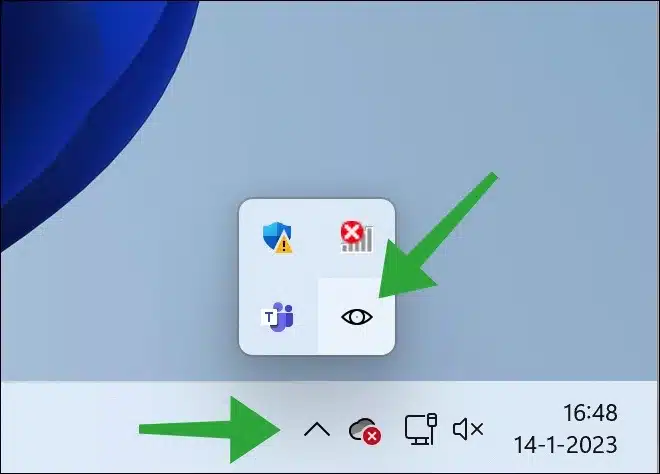
By clicking on the icon in it overflow menu in the system tray you can enable or disable sleep mode prevention.
I hope this helped you. Thank you for reading!