

If we use Windows 11 in a work or public environment, you must protect the contents of the computer. You can do this by having the Windows 11 computer automatically lock if you have not used the computer for a while.
Suppose you forget to lock your computer, Windows 11 will automatically do it for you. This prevents unwanted access to the physical computer.
In order for the computer to lock automatically, a password must be present on the user account. This can be a normal password or a PIN code. It is not possible to automatically lock the Windows 11 computer without a passcode.
If you have not yet set a password in Windows 11, read this article to learn how to set a password for a user account.
Windows 11 auto lock after inactivity
Set password for user account
If you have already set a password for the user account, you can skip this step. Otherwise, first follow these steps below to set a password for the Windows 11 user.
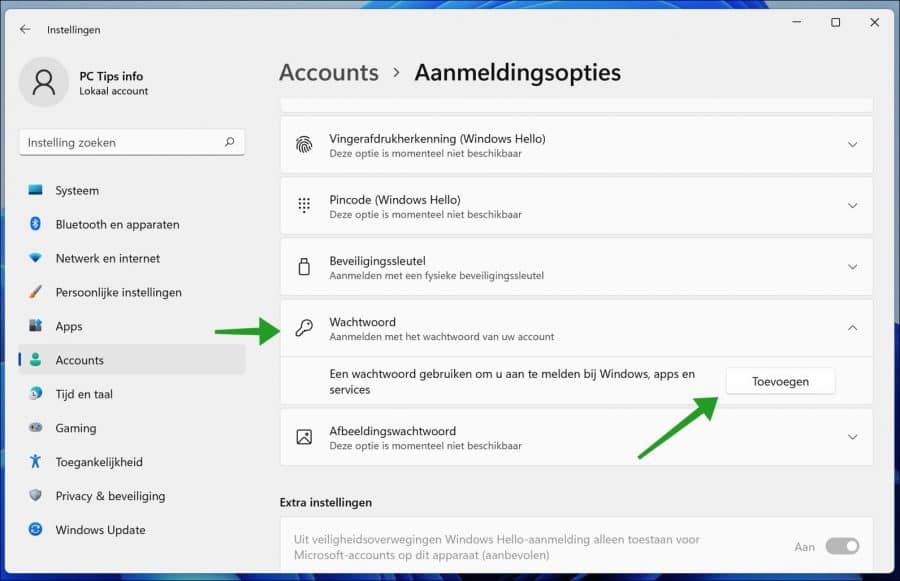
Right-click on the start button. Click on Settings in the menu. Click Accounts on the left and then click Login Options.
Click on Password. Next to the text “Use a password to sign in to Windows, apps and services” click “Add”. Now enter a password to log in to Windows 11.
Continue to the next step to automatically lock Windows 11 on inactivity.
Windows 11 auto lock
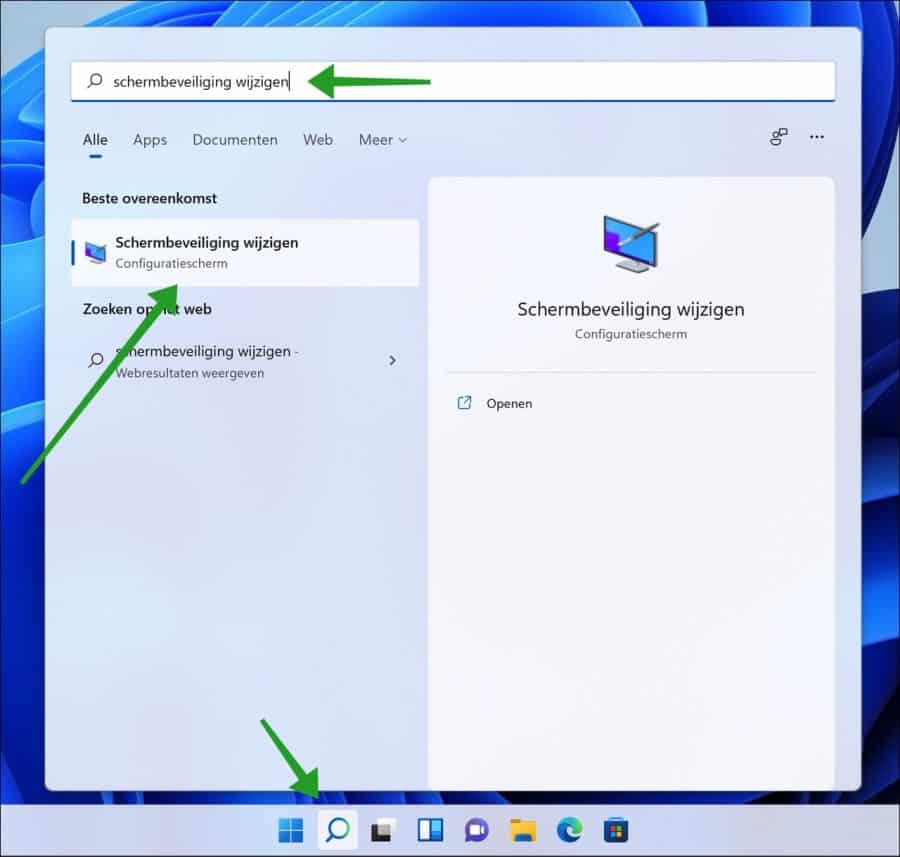
Click on the start button. In the search window type: change screen saver. Click on the result.
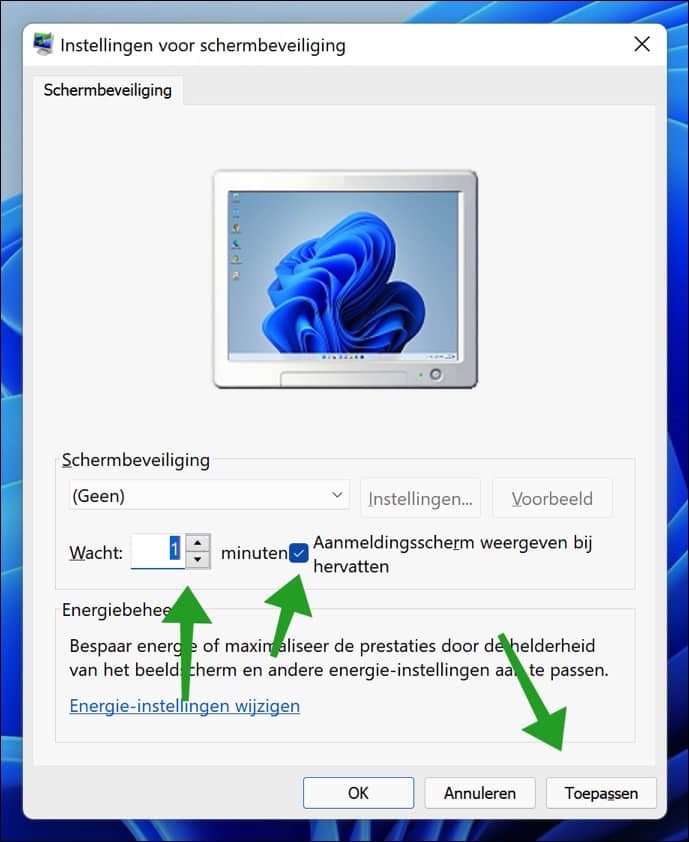
To lock the computer when inactive, enable the option: Show login screen on resume. You can adjust the time after which this login screen resumes by changing the “Wait” time (minutes).
After the idle time has elapsed it becomes Windows 11 lock screen displayed. It lock screen immediately asks for one password or enter PIN code to log in.
I hope this helped you. Thank you for reading!