
Een groot voordeel van Linux is dat u het kunt uitproberen zonder het op uw harde schijf te installeren. De meeste Linux-distributies bieden disk images (ISO-bestanden) die alles bevatten wat u nodig heeft om in een live-omgeving op te starten en, optioneel, met de installatie te beginnen.
U kunt het ISO-bestand wegschrijven naar een USB stick om er Linux vanaf te starten. Dit scheelt een installatie en kunt Linux starten zonder het te installeren. Mocht u Linux toch willen installeren dan kan dit ook via de opstartbare USB stick met Linux erop. Er zijn verschillende linux distributies die u kunt gebruiken om een bootable USB stick te maken.
Iedere Linux distributie heeft een iets ander installatieproces maar de meeste werken allemaal via een ISO-bestand die u kunt plaatsen op een USB stick om ermee op te starten.
Meld u dan aan voor onze nieuwsbrief.
Opstartbare (Bootable) Linux USB stick aanmaken
Etcher is geschreven in Electron is een cross-platform open-source hulpprogramma voor het flashen van ISO schijf-images naar USB-drives en geheugenkaarten.
Het draait op Windows, macOS en Linux en biedt een toegankelijke grafische gebruikersinterface die het proces van het maken van een opstartbare Linux USB reduceert tot slechts drie eenvoudige stappen.
U heeft ook een Linux distro nodig. Ik ga ervan uit dat u deze al bezit, zo niet kunt u zoeken op Ubuntu, de meest gebruiksvriendelijke Linux distributie op dit moment.
Bootable Linux USB maken via Windows met Etcher
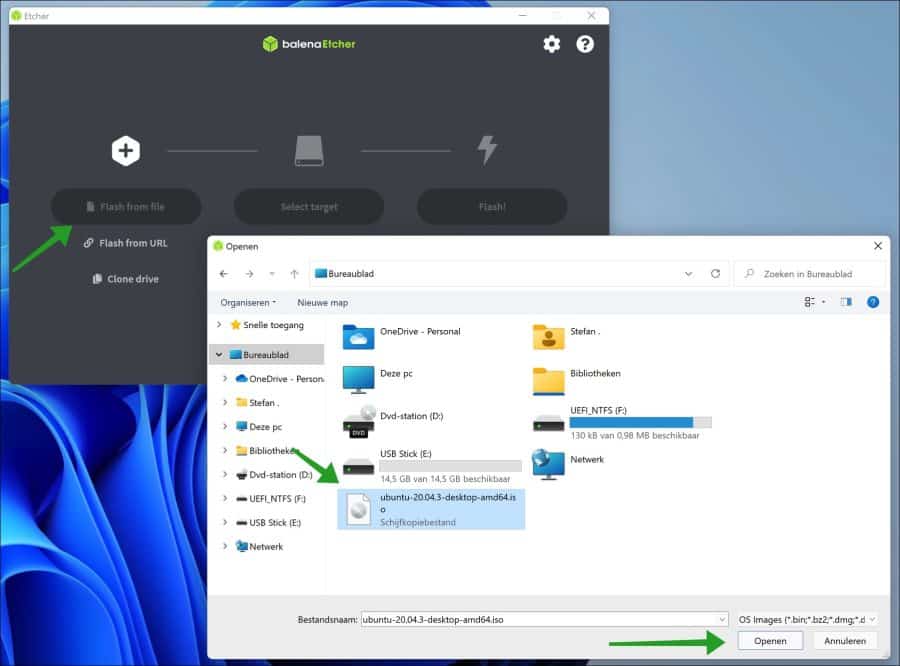
Om te beginnen download en installeer Etcher op uw computer. Open Etcher en klik op de knop “Flash from file”.
Selecteer vervolgens het Linux ISO bestand op uw computer en klik op Openen.
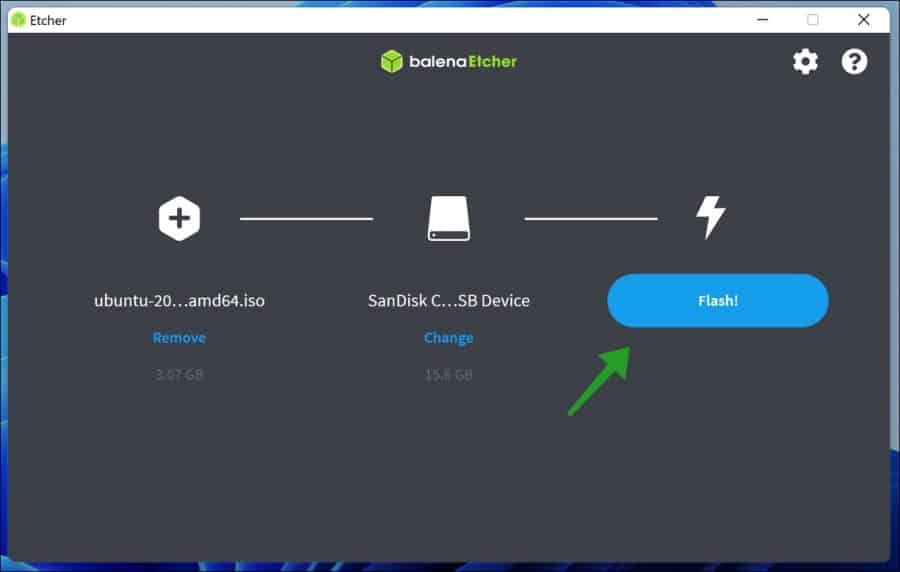
Klik vervolgens op “Select target” om de USB stick te selecteren. Zorg ervoor dat de USB stick wordt herkend.

Als u de USB stick heeft geselecteerd, klikt u op de knop “Flash!”.
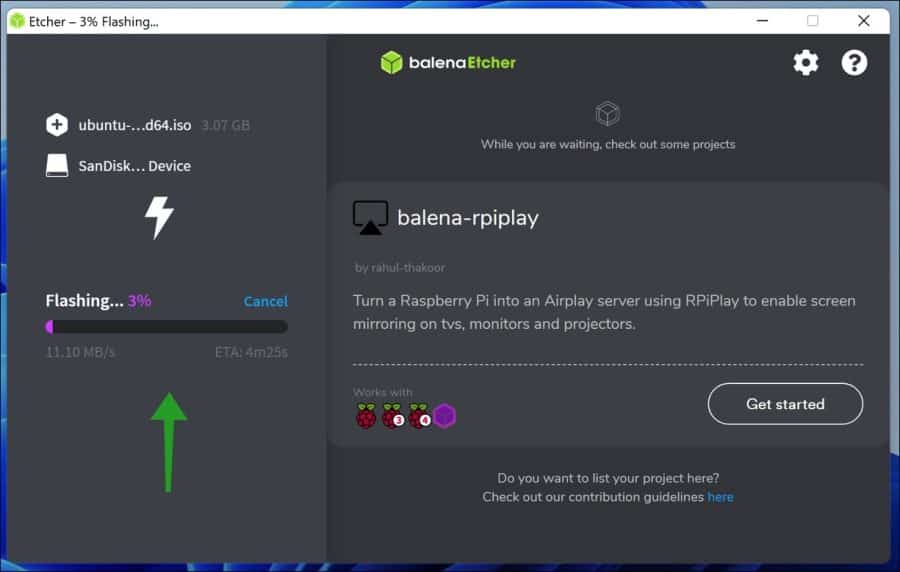
De USB stick wordt nu geflasht met de Linux distributie. Na dit proces is de USB stick klaar om te starten vanaf USB.
Bootable Linux USB maken via Windows met RUFUS
Voor de release van Etcher in 2016, was Rufus de beste manier om een opstartbare Linux USB in Windows te maken. Deze bootable USB flash drive creator is veel sneller dan al zijn Windows concurrenten en het kan live USB drives maken voor systemen met zowel BIOS als UEFI.
Om een opstartbare Linux USB te maken met Rufus:
- Download Rufus van zijn officiële website.
- U kunt kiezen tussen een installer en een portable versie.
- Installeer het als u het installatieprogramma hebt gedownload. Anders kunt u het gewoon starten via de Portable versie.
- Selecteer het doel USB apparaat.
- Klik op de Selecteren knop naast het boot selectie dropdown menu en specificeer het ISO bestand dat u wilt flashen.
- Kies de juiste partitie-indeling voor uw systeem.
- Klik op de Starten knop en wacht tot Rufus klaar is.

Bootable Linux USB maken via Mac
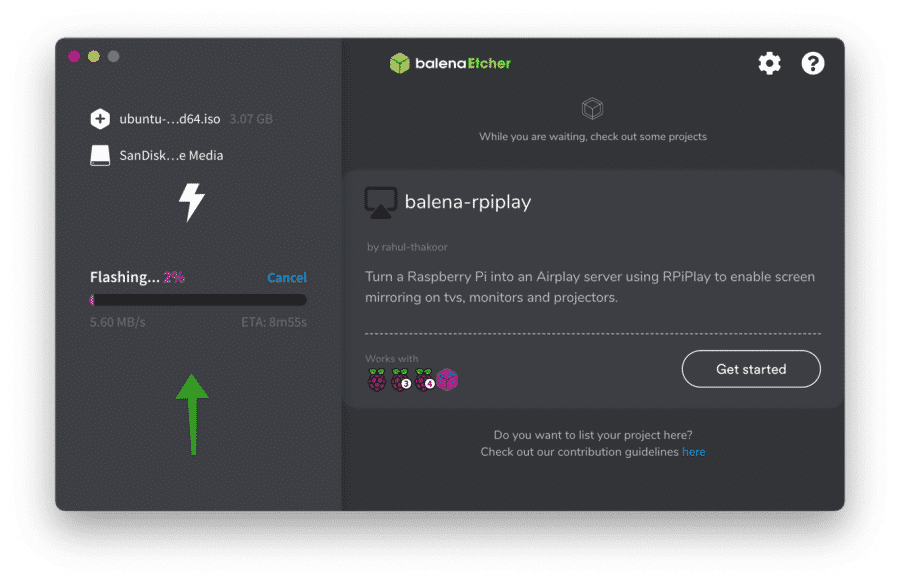
Om te beginnen download Etcher naar uw Mac. Open Etcher en klik op de knop “Flash from file”.
Selecteer vervolgens het Linux ISO bestand op uw Mac en klik op Openen. Selecteer daarna de USB stick waar u de Linux distro op wilt installeren en klik daarna op “Flash!”.

Er wordt nu een opstartbare Linux USB stick aangemaakt in macOS.
Lees ook: macOS installatie USB maken.
Ik hoop u hiermee geholpen te hebben. Bedankt voor het lezen!
alvast bedankt voor deze tip
Ik heb nog een computer met xp op en zou daar graag linux op zetten, daarvoor heb ik dit op usb geplaatst, ik moet dit opstarten in de bios, even uitleg aub om van de usb optestarten, dank u bij voorbaat
Danny
Hallo, leuk dat je aan linux gaat beginnen. Hier meer informatie over het opstarten vanaf usb.
https://www.pc-tips.info/tips/windows-tips/hoe-start-ik-mijn-computer-op-vanaf-usb/
Succes!