
In macOS zijn verschillende handig hulpmiddelen beschikbaar. Een handig hulpmiddel om een schermafbeelding te maken is de “schermafbeelding” app.
De Schermafbeelding app voor macOS is een app waarmee u een schermafbeelding kunt maken van het scherm of een specifiek gebied van het scherm. Schermafbeeldingen zijn handig voor het vastleggen van afbeeldingen van webpagina’s, documenten of andere onderdelen die kunnen worden gebruikt om te delen. In het macOS besturingssysteem wordt een standaard schermafbeelding app aangeboden die u terugvindt in de “Hulpprogramma’s”.

Meld u dan aan voor onze nieuwsbrief.
Deze app kunt u gebruiken om verschillende typen schermafbeeldingen te maken. Zo kunt u een schermafbeelding maken van het hele scherm, een deel van het scherm die u zelf kunt selecteren of een venster. Naast het maken van een schermafbeelding kan deze app ook een video opnemen van het hele scherm of een selectie van het scherm.
Schermafbeelding maken op een Mac met Schermafbeelding app
Open de schermafbeelding app door de “Apps” te openen. Klik vervolgens op “Hulpprogramma’s” en open de “Schermafbeelding” app.
Na het openen van de schermafbeeldingen app verschijnt er onderin, net boven het dock een venster met verschillende opties om een schermafbeelding of video vast te leggen.
U kunt kiezen uit de volgende opties om een schermafbeelding te maken.
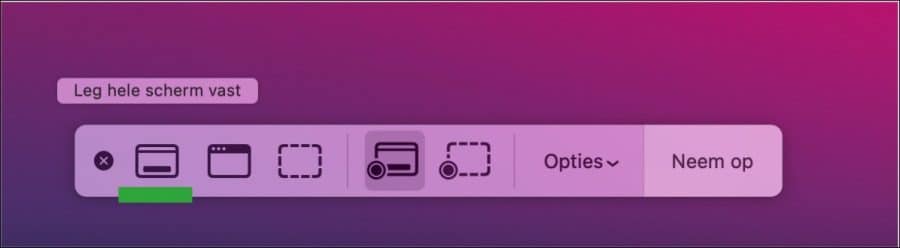
Om het hele scherm vast te leggen klikt u op de knop “Leg hele scherm vast”. Er wordt nu een schermafbeelding gemaakt van het gehele scherm inclusief dock en andere vensters. De resolutie van deze schermafbeelding is vrij hoog, als u deze voor het web gaat gebruiken raad ik aan om de schermafbeelding te verkleinen.
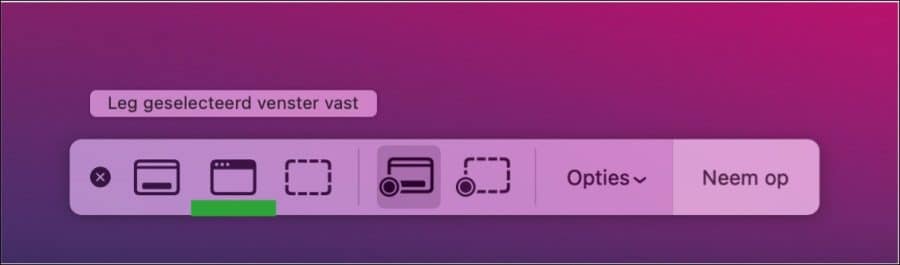
Door op de tweede knop te klikken “Leg geselecteerd venster vast” maakt u een schermafbeelding van een actief venster. Na een klik op deze knop klikt u op het venster wat u wilt vastleggen. Er wordt nu een schermafbeelding gemaakt van alleen dit venster.
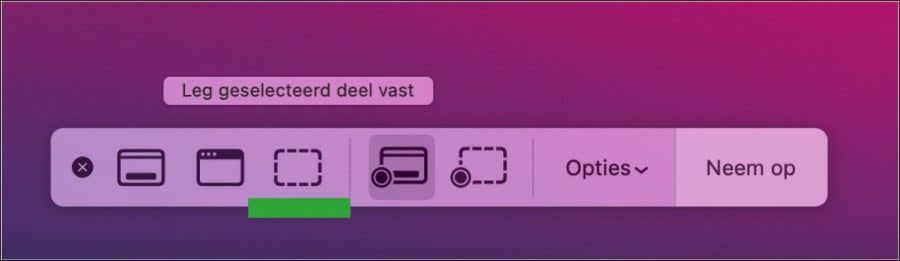
De volgende knop is de “Leg geselecteerd deel vast” schermafbeeldingsfunctie. Na een klik op deze knop selecteert u het deel van het beeldscherm wat u wilt vastleggen. Dit kunt u selecteren met een raster. Na het aangeven welk gedeelte dat u wilt vastleggen klikt u op de knop “Leg vast” om hiervan een schermafbeelding te maken.
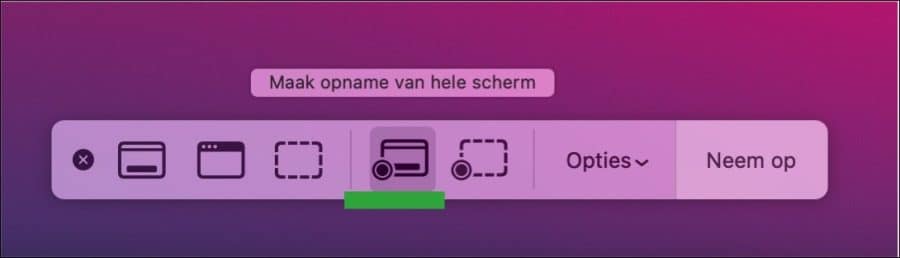
De volgende twee knoppen zijn er om een video te maken van het beeldscherm. De eerste knop “Maak opname van hele scherm” helpt u om een video-opname te maken van het gehele beeldscherm. Dit is bijvoorbeeld handig als u een instructie video wilt opnemen.
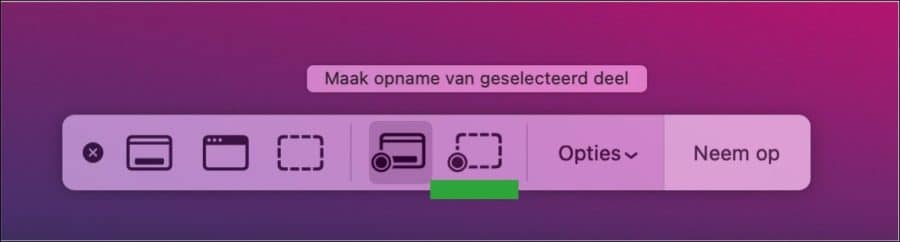
De tweede video-opname knop “Maak opname van geselecteerd deel” kunt u gebruiken om een video op te nemen van een gedeelte van het beeldscherm. Eerst selecteert u welk gedeelte en vervolgens klikt u op “Neem op” om van dit gedeelte een video-opname te maken.
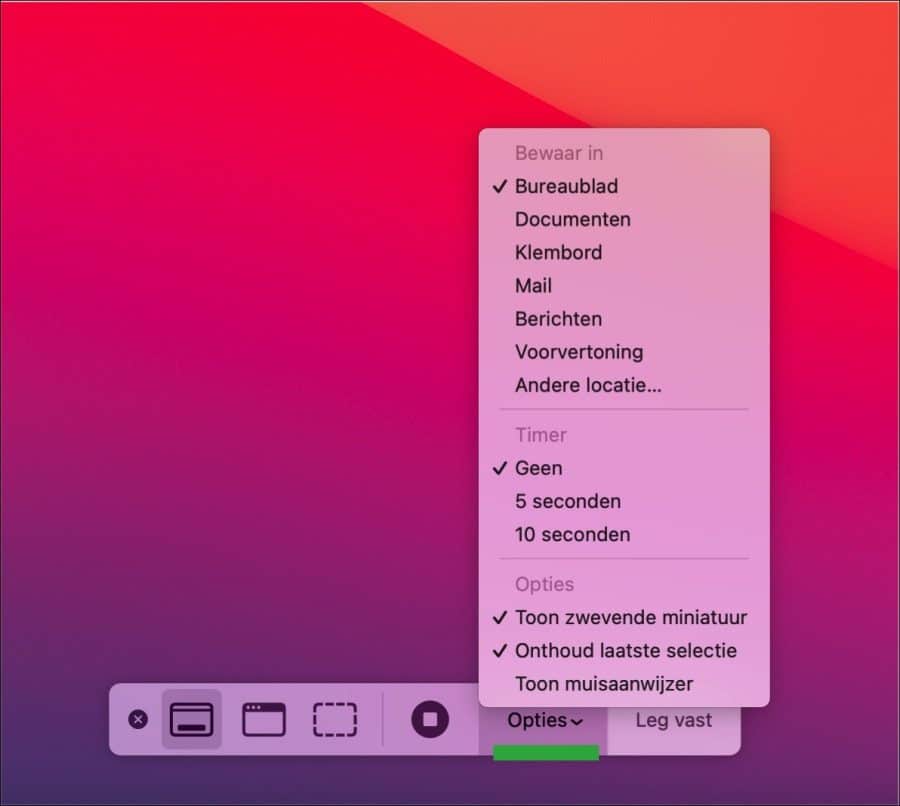
De laatste knop “Opties” biedt verschillende opties om de schermafbeeldingen of video’s te beheren.
U kunt een standaard locatie of een andere locatie kiezen om de schermafbeeldingen of video-opname in op te slaan. Ook kunt u een timer instellen. Als u op de “Leg vast” of “Neem op” knop klikt dan duurt het 5- of 10 seconden voordat de schermafbeelding of video wordt gestart.
Een andere handig optie is om de muisaanwijzer weer te geven of niet. In enkele gevallen wilt u niet dat de muisaanwijzer zichtbaar is op de schermafbeelding. In de opties kunt u dit in- of uitschakelen.
Lees ook: Voorvertoning Mac: De alleskunner om afbeelding te bewerken!
Ik hoop u hiermee te hebben geïnformeerd. Bedankt voor het lezen!
Help mee
Mijn computertips zijn gratis en bedoeld om andere mensen te helpen. Door deze pc-tip te delen op een website of social media, helpt u mij meer mensen te bereiken.Overzicht met computertips
Bekijk ook mijn uitgebreide overzicht met praktische computertips, overzichtelijk gesorteerd per categorie.Computerhulp nodig?
Loopt u vast met uw pc, laptop of software? Stel uw vraag op ons computerforum en krijg gratis computerhulp van ervaren leden en experts.