
Als u een back-up maakt van het printerstuurprogramma, dan weet u zeker dat als u gaat herinstalleren of als er problemen ontstaan, u altijd over de juiste stuurprogramma’s beschikt.
Iedereen die wel eens opnieuw heeft moeten installeren om wat voor reden dan ook, weet dat het altijd zoeken is naar de juiste stuurprogramma’s voor randapparatuur. Dit geldt ook voor printers. Door een back-up te maken heeft u direct de juiste stuurprogramma’s bij de hand en kunt u de stuurprogramma’s op een snelle manier ook direct weer terug installeren. Dit scheelt behoorlijk tijd en frustratie.
Back-up maken van Printer Stuurprogramma en herstellen
Windows beschikt over verschillende hulpprogramma’s die niet altijd bij iedereen bekend zijn. Zo is er een het printer migreren hulpprogramma waarmee u een back-up kunt maken van de printer driver (stuurprogramma) en deze ook weer kunt terugzetten.
Back-up maken van printer stuurprogramma
Om te beginnen drukt u op de Windows toets + R op uw toetsenbord. In het uitvoeren veldt type: printbrmui.exe. Het printer migreren hulpprogramma wordt geopend.
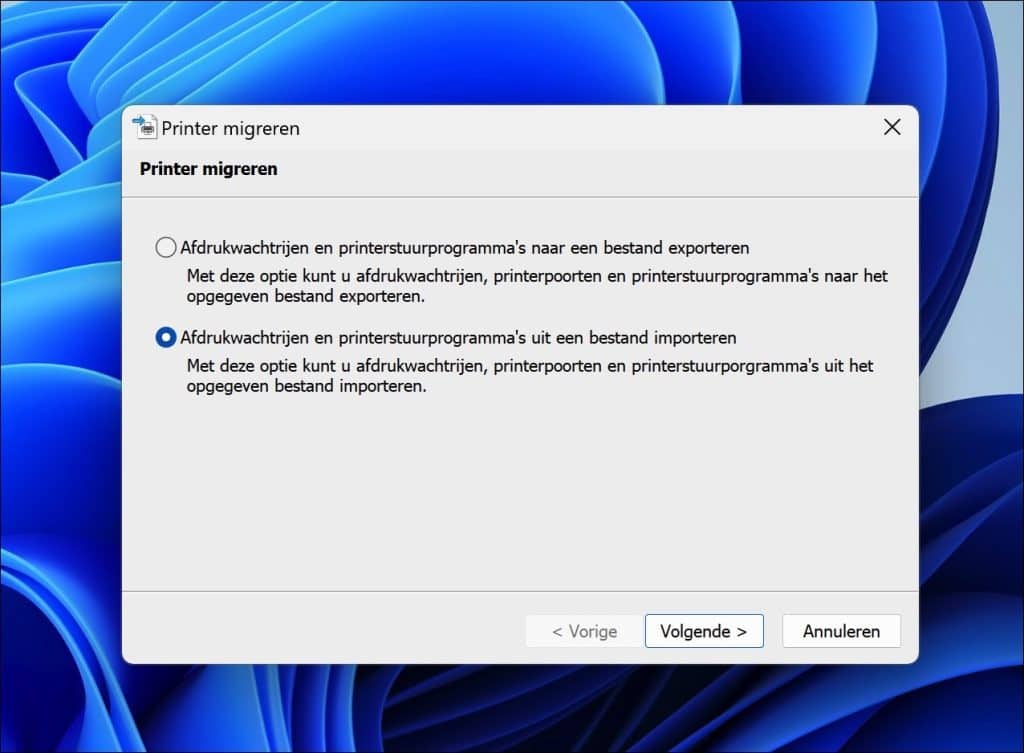
In het venster Printer migreren vindt u de optie om “Afdrukwachtrijen en printerstuurprogramma’s naar een bestand te exporteren”. Selecteer deze optie en klik op Volgende.

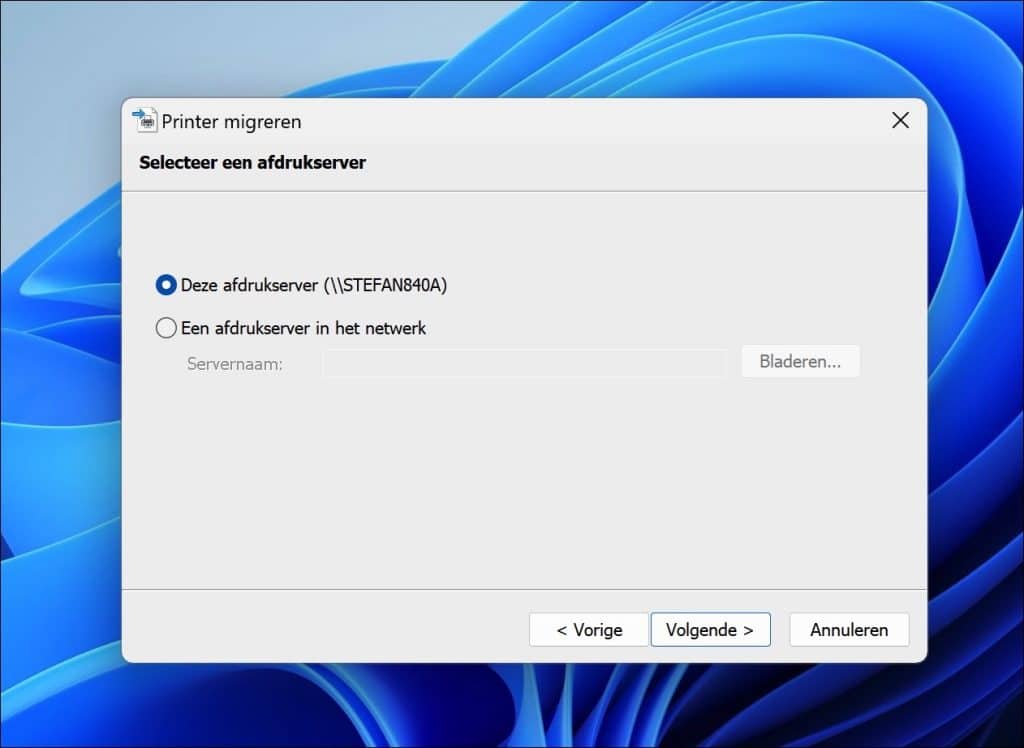
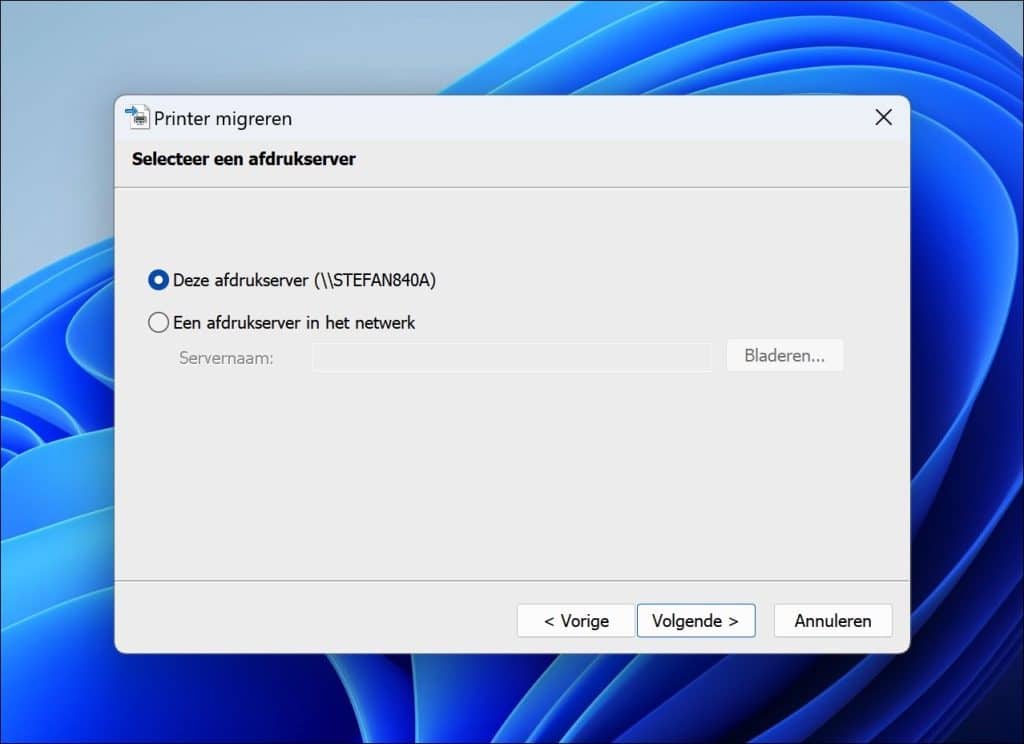
Vervolgens dient u te kiezen waar uw printer is aangesloten. Voor de meeste gebruikers zal de te selecteren optie “Deze printserver” zijn. Klik op Volgende om verder te gaan. Als u met een netwerkprinter werkt, kies dan voor de optie “Een printserver in het netwerk” en geef het netwerkadres op of blader om het te vinden.
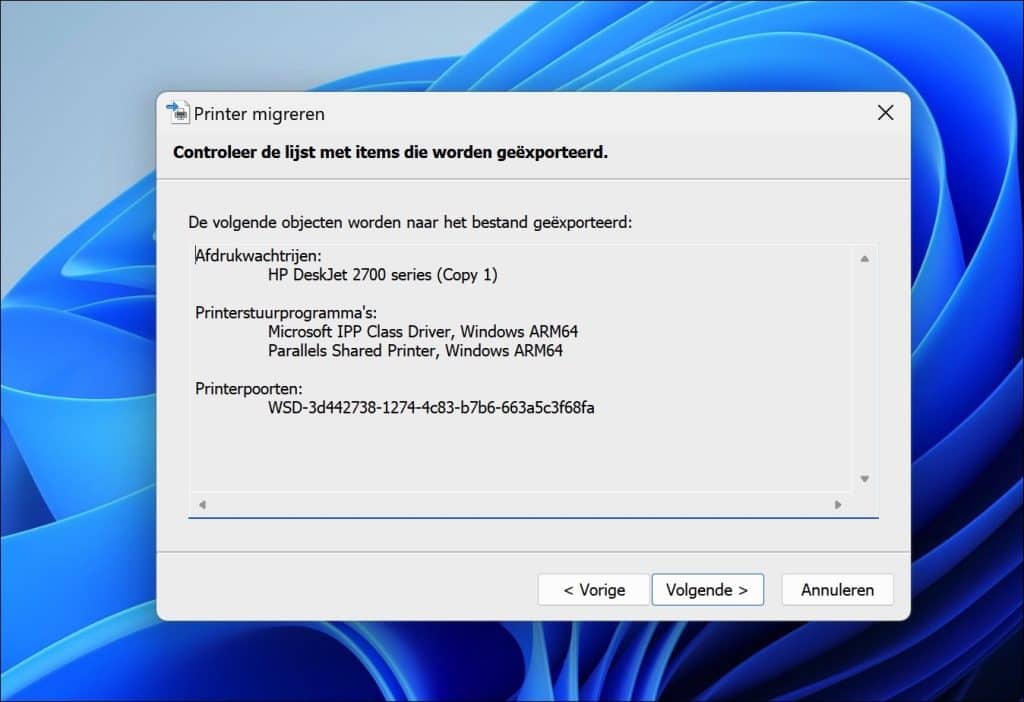
U krijgt een lijst met beschikbare printerstuurprogramma’s voor back-up te zien. Na het bekijken drukt u op Volgende om door te gaan.
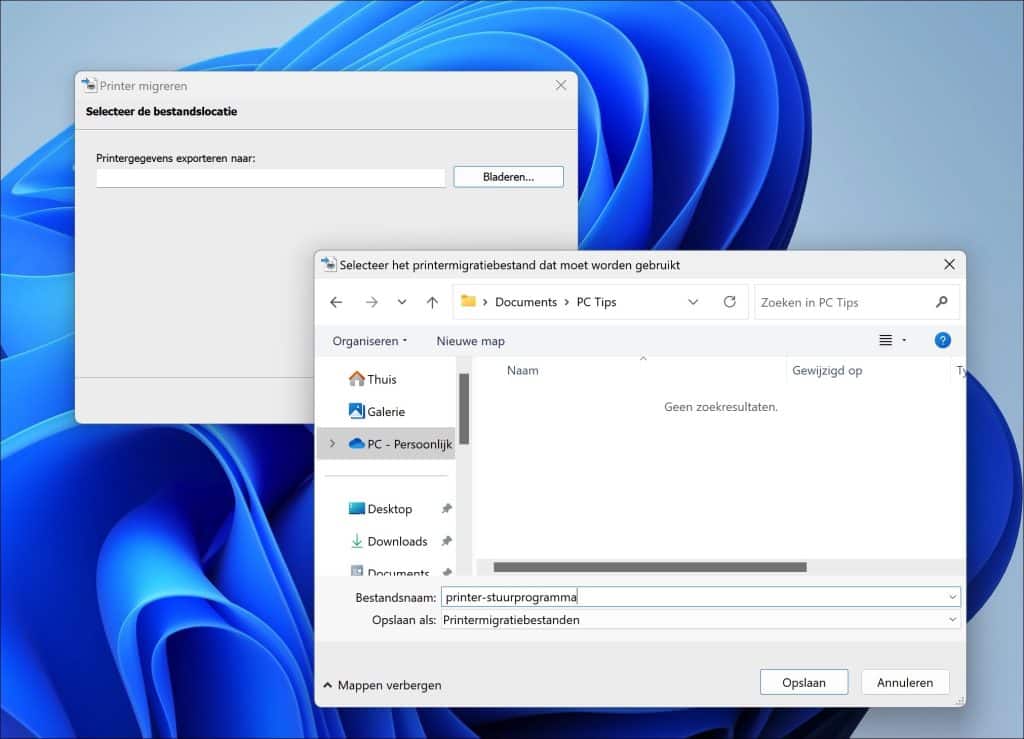
Nu moet u kiezen waar u het back-upbestand wilt opslaan. Klik op de knop Bladeren, navigeer naar de gewenste map, geef een naam voor het back-upbestand op en klik vervolgens op Opslaan.
Om het back-upproces af te ronden, klikt u op Volgende en dan op Afronden.
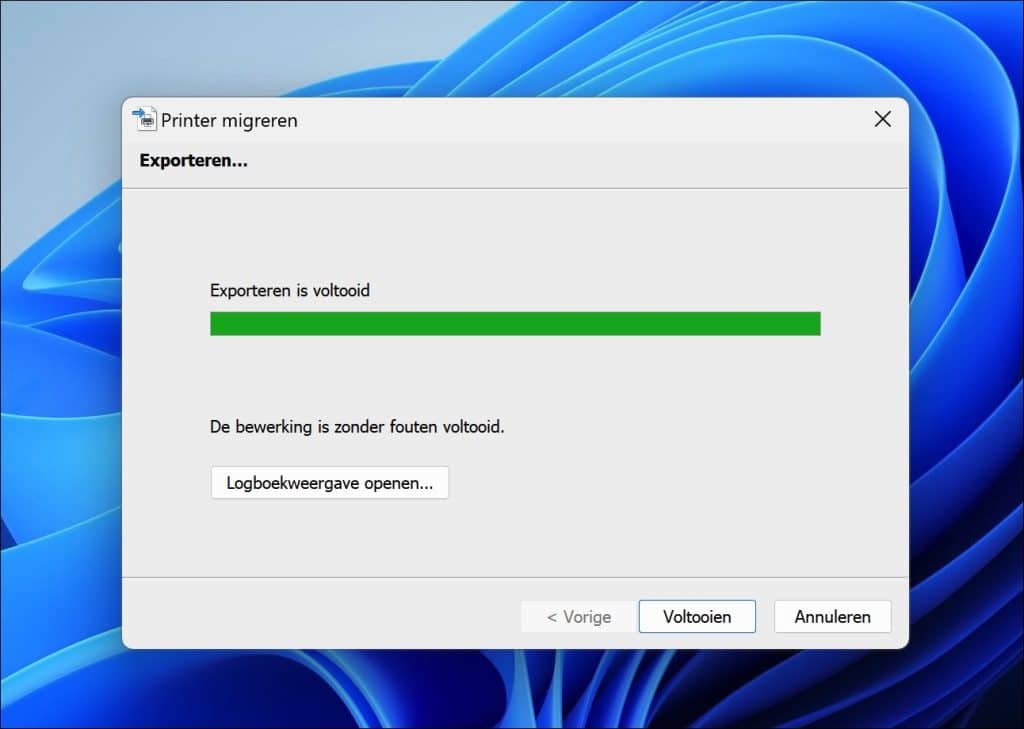
U kunt naar de map gaan waar u het bestand hebt opgeslagen en u zou een bestand met de extensie “.printerexport” moeten vinden. Dit is uw back-upbestand met alle printerstuurprogramma’s.
Back-up van printer stuurprogramma terugzetten
Om te beginnen drukt u op de Windows toets + R op uw toetsenbord. In het uitvoeren veldt type: printbrmui.exe. Het printer migreren hulpprogramma wordt geopend.
Kies de optie “Afdrukwachtrijen en printerstuurprogramma’s vanuit een bestand importeren” en klik op Volgende.
Gebruik de knop Bladeren om het eerder gecreëerde back-upbestand te vinden en te selecteren (dit zal de extensie .printerexport hebben), klik daarna op Openen, gevolgd door Volgende.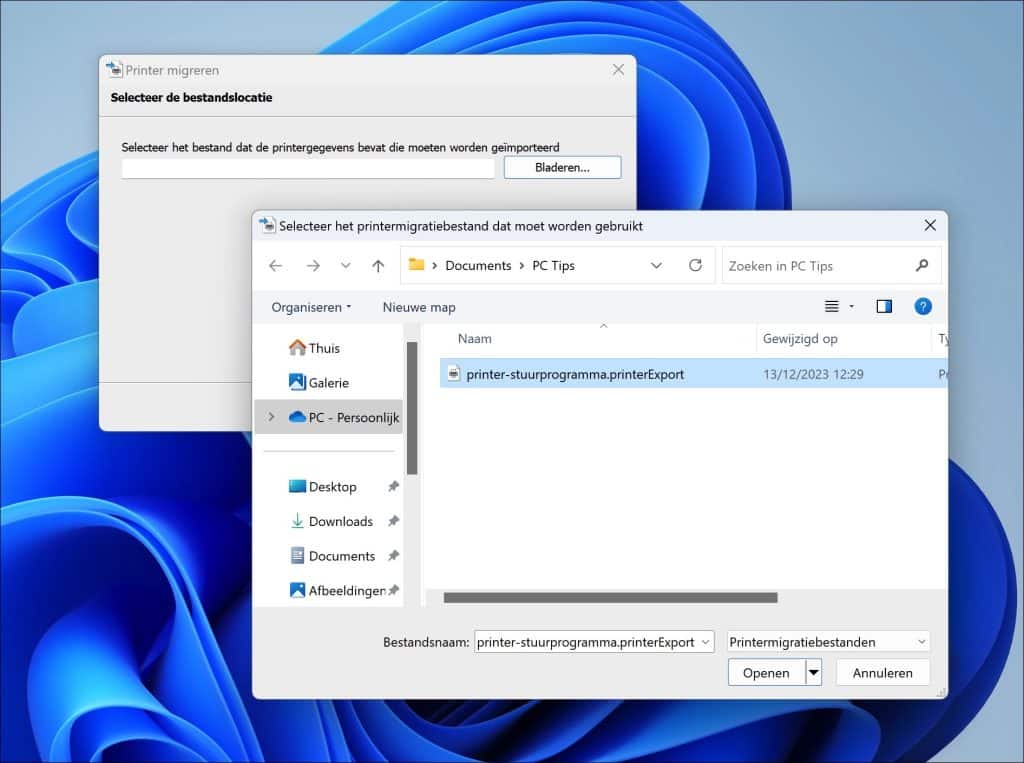
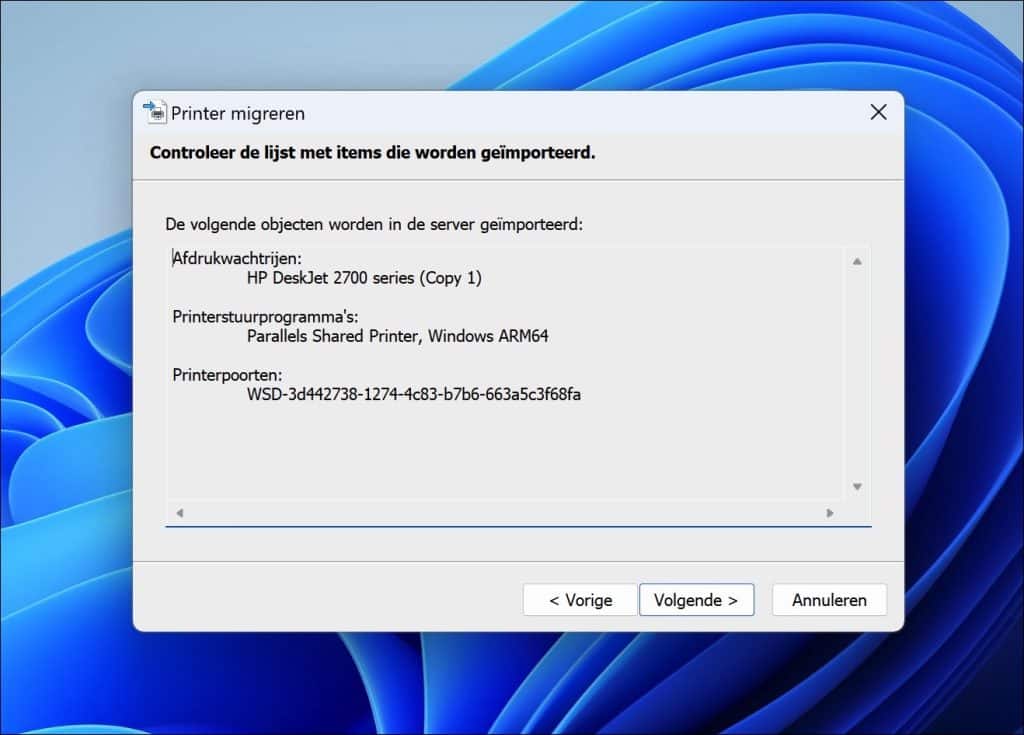
U krijgt een overzicht te zien van de printerstuurprogramma’s die zullen worden hersteld. Na het controleren van de details, klikt u op Volgende.
Kies de geschikte printserveroptie. Als u herstelt voor dezelfde machine, kies dan “Deze printserver”. Als het voor een netwerk is, moet u de overeenkomstige netwerkoptie selecteren en de juiste netwerkprinter kiezen.
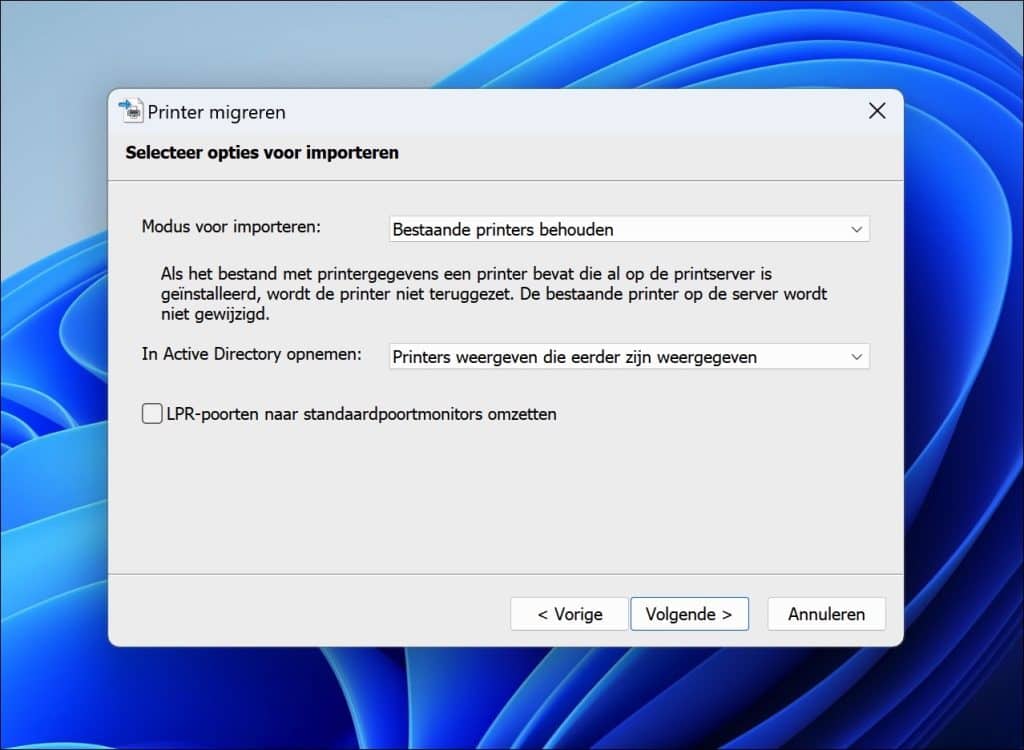
Behoud de standaard importopties of pas ze naar behoefte aan en ga vervolgens verder door op Volgende te klikken. Wanneer u op Volgende klikt, worden de printerstuurprogramma’s geïmporteerd en hersteld.
Om het proces te voltooien, drukt u op de knop Afronden. Mogelijk moet u uw computer herstarten om ervoor te zorgen dat alle wijzigingen worden toegepast.
Ik hoop u hiermee geholpen te hebben. Bedankt voor het lezen!
Lees verder: Bestandsgeschiedenis back-up maken & herstellen in Windows
❤️ Help mee en deel
Voordat u verdergaat, zou ik het waarderen als u overweegt mijn werk te steunen. In tegenstelling tot veel grote websites is er op PC Tips geen betaalmuur die lezers blokkeert, maar daardoor is uw steun des te belangrijker.Als u onafhankelijke initiatieven zoals deze waardeert, overweeg dan alstublieft om mij te steunen, zodat ik kan blijven doen wat ik met plezier doe. Deel mijn website PC Tips op andere websites, social media of binnen uw eigen netwerk. Hartelijk dank.
🙂 Overzicht met computertips
Bekijk ook mijn uitgebreide overzicht met praktische computertips, overzichtelijk gesorteerd per categorie.