

File History is a built-in Windows backup tool to backup all folders in a user's home directory and the files in the home directory. This is called a version backup and is made of the folders, Documents, Music, Pictures, Videos and Desktop.
In cases where the original files are lost or damaged, users can then use the backup versions created by File History to restore them. File History also lets you browse a backup timeline, select the version you want, and restore it.
By default, File History backs up all files and folders in a user's home directory. This is the c:\users\ location. You can also add additional folders and locations to back up.
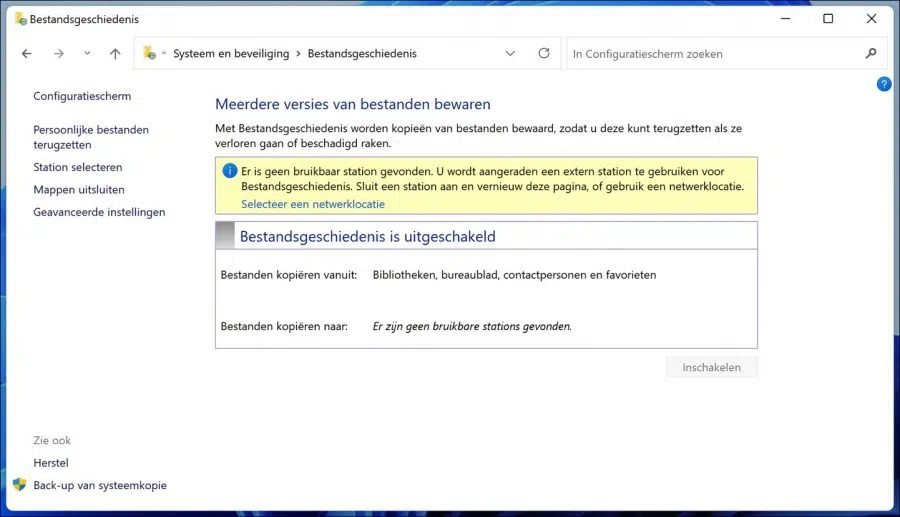
File History will not be enabled automatically if there are no suitable locations to back up to. You can back up only to an externally connected drive, such as a USB flash drive, or you can back up to a drive on a network. If none of these locations are available, File History cannot be enabled.
File history in Windows 11
Enable File History in Windows 11
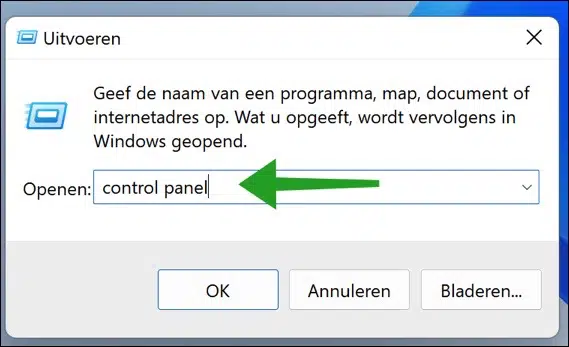
Right-click on the start button. Click run. In the run window type: control panel.
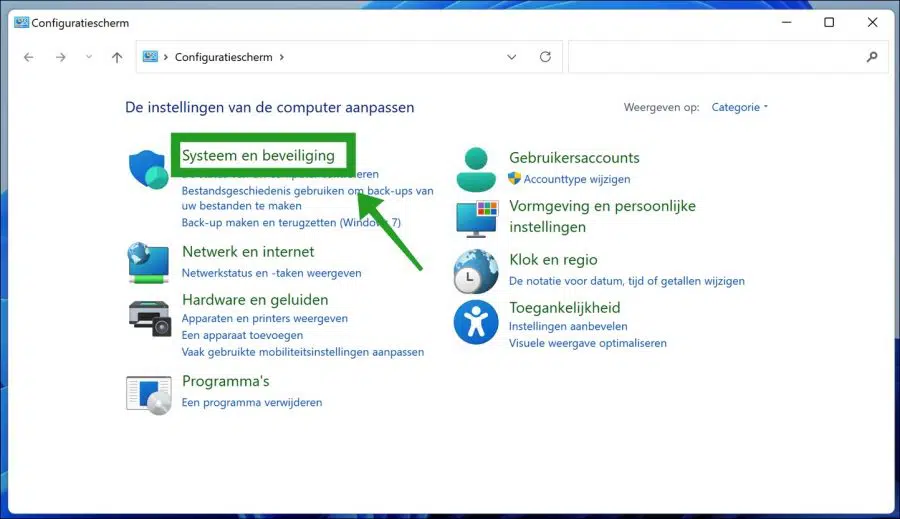
The control panel will now open. Click on “System and Security”.
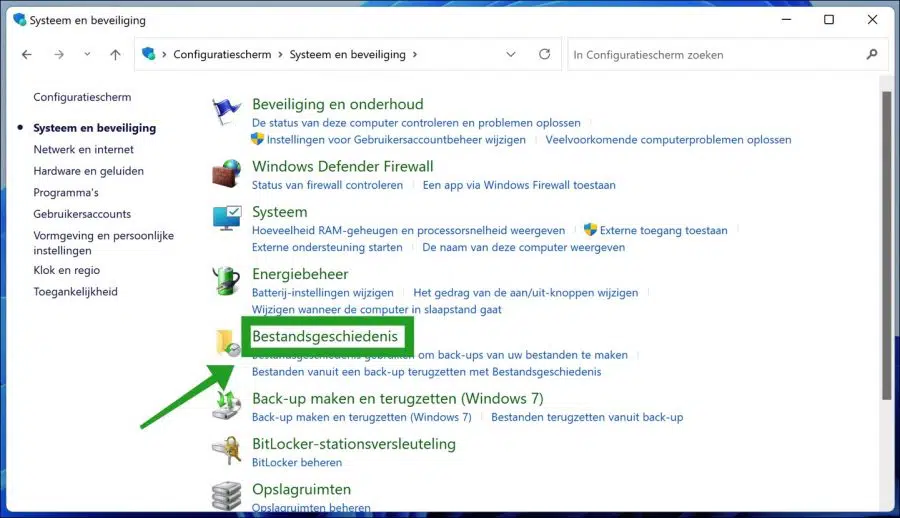
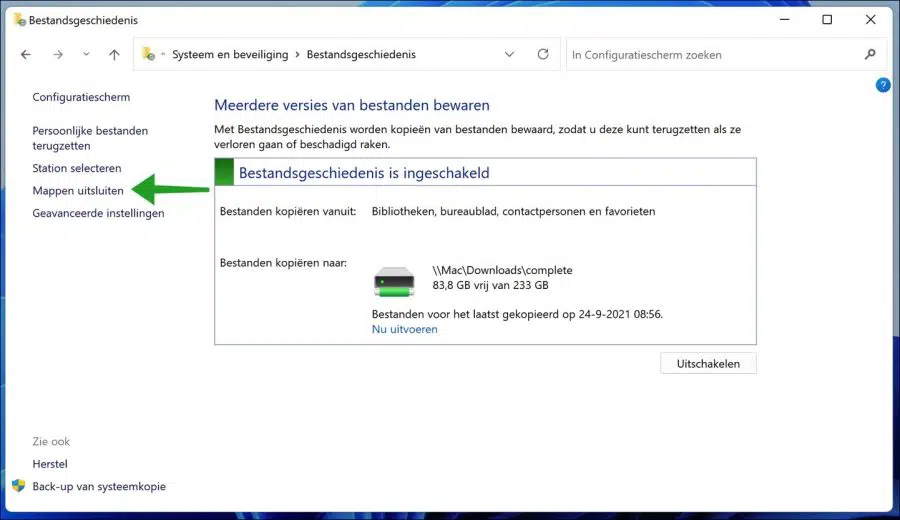
Click File History.
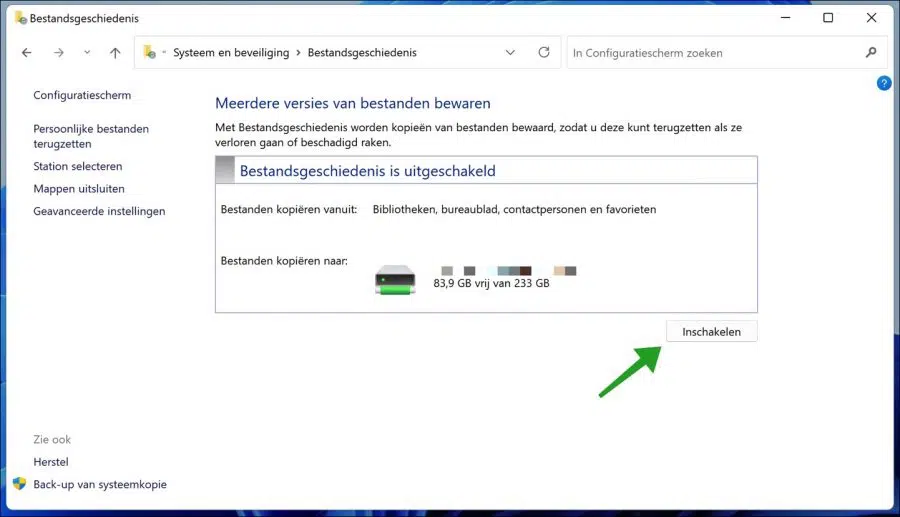
To enable file history, you must mount an external USB drive or select a network location.
Once you have done this, click the Enable button.
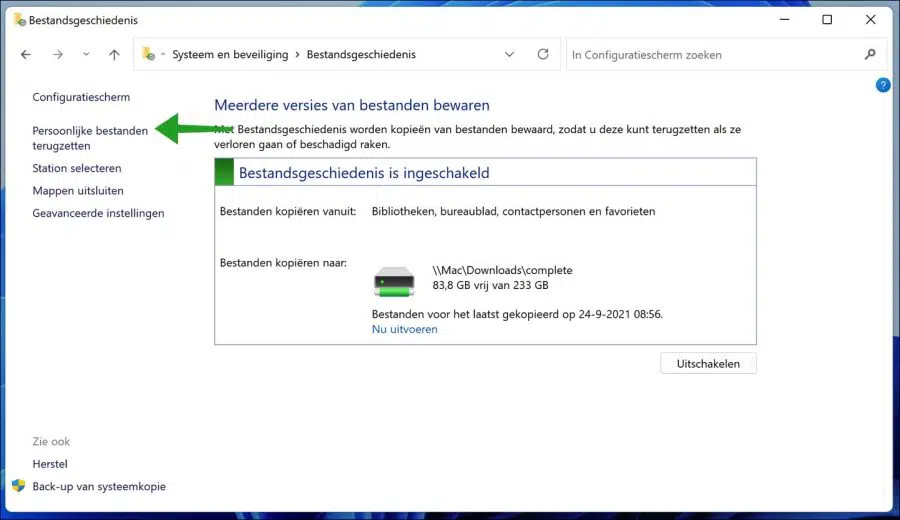
Copies of files and folders are now saved. You can adjust a number of options.
Restore files from file history
If you want to restore files from file history, click Restore personal files on the left.
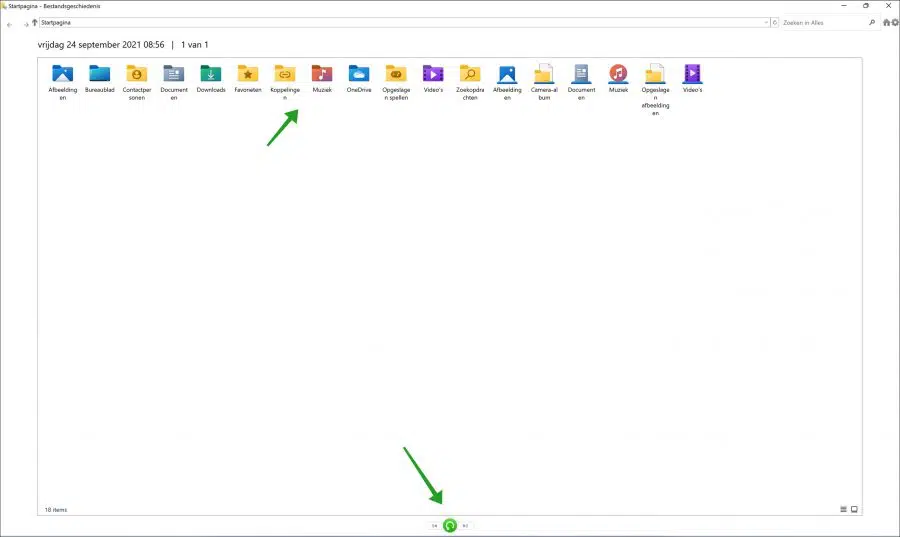
A completely new screen will now open with files and folders in a timeline. Navigate to the file or entire folder you wish to restore from the backup and click the green button at the bottom.
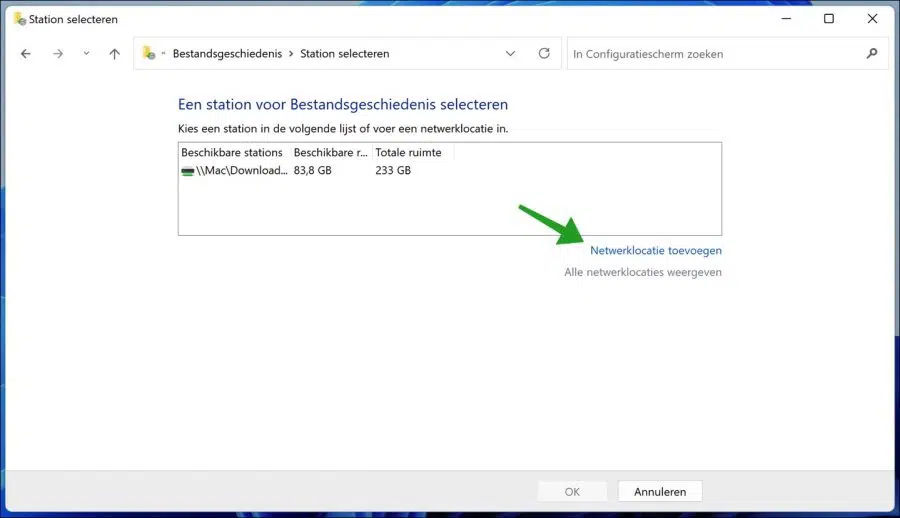
Select file history drive
If you want to change, add or remove the network location or drive, click Select drive on the left.
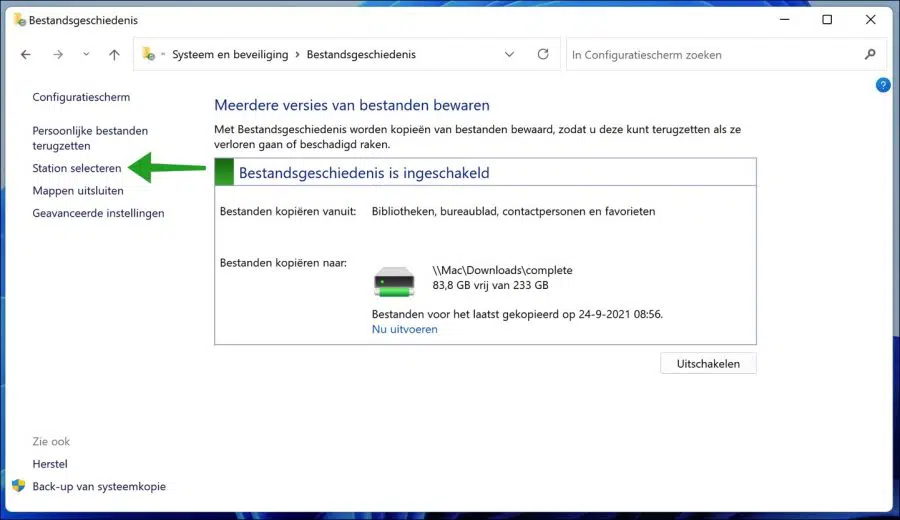
Here you can change, add or delete new drives, network locations. This location is then included in the file history backup.
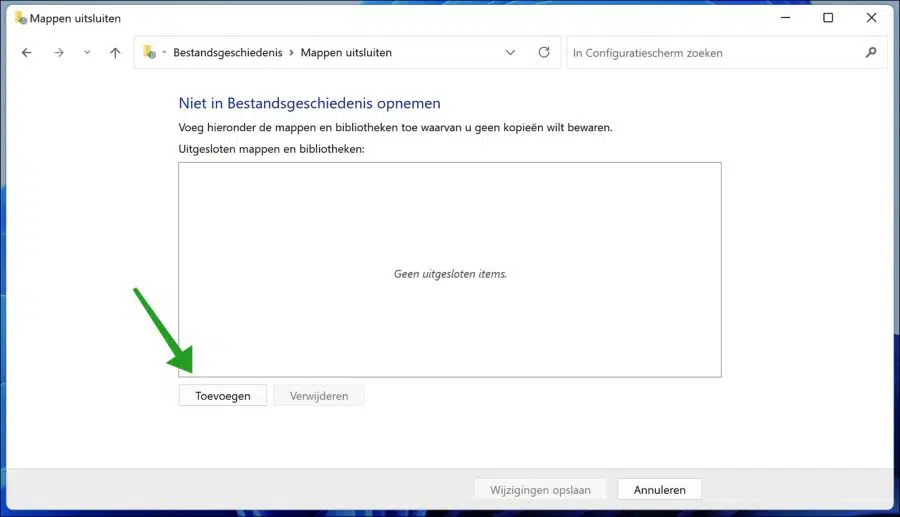
Exclude File History folders
If you do not want to make file history backups of specific files or folders, you can exclude them from the backup as follows. Click Exclude folders on the left.
Click Add to exclude the selected folder from file history backups.
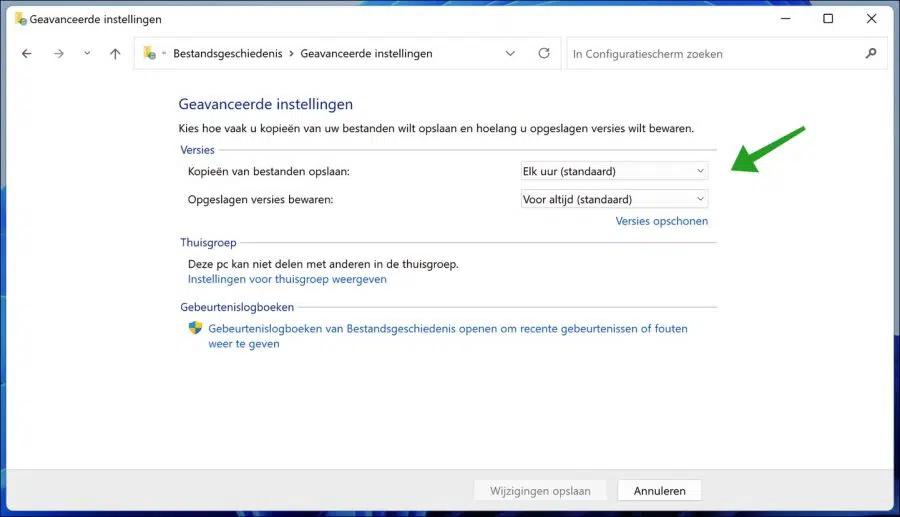
File history advanced settings
To choose how often and for how long a file history backup should be made, open the advanced settings on the left.

Here you can adjust how often a version of a file history backup should be created. By default this is every hour. You can also determine how long a version should be kept. This is forever by default.
By clicking the Clean versions button you can clean old versions if you have adjusted the saved version period.
You can read any file history errors in the event log at the bottom. Shows recent events and errors.
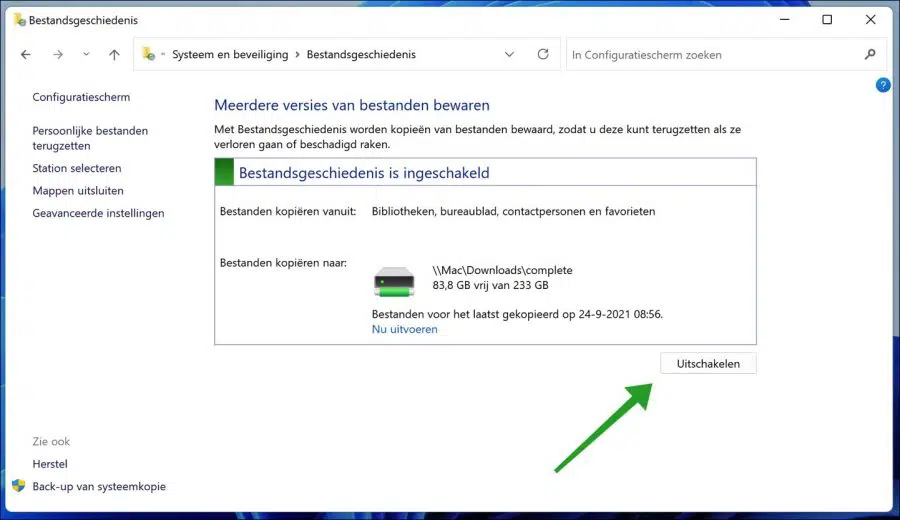
Disable File History in Windows 11
Right-click on the start button. Click run. In the run window type: control panel.
The control panel will now open. Click on “System and Security”.
Click File History.
Then click on the disable button.
Lees meer:
- Recover files from a Windows restore point.
- USB stick is not recognized.
- Back up computer to Google Drive.
- System restore in Windows 11.
- Windows 11 registry cleaning.
- Create a restore point in Windows 10 or Windows 11.
- File history backup in Windows 10.
I hope this helped you. Thank you for reading!
Hello, can I also add a folder to file history in Windows 11?
Hello, yes you can. You can add the folder you want to the “Documents” folder. This way the folder is also included in the file history backups.
Success!