In Windows 11 kunt u meldingen en andere afleidingen voorkomen door de “niet storen” functie in te schakelen.
“Niet storen” is een functie waarmee u meldingen, waarschuwingen en onderbrekingen kunt controleren en beperken, terwijl uw computer of laptop gebruikt. Als “niet storen” is ingeschakeld, worden meldingen voor oproepen, berichten, applicatie-waarschuwingen en andere onderbrekingen onderdrukt. Hierdoor kunt u geconcentreerder en zonder onderbrekingen werken.
Niet storen inschakelen of uitschakelen in Windows 11
Niet storen is een standaard functie in Windows 11. U hoeft er dus geen aparte applicatie voor te installeren.
Meld u dan aan voor onze nieuwsbrief.
U kunt “niet storen” handmatig inschakelen of automatisch laten inschakelen in een bepaalde tijdsperiode. Als u eventuele apps met meldingen wilt uitsluiten om toch meldingen alleen van deze specifieke app(s) te ontvangen, dan kunt u deze configureren in de prioriteitsmeldingen. Dit is hoe het werkt.
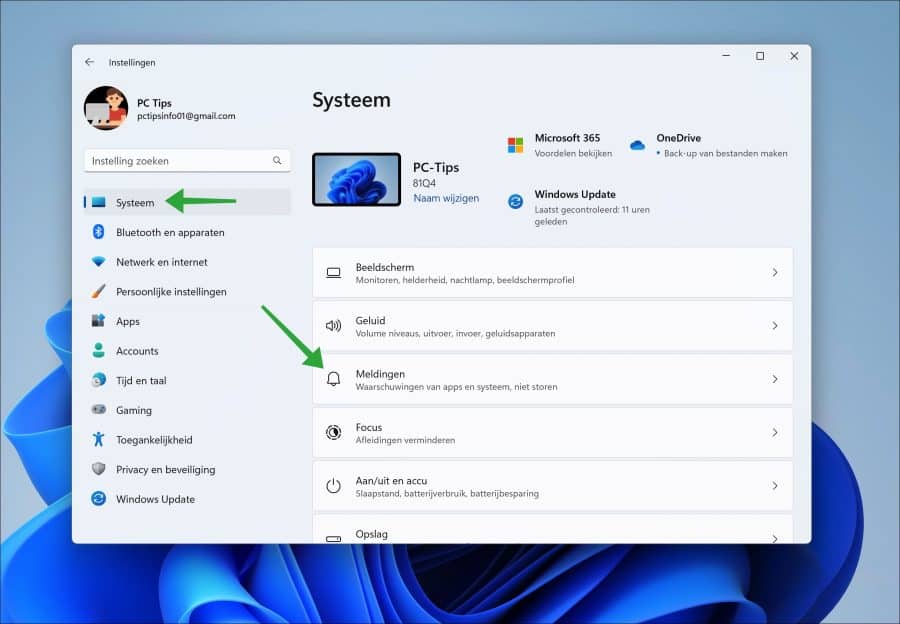
Om te beginnen opent u de instellingen. In de instellingen klikt u op “Systeem”. In de systeeminstellingen klikt u vervolgens op “Meldingen”.
Niet storen inschakelen
Als u “niet storen” wilt inschakelen dan kunt in de meldingen instellingen de optie “Niet storen” inschakelen door de schuif naar “aan” te wijzigen.
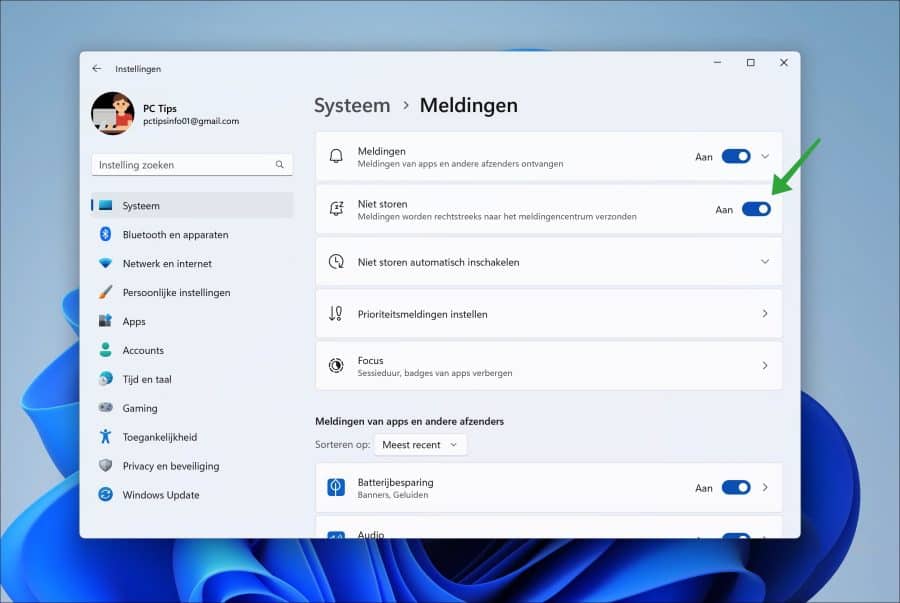
Niet storen uitschakelen
Als u “niet storen” wilt uitschakelen dan kunt in de meldingen instellingen de optie “Niet storen” inschakelen door de schuif naar “uit” te wijzigen.
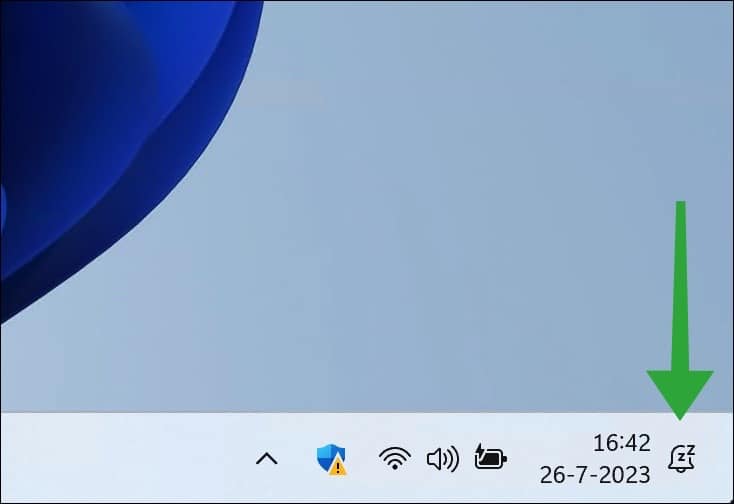
Niet storen pictogram
Wanneer “niet storen” actief is, dan ziet u in het systeemvak (rechts naast de tijd en datum) een pictogram van een belletje met de tekst “zz” erin. Dit betekent dat de “niet storen” functie op dit moment actief is op uw computer en dat u dus geen meldingen ontvangt van apps en Windows 11. Alle meldingen ziet u in het actiecentrum door erop te klikken, meestal te herkennen aan een cirkeltje met het aantal meldingen.
Niet storen automatisch inschakelen
Het is ook mogelijk om “niet storen” automatisch te laten inschakelen tussen een bepaalde tijdsperiode. Dit is bijvoorbeeld aan te raden tussen kantooruren, tijdens het spelen van een computerspel, het werken met een volledig scherm of wanneer u gaat slapen.
Open de meldingsinstellingen. In de meldingsinstellingen klikt u op “Niet storen automatisch inschakelen”.
Om geen meldingen tussen een bepaalde tijdsperiode te ontvangen schakelt u de optie “Tijdens deze tijden” in. Stel vervolgens en begin en eindtijd in en wijzig eventueel de herhaling voor dagen, weekenden of weekdagen.
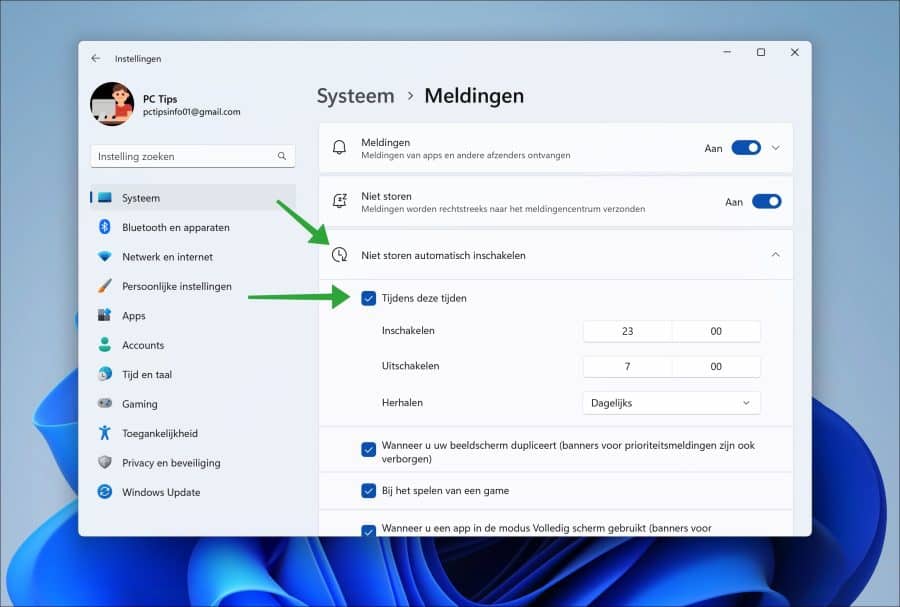
U vindt er verder nog opties zoals geen meldingen ontvangen bij het dupliceren van het beeldscherm, bij het spelen van een game of wanneer u een app in volledig scherm gebruikt. Door deze opties in- of uit te schakelen maakt u ze actief.
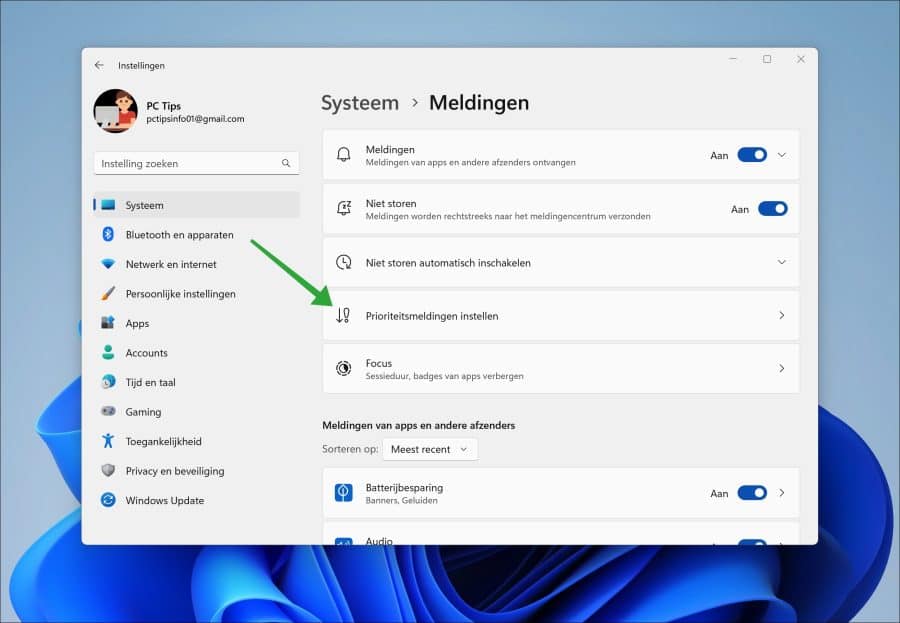
Prioriteitsmeldingen instellen
Als u van een bepaalde app toch meldingen wilt ontvangen terwijl “niet storen” is ingeschakeld, dan kunt u dit instellingen in de prioriteitsmeldingen instellingen.
Open de meldingsinstellingen. Klik vervolgens op “prioriteitsmeldingen instellen”.
Klik op de knop “apps toevoegen” om een app te selecteren waarvan u ondanks dat u “niet storen” heeft ingeschakeld, toch meldingen wilt ontvangen.
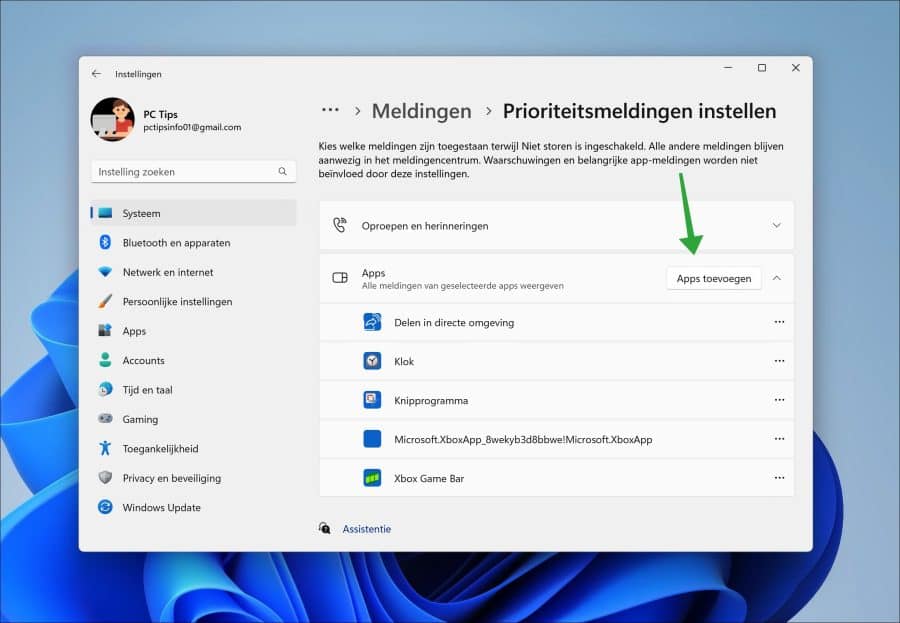
Klik op de “…” puntjes om een app uit de lijst van prioriteitsmeldingen te verwijderen.
Ik hoop u hiermee geïnformeerd te hebben. Bedankt voor het lezen!
Lees ook:
Help mee
Mijn computertips zijn gratis en bedoeld om andere mensen te helpen. Door deze pc-tip te delen op een website of social media, helpt u mij meer mensen te bereiken.Overzicht met computertips
Bekijk ook mijn uitgebreide overzicht met praktische computertips, overzichtelijk gesorteerd per categorie.Computerhulp nodig?
Loopt u vast met uw pc, laptop of software? Stel uw vraag op ons computerforum en krijg gratis computerhulp van ervaren leden en experts.