
In Windows hebben de meeste bestandstypes een standaard pictogram. Dit pictogram maakt het in één snelle blik duidelijk om welk bestandstype het gaat.
Als u werkt met een bepaald bestandstype waar Windows geen standaard pictogram voor biedt, dan kunt u er één instellen via de informatie in dit artikel.
Als er namelijk geen pictogram voor het bestandstype beschikbaar is, wordt er wit (“blank”) pictogram weergegeven. U kunt dit blank pictogram vervangen door een aangepast pictogram naar keuze.
Het pictogram van elke bestandstype wijzigen in Windows 11 of Windows 10
Om te beginnen heeft een pictogram nodig in de vorm van een (“.ico”) bestand. Deze iconen kunt u downloaden via verschillende websites op het internet. Afhankelijk van uw bestandstype keuze selecteert u het gewenste pictogram.
Download FileTypesMan van NirSoft naar uw computer. Hiermee kunt u het pictogram voor het gewenste bestandstype wijzigen.
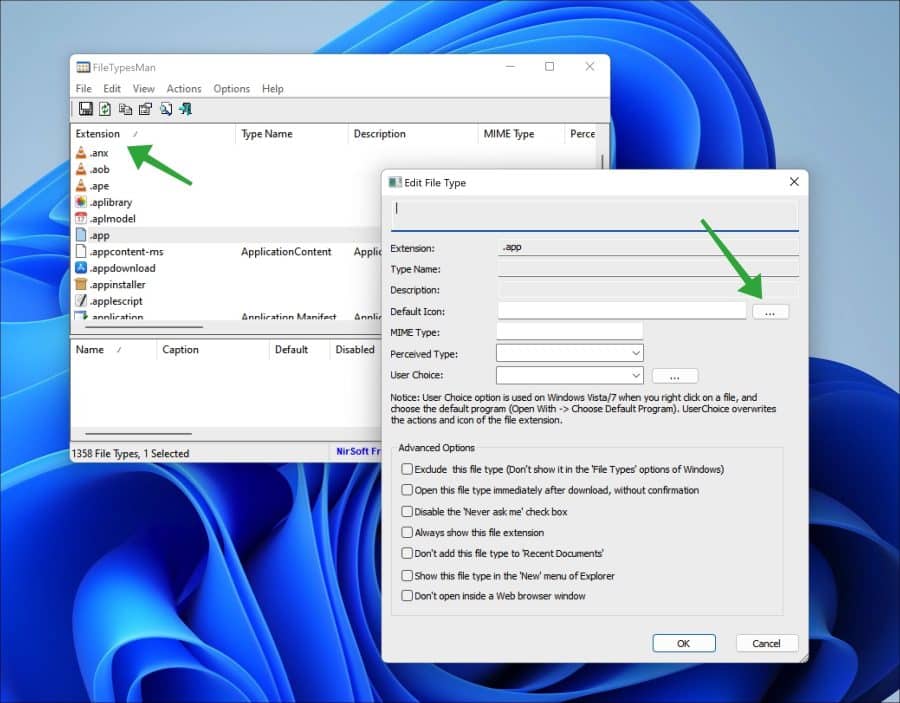
In de app worden alle bestandstypes in de kolom “Extension” weergeven. Dubbelklik op de extensie van het bestandstype waarvan u het pictogram wilt wijzigen.
In dit voorbeeld gebruik ik de extensie (“.app”). In de “Edit file type” instellingen klikt u vervolgens naast “Default icon” op de wijzigen knop.
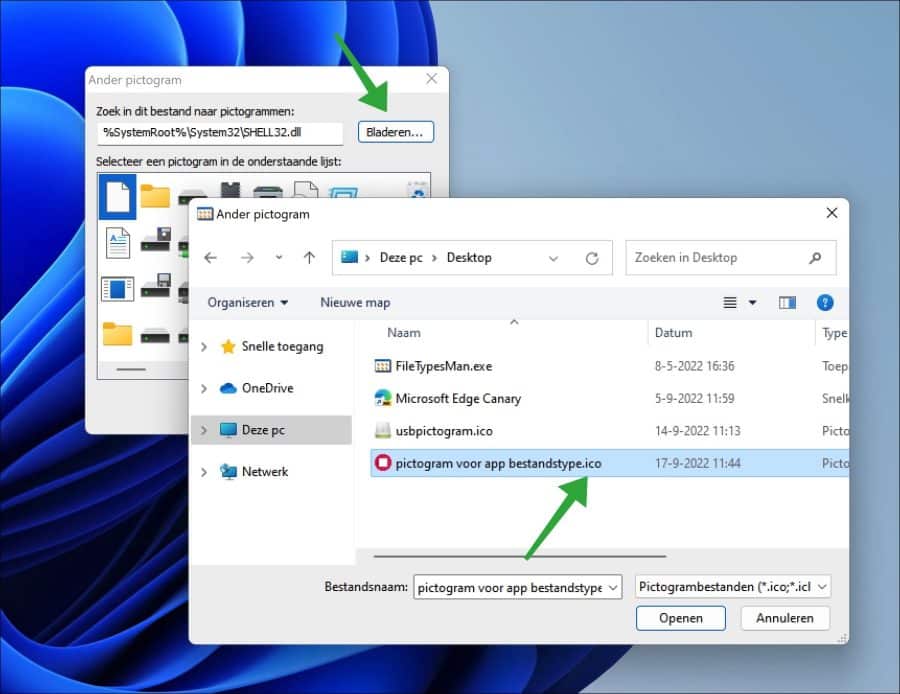
Klik vervolgens op de “Bladeren” knop om het aangepaste (“.ico”) bestand te selecteren wat u wilt gebruiken voor het aangepast bestandstype. Klik op “Openen”.
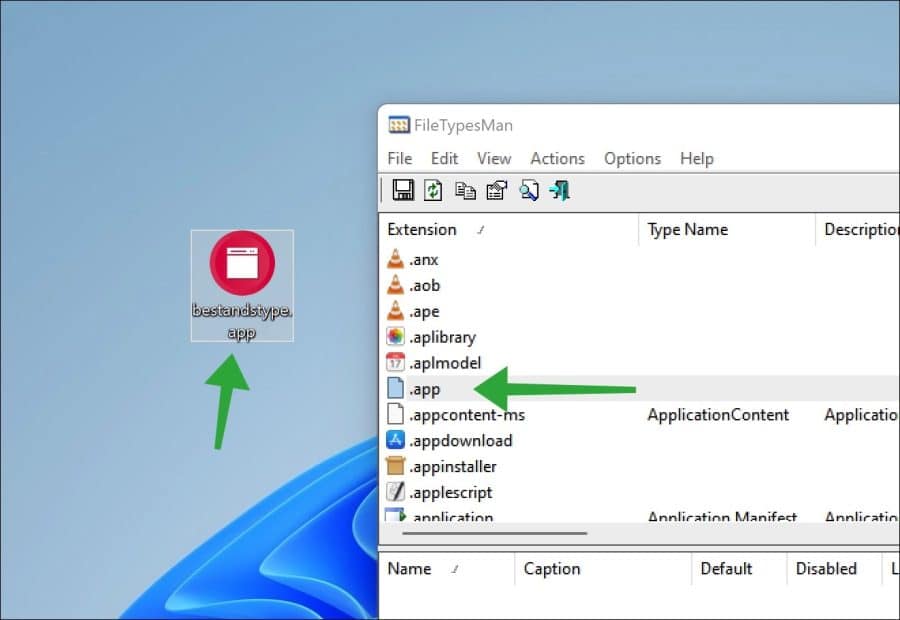
U heeft nu met succes een aangepast pictogram voor een bepaald bestandstype aangepast. Iedere keer als u nu dat specifieke bestandstype gebruikt op uw computer ziet u het ingesteld pictogram.
Ik hoop u hiermee geholpen te hebben. Bedankt voor het lezen!
Lees ook deze tips:
- Pictogram van een schijf wijzigen in Windows 11 of Windows 10.
- Bureaublad pictogrammen beheren in Windows 11.
- Pictogram werkt niet in Windows.
- Pictogrammen wijzigen in Windows 11.
- Prullenbak pictogram op bureaublad plaatsen.
- Bureaublad pictogrammen weergeven in Windows 11.
- Grootte van de taakbalk pictogrammen aanpassen in Windows 11.
❤️ Help mee en deel
Voordat u verdergaat, zou ik het waarderen als u overweegt mijn werk te steunen. In tegenstelling tot veel grote websites is er op PC Tips geen betaalmuur die lezers blokkeert, maar daardoor is uw steun des te belangrijker.Als u onafhankelijke initiatieven zoals deze waardeert, overweeg dan alstublieft om mij te steunen, zodat ik kan blijven doen wat ik met plezier doe. Deel mijn website PC Tips op andere websites, social media of binnen uw eigen netwerk. Hartelijk dank.
🙂 Overzicht met computertips
Bekijk ook mijn uitgebreide overzicht met praktische computertips, overzichtelijk gesorteerd per categorie.