
Winget is een hulpmiddel via het Opdrachtprompt om software te zoeken, te installeren en te beheren.
Winget is de client interface voor de (“Windows Package Manager”). Winget kan worden gebruikt om snel software te installeren zonder het hele installatieproces te volgen of om bijvoorbeeld te verwerken in scripts. U kunt er apps mee downloaden uit de Microsoft Store en alle EXE, MSI en MSIX bestandsextensies.
Winget kan geïnstalleerd worden op verschillende manieren. U kunt het downloaden uit de Microsoft Store app, of via GitHub downloaden.
Meld u dan aan voor onze nieuwsbrief.
Ik raad aan om eerst te kijken of winget niet al is geïnstalleerd. Als winget niet is geïnstalleerd kunt u het met onderstaande instructie installeren.
Winget installeren in Windows 11 of 10
Als u Windows 10 22H2 of Windows 11 22H2 heeft geïnstalleerd dan beschikt de computer al over winget. Dit kunt u op de volgende manier controleren.
Klik op “zoeken” in de taakbalk. In het zoekvenster type: cmd.exe. Klik op “Opdrachtprompt”. In het Opdrachtprompt type: winget
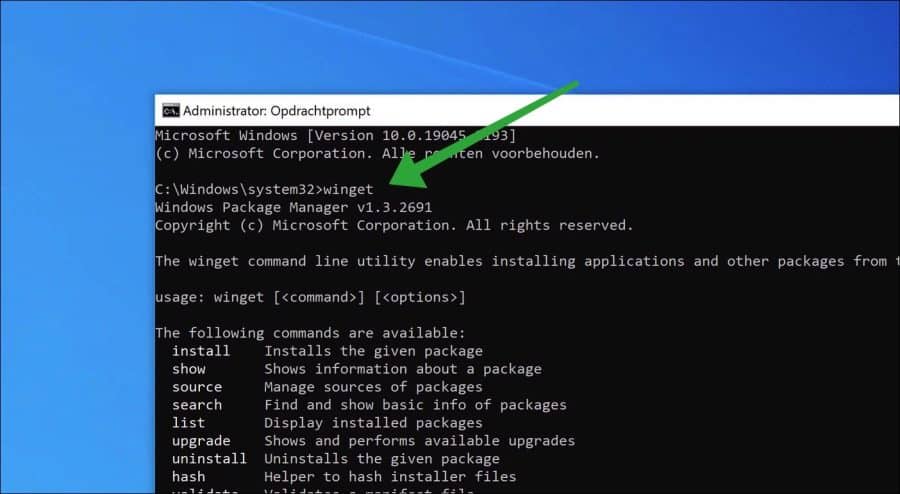
Als winget opent dan is winget als geïnstalleerd. Als winget niet is gevonden kunt u het op de volgende manier installeren.
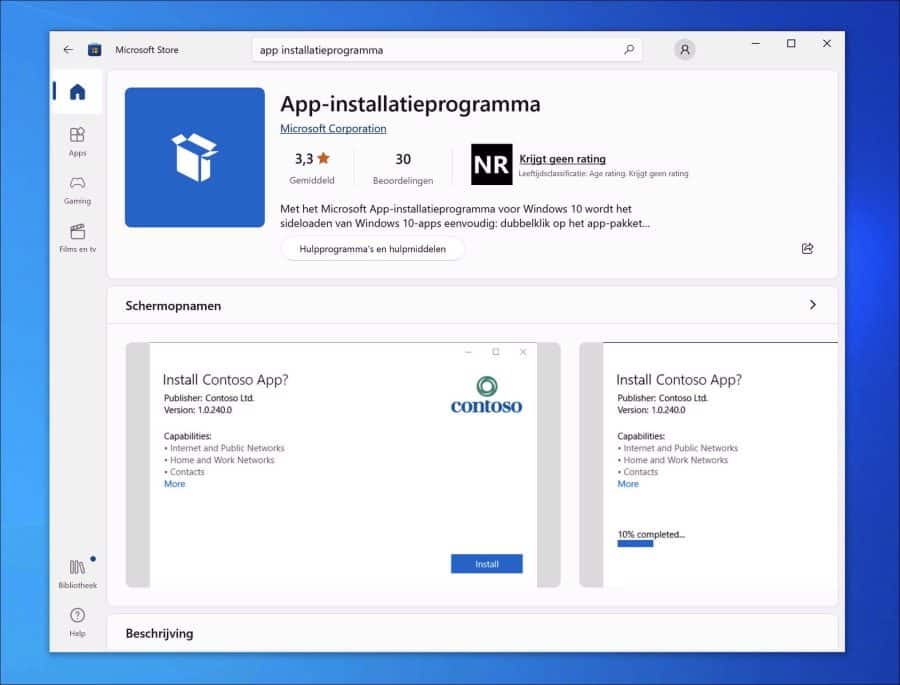
Winget installeren via Microsoft Store
Open de Microsoft Store. In de zoekbalk, zoek op “app installatieprogramma” en open de “app-installaprogramma” pagina. Installeer deze app. Dit is winget.
Winget installeren via GitHub
Om de laatste, experimentele of previews versies van winget te installeren kunt u winget ook downloaden vanaf GitHub.

Lees ook: PowerShell updaten naar de laatste versie in Windows 11 of 10.
Ik hoop u hiermee geholpen te hebben. Bedankt voor het lezen!
Help mee
Mijn computertips zijn gratis en bedoeld om andere mensen te helpen. Door deze pc-tip te delen op een website of social media, helpt u mij meer mensen te bereiken.Overzicht met computertips
Bekijk ook mijn uitgebreide overzicht met praktische computertips, overzichtelijk gesorteerd per categorie.Computerhulp nodig?
Loopt u vast met uw pc, laptop of software? Stel uw vraag op ons computerforum en krijg gratis computerhulp van ervaren leden en experts.