
Preventie van gegevensuitvoering (DEP) is ook wel bekend als “Data Execution Prevention”. Het is een beveiligingsfunctie in Windows die voorkomt dat gevaarlijke code kan worden uitgevoerd op uw computer.
DEP werkt door bepaalde delen van het geheugen als “niet-uitvoerbaar” te markeren. Wanneer een programma probeert code uit te voeren vanuit een van deze “niet-uitvoerbare” gemarkeerde gebieden (makkelijk gezegd), wordt een uitzondering gemaakt en wordt het programma beëindigd. Dit helpt voorkomen dat kwaadaardige code op uw computer kan worden uitgevoerd, omdat het voor aanvallers moeilijker wordt om code te injecteren.
Standaard is “Preventie van gegevensuitvoering” (“DEP”) ingeschakeld voor alle noodzakelijke systeemprocessen in Windows en voor programma’s die DEP inschakelen via een speciale code in hun header.
Meld u dan aan voor onze nieuwsbrief.
In sommige gevallen moet u DEP inschakelen voor specifieke programma’s, of moet u DEP uitschakelen vanwege compatibiliteit, voornamelijk in 32-bit apps. Dit is hoe het werkt.
Preventie van gegevensuitvoering (DEP) in- of uitschakelen
Data Execution Prevention instellingen wijzigen
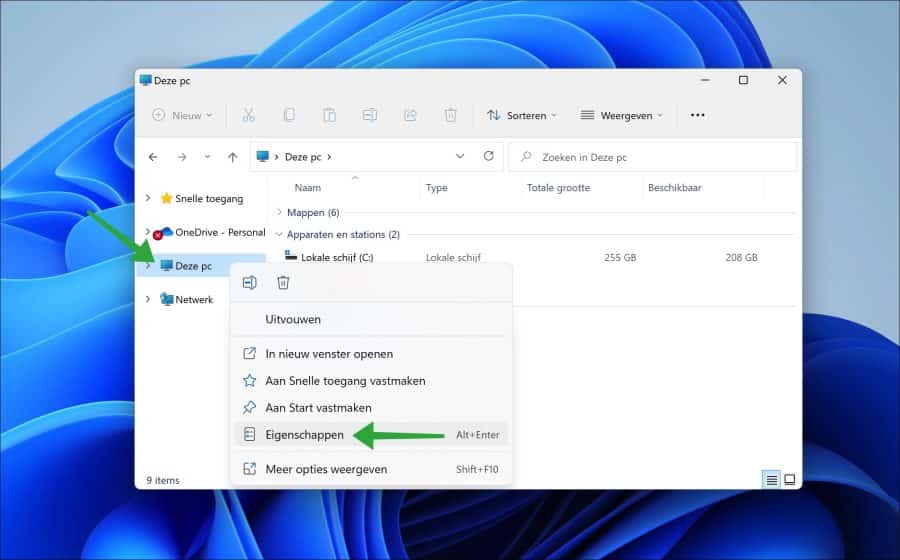
Om Preventie van gegevensuitvoering (DEP) in- of uitschakelen opent u de Windows verkenner. Klik vervolgens met de rechtermuisknop op “Deze PC”. In het menu klik op “Eigenschappen”.
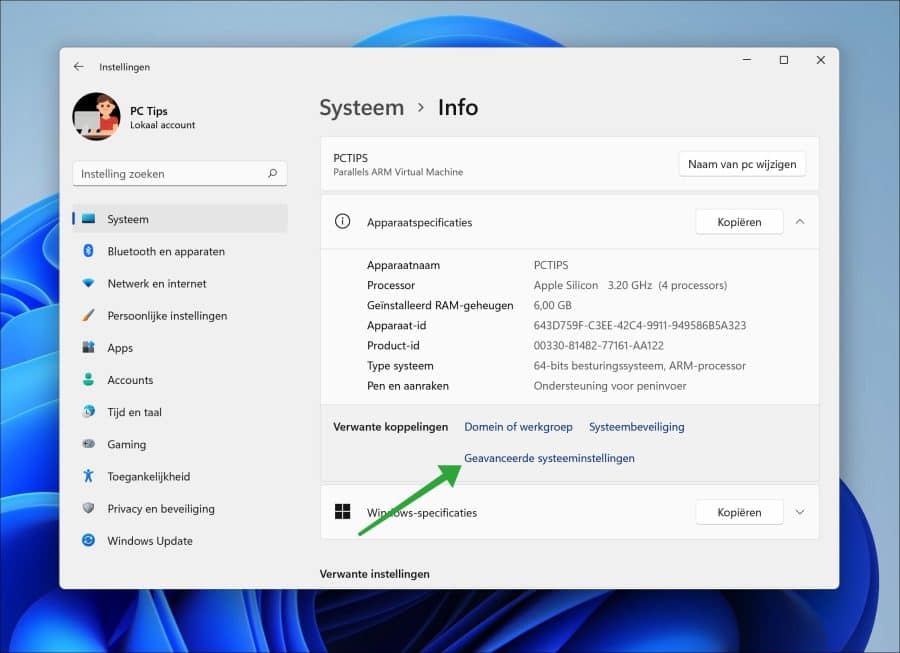
Klik vervolgens op “Apparaatspecificaties” en hierna op “Geavanceerde systeeminstellingen”.
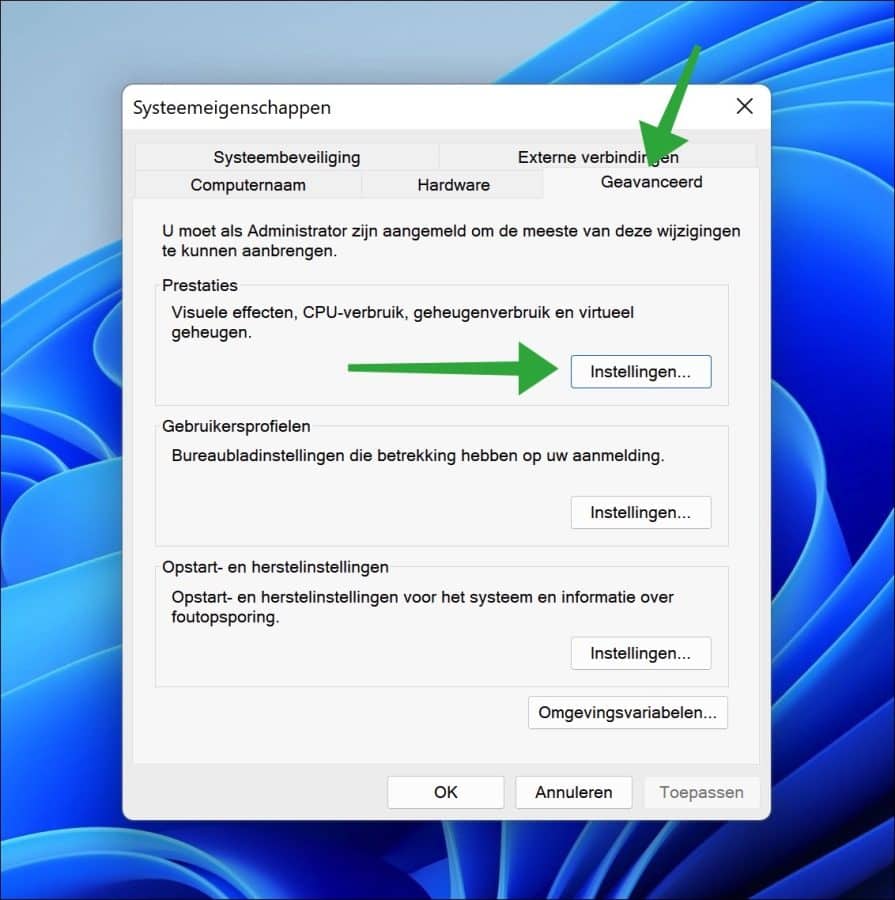
In de systeemeigenschappen klikt u op tabblad “Geavanceerd” en vervolgens op de “Instellingen” knop in de prestatieinstellingen.
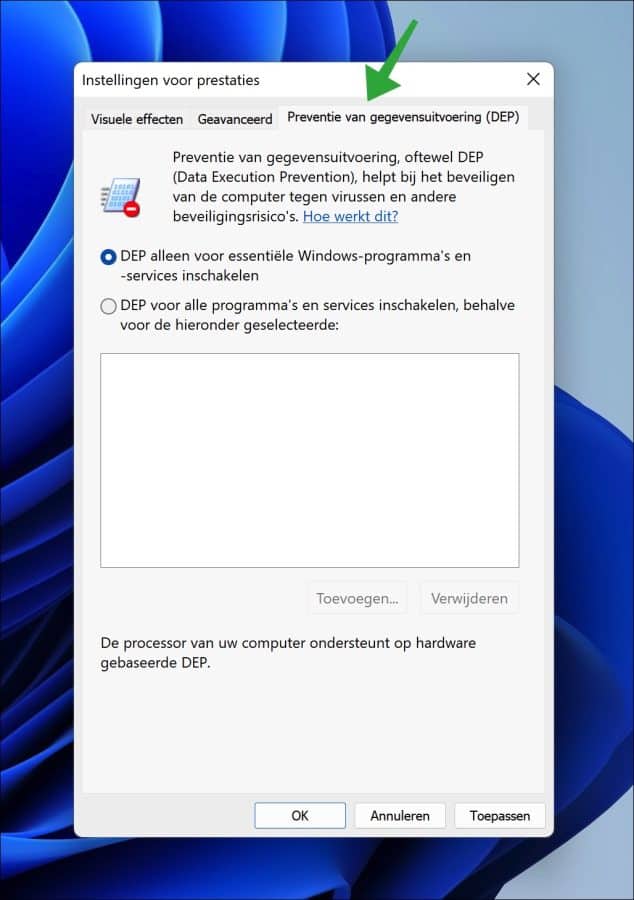
Klik op tabblad “Preventie van gegevensuitvoering (DEP)” om de instellingen te wijzigen. U kunt nu “DEP alleen voor essentiële Windows-programma’s en -service inschakelen” of u kunt “DEP voor alle programma’s en services inschakelen, behalve voor de hieronder geselecteerde”.
Als u dus DEP wilt uitschakelen voor een bepaalde app, dan kunt u door op de “toevoegen” knop te klikken en app uitzonderen van “Data Exection Prevention”.
Data Execution Prevention volledig uitschakelen
Als u Preventie van gegevensuitvoering (DEP) volledig wilt uitschakelen dan kunt u dit doen op de volgende manier.
Open een Opdrachtprompt als administrator. In het Opdrachtprompt kopieer en plak de onderstaande code om Data Execution Prevention helemaal uit te schakelen.
bcdedit.exe /set {current} nx AlwaysOff
Om Data Execution Prevention weer in te schakelen wijzigt u “AlwaysOff” naar “AlwaysOn”. Dit is het commando:
bcdedit.exe /set {current} nx AlwaysOn
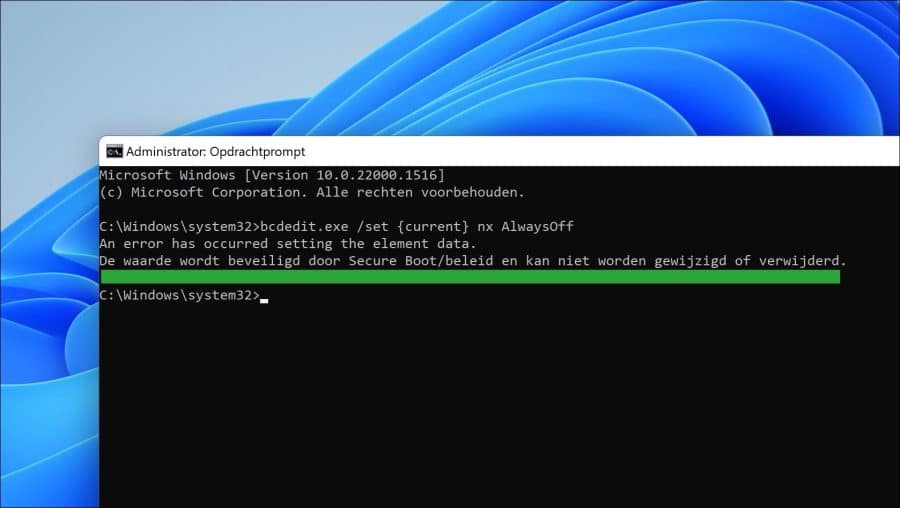
Als u DEP niet kunt uitschakelen vanwege de foutmelding:
“De waarde wordt beveiligd door Secure Boot/beleid en kan niet worden gewijzigd of verwijderd”
Dan schakelt u Secure Boot of “Beveiligd opstarten” uit in de BIOS/EUFI indien noodzakelijk.
Ik hoop u hiermee geholpen te hebben. Bedankt voor het lezen!
Help mee
Mijn computertips zijn gratis en bedoeld om andere mensen te helpen. Door deze pc-tip te delen op een website of social media, helpt u mij meer mensen te bereiken.Overzicht met computertips
Bekijk ook mijn uitgebreide overzicht met praktische computertips, overzichtelijk gesorteerd per categorie.Computerhulp nodig?
Loopt u vast met uw pc, laptop of software? Stel uw vraag op ons computerforum en krijg gratis computerhulp van ervaren leden en experts.