
Als u meerdere afspeelapparaten gebruikt in Windows 11, dan kunt u een afspeelapparaat instellen als standaard.
Stel dat u bijvoorbeeld een hoofdtelefoon, meerdere geluidsboxen heeft aangesloten dan kunt u één van deze apparaten instellen als standaard.
Zou u dit niet doen, dan kiest Windows 11 zelf een van deze apparaten op het moment dat ze worden verbonden. Als u dan wilt wisselen zou u zelf telkens het afspeelapparaat handmatig moeten selecteren. Door een bepaald afspeelapparaat als standaard in te stellen zorgt u ervoor dat het geluid altijd uit dit apparaat komt, ongeacht hoeveel typen geluidsapparaten er zijn verbonden.
Standaard afspeelapparaat wijzigen en instellen in Windows 11
Om te beginnen zorgt u ervoor dat het afspeelapparaat wat u wilt instellen als standaard is verbonden met uw computer. Dit kan een hoofdtelefoon zijn, maar ook een set boxen via bijvoorbeeld een bluetoothverbinding.
Klik op de Startknop en klik vervolgens op “Instellingen” om de Windows instellingen te openen.
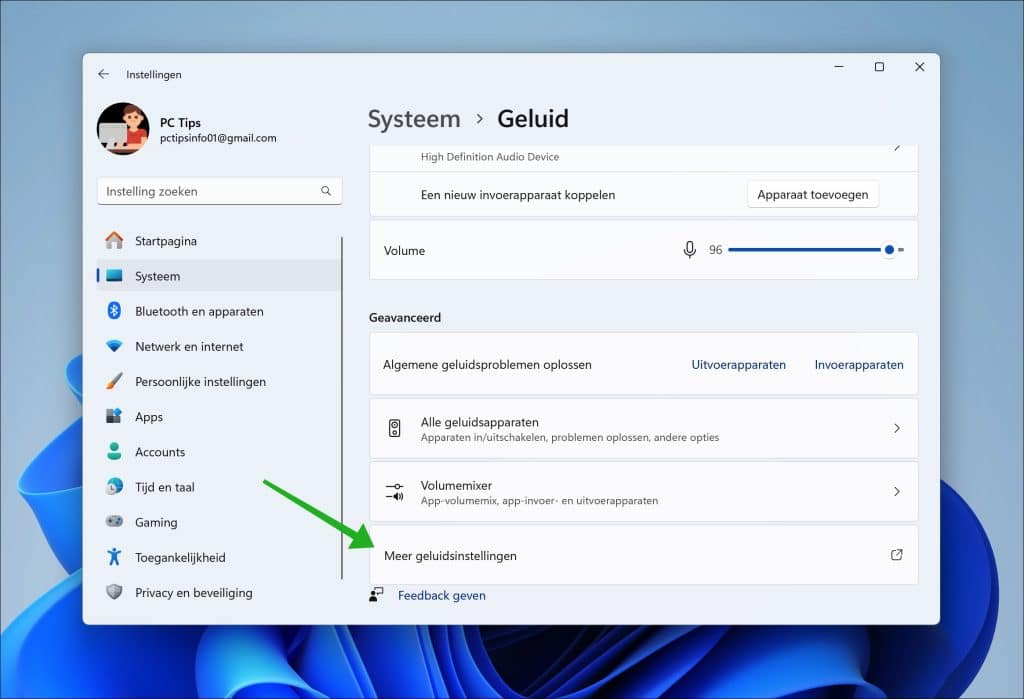
In de instellingen klikt u op “Systeem” en vervolgens op “Geluid”.
Klik helemaal onderin op “Meer geluidsinstellingen”.
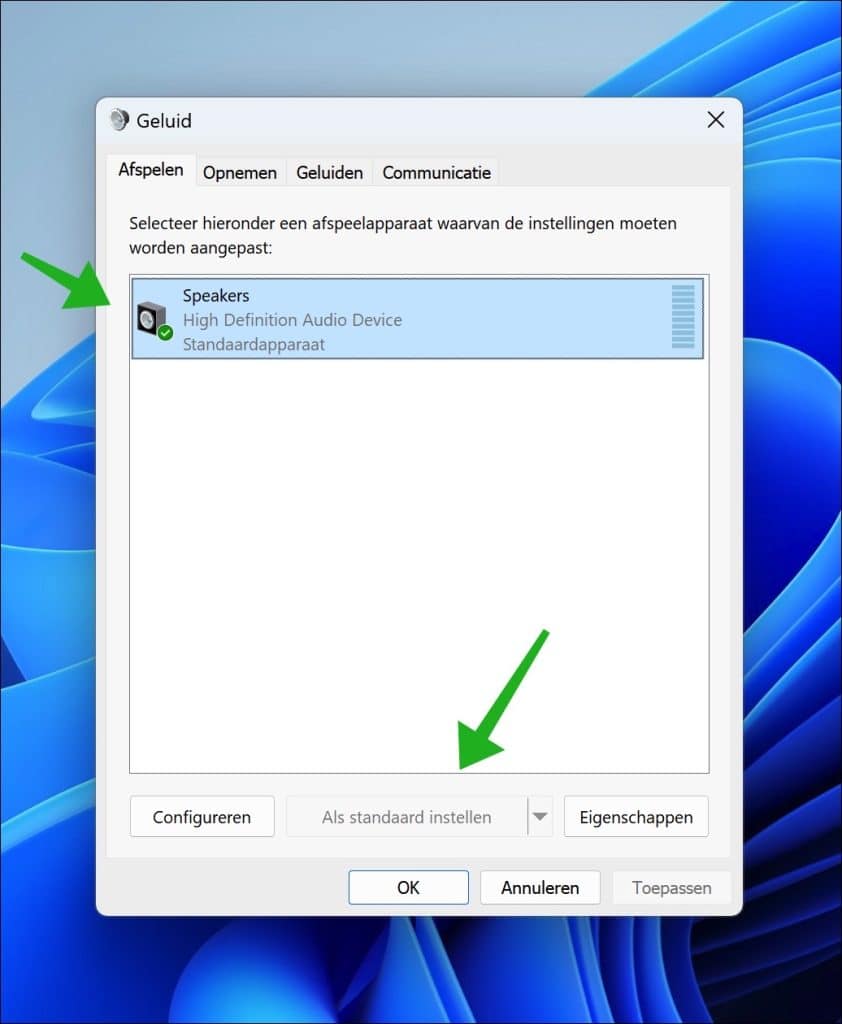
Klik op tabblad “Afspelen”. Hier ziet u alle gedetecteerde en verbonden afspeelapparaten.
Klik op het afspeelapparaat dat u wilt instellen als standaard en klik onderin op de knop “Als standaard instellen”.
U heeft nu met succes dit afspeelapparaat ingesteld als standaard. Elke keer als dit afspeelapparaat is verbonden wordt het door Windows 11 automatisch ingesteld als standaard uitvoerapparaat. Als het niet is verbonden selecteert Windows 11 zelf een ander uitvoerapparaat.
U herkent het standaard afspeelapparaat altijd aan het groene vinkje in het pictogram in de geluidsinstellingen.
Ik hoop u hiermee geïnformeerd te hebben. Bedankt voor het lezen!
Lees meer:
❤️ Help mee en deel
Voordat u verdergaat, zou ik het waarderen als u overweegt mijn werk te steunen. In tegenstelling tot veel grote websites is er op PC Tips geen betaalmuur die lezers blokkeert, maar daardoor is uw steun des te belangrijker.Als u onafhankelijke initiatieven zoals deze waardeert, overweeg dan alstublieft om mij te steunen, zodat ik kan blijven doen wat ik met plezier doe. Deel mijn website PC Tips op andere websites, social media of binnen uw eigen netwerk. Hartelijk dank.
🙂 Overzicht met computertips
Bekijk ook mijn uitgebreide overzicht met praktische computertips, overzichtelijk gesorteerd per categorie.