
Als u de Google Chrome browser gebruikt dan kunt u een Google-account koppelen en gegevens met Google synchroniseren.
Het synchroniseren van gegevens helpt om persoonlijke instellingen te gebruiken op verschillende apps of apparaten waar u zich aanmeldt met het Google-account. Zo kunt u gegevens en instellingen synchroniseren via Google Chrome.
Google Chrome synchronisatie is een functie van de Chrome browser waarmee kopieën van de bladwijzers van Chrome, de browsegeschiedenis, wachtwoorden en browser- en extensie instellingen van een gebruiker worden opgeslagen op de cloudservers van Google.
Meld u dan aan voor onze nieuwsbrief.
In dit artikel leest u hoe u de gegevens die u met de cloudservers van Google synchroniseert kunt wijzigen en kunt beheren. Zo kunt u beheren wat u wilt synchroniseren door verschillende instellingen in- of uit te schakelen voor synchronisatie.
Synchronisatie instellingen en gegevens wijzigen in Google Chrome
Zoals aangegeven in de begeleidende tekst, u moet aangemeld zijn in de Google Chrome browser met een Google-account. Lees hier hoe u een Google account aanmaakt.
Google Chrome synchronisatie inschakelen
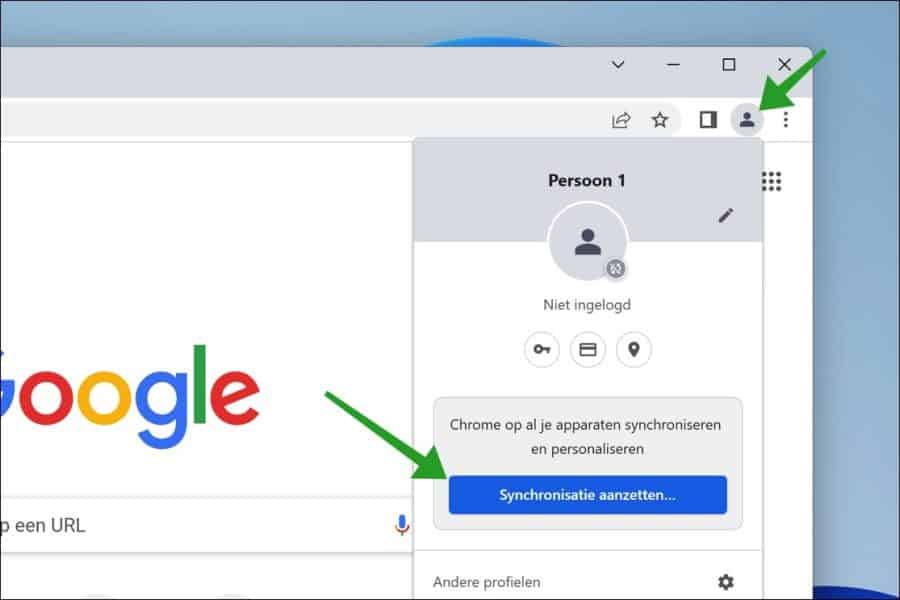
U kunt de synchronisatie aanzetten door op het profiel pictogram te klikken in de menubalk. Daarna klikt u op “Synchronisatie aanzetten” en meldt u zich aan met uw Google-account gegevens.
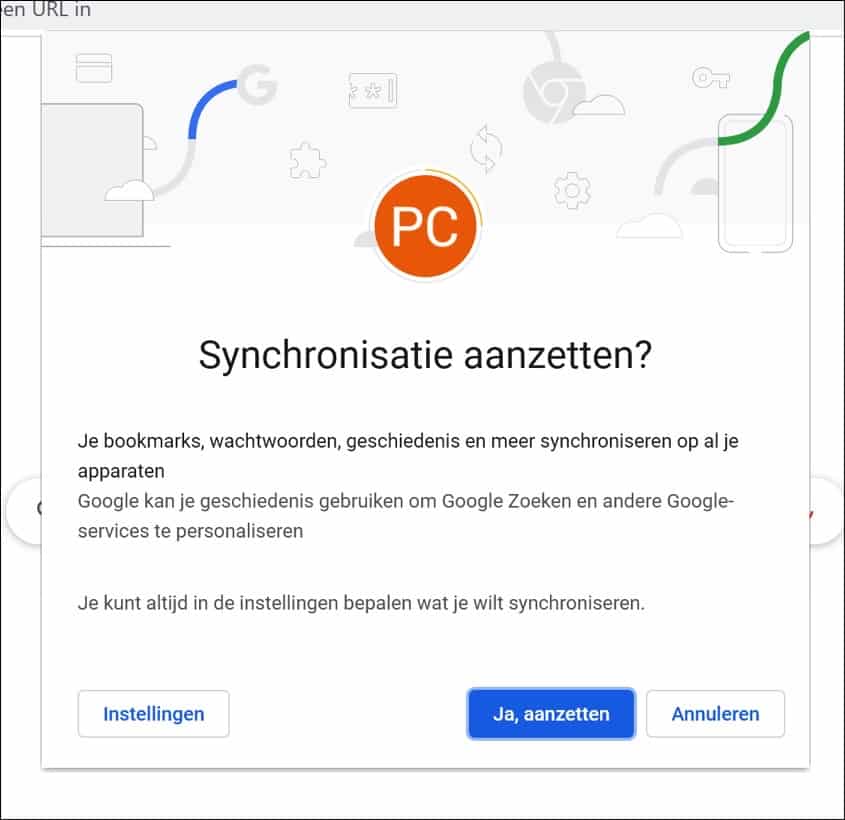
Nadat u zich heeft aangemeld krijgt u de volgende melding te zien om de synchronisatie aan te zetten.
Uw bookmarks, wachtwoorden, geschiedenis en meer synchroniseren op al uw apparaten. Google kan uw geschiedenis gebruiken om Google zoeken en andere Google-services te personaliseren. U kunt altijd bepalen in de instellingen wat u wilt synchroniseren.
Klik op “Ja, aanzetten” om de synchronisatie te starten als u dat nog niet had gedaan.
Bepalen welke gegevens u met Google wilt synchroniseren in de Google Chrome browser
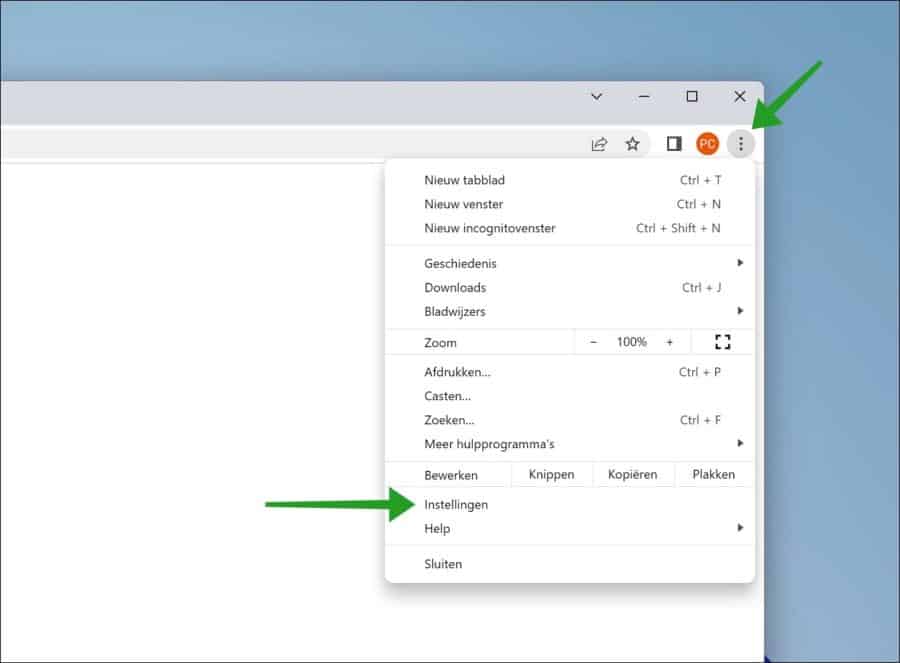
Om te bepalen wat u wilt synchroniseren dient u de instellingen te openen. Klik hiervoor in de rechterbovenhoek op het menu pictogram. In het menu klik op Instellingen.
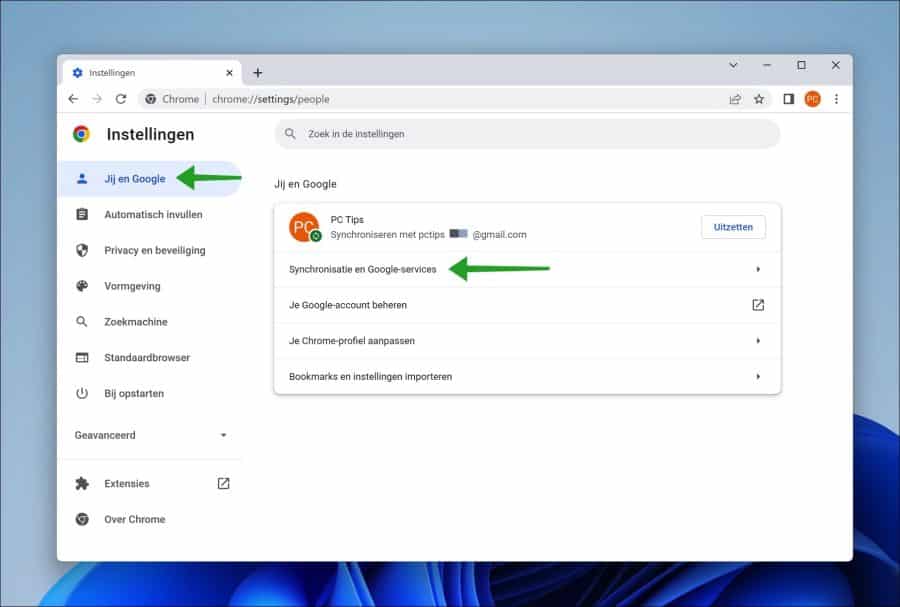
In het linkermenu klik op “Jij en Google”. U bent nu in de instellingen waar u verschillende opties kunt kiezen om de synchronisatie te beheren in Google Chrome.
U kunt hier door op de “Uitzetten” knop te klikken de synchronisatie in Chrome uitzetten. Door op “Synchronisatie en Google-services” te klikken kunt u de gegevens die worden gesynchroniseerd wijzigen.
Ook is er een snelkoppeling naar “Je Google-account beheren” die een nieuw venster opent met Google-account instellingen. Door op “Je Chrome-profiel te klikken” kunt u profielinstellingen in Google Chrome aanpassen zoals de avatar (profielafbeelding) en de profielnaam.
Eventueel kunt u bookmarks en instellingen importeren vanuit een andere browser door op “Bookmarks en instellingen importeren” te klikken.
In deze gids leg ik uit hoe u de gegevens voor synchronisatie kunt beheren. Om deze gegevens zoals instellingen e.d. te beheren klikt u op “Synchronisatie en Google-services”.
Er zijn in de instellingen voor synchronisatie vier verschillende links naar instellingen. Door op “Beheren wat je synchroniseert” te klikken kunt u bepalen welke gegevens er naar de Google cloudservers worden verzonden.
“Beheren hoe je browsergeschiedenis wordt gebruikt om Google Zoeken en meer te personaliseren” brengt u naar een nieuwe pagina op google.com om deze gegevens te beheren.
Om alle gegevens die u al heeft gesynchroniseerd in te zien klikt u op “Je gesynchroniseerde gegevens controleren”. Hier kunt u vervolgens deze gegevens inzien of wissen.
Als laatste is er nog een optie om de encryptie voor deze gegevens aan te passen. Alle gesynchroniseerde gegevens op de Google cloudservers worden versleuteld met een sleutel van uw Google-account. Dit kunt u eventueel wijzigen naar een eigen wachtwoord zin.
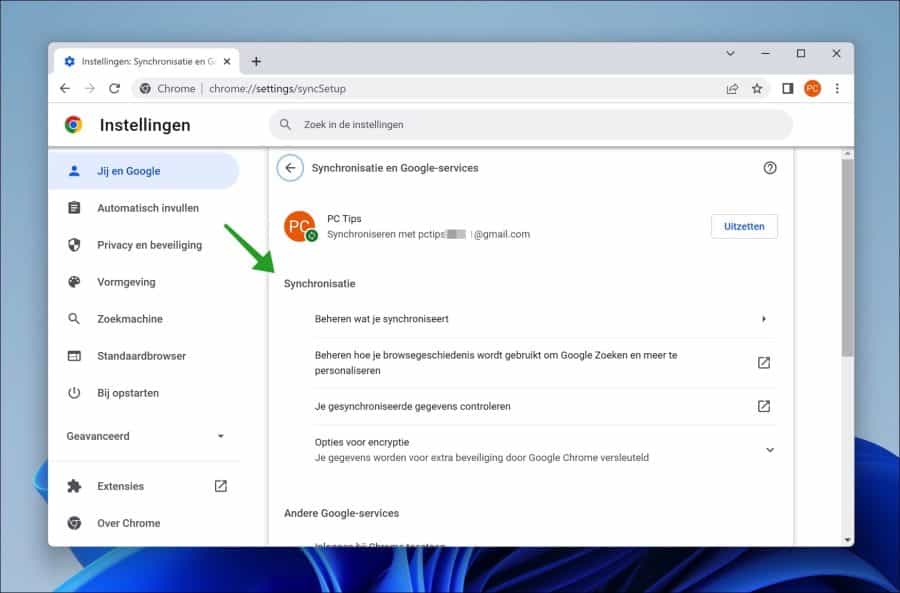
Klik op “Beheren wat je synchroniseert” om de Chrome synchronisatie gegevens aan te passen.
Standaard staat de synchronisatie ingesteld op “alles synchroniseren”. Door “Synchronisatie aanpassen” te klikken kunt u bepaalde instellingen en functies in- of uitschakelen van synchronisatie.
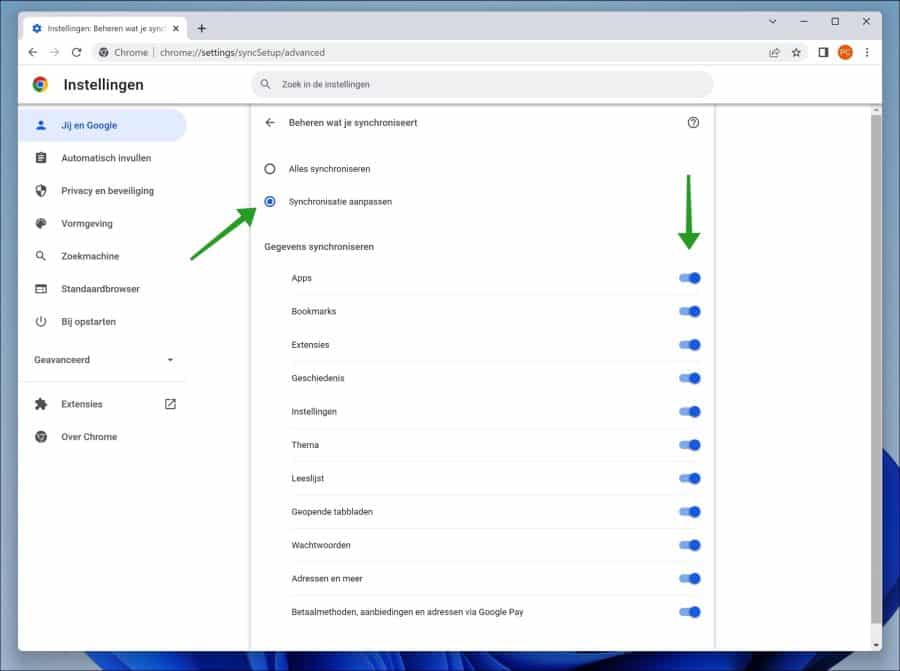
De gegevens die binnen Google Chrome worden gesynchroniseerd met de Google cloudservers zijn;
Apps, bookmarks, extensies, de browsergeschiedenis, Google Chrome voorkeuren, thema’s, de leeslijst, alle geopende tabs, opgeslagen wachtwoorden, aangevulde adressen, betaalmethodes, aanbiedingen en adressen via Google Pay.
Door elk afzonderlijk gegeven in- of uit te schakelen door op de blauwe schuif te klikken, kunt u bepalen of deze gegevens in de Chrome synchronisatie moeten worden meegenomen of niet.
Ik hoop dat het hiermee is gelukt om de gegevens synchronisatie in Google Chrome aan te passen naar wens. Bedankt voor het lezen!
Problemen met Google Chrome? Lees hoe u Google Chrome kunt resetten.
Help mee
Mijn computertips zijn gratis en bedoeld om andere mensen te helpen. Door deze pc-tip te delen op een website of social media, helpt u mij meer mensen te bereiken.Overzicht met computertips
Bekijk ook mijn uitgebreide overzicht met praktische computertips, overzichtelijk gesorteerd per categorie.Computerhulp nodig?
Loopt u vast met uw pc, laptop of software? Stel uw vraag op ons computerforum en krijg gratis computerhulp van ervaren leden en experts.