

In Windows 11 you can manage multiple types of accounts. For example, there is a user account and a administrator account, both with a set of rights that can perform changes in Windows.
For example, if you want to add an administrator because a new colleague or family member has been added, you can set this up in Windows. It is a requirement that you first create a create a user account. After creating the user account, you can change the account to an administrator with administrative rights on the computer.
In this article I will explain how you can change an administrator in Windows 11 in different ways.
Change administrator windows 11
The first way to change an administrator is through the settings. The settings are used to configure Windows 11 as desired.
Via settings
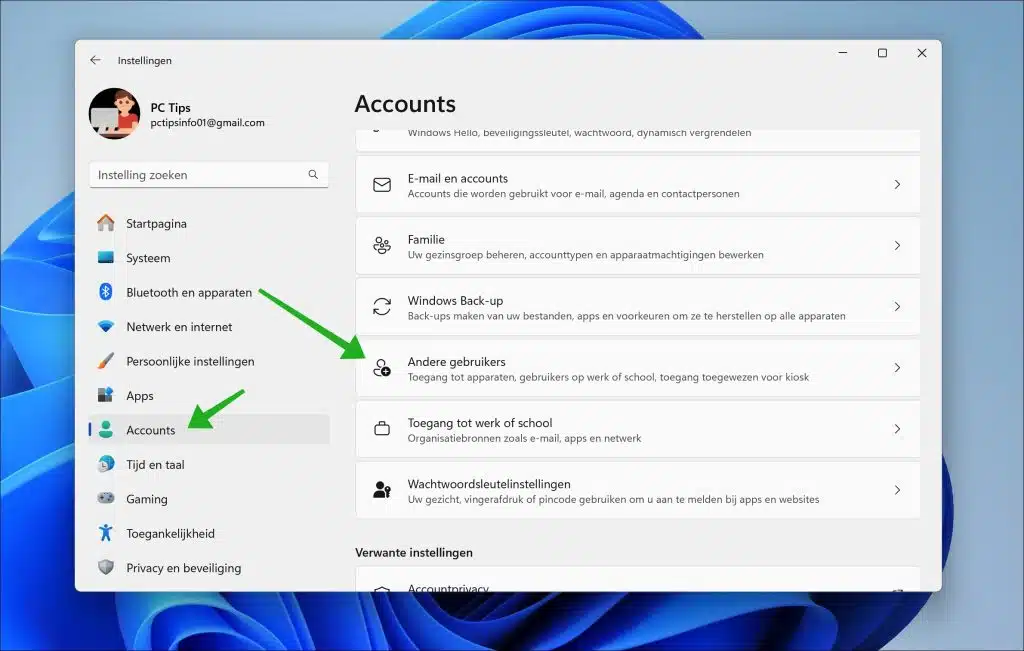
To do this, right-click on the Start button in the taskbar. Then click on “Settings” in the context menu.
On the left side of the menu, click on “Accounts” and then on “Other users”.
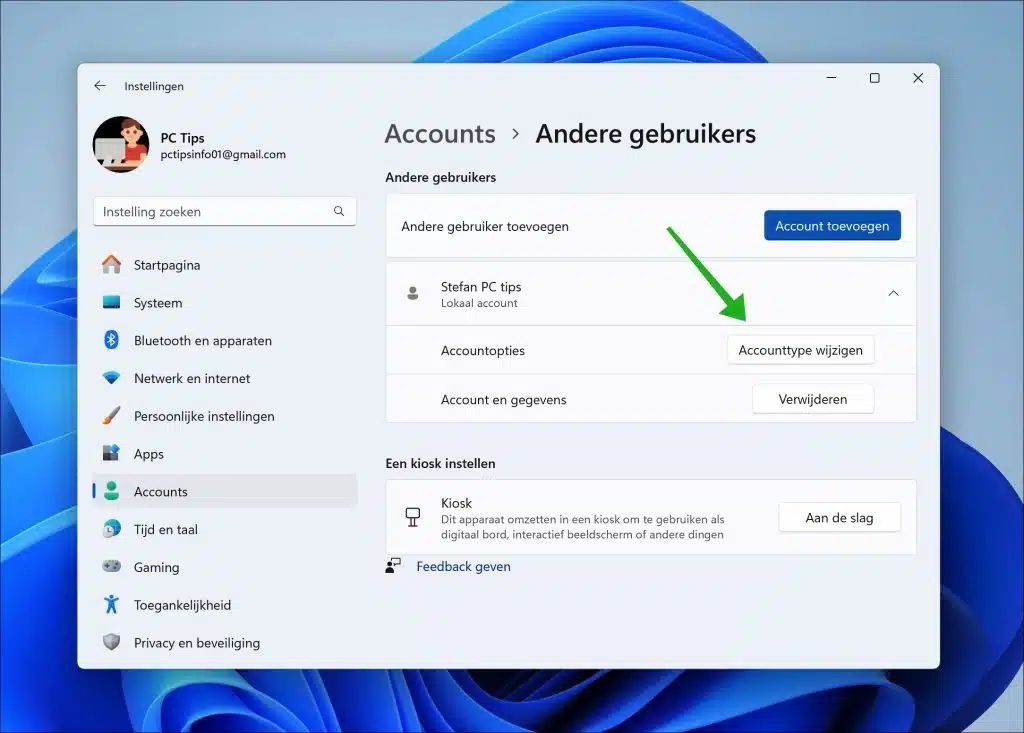
Here you will see all other user accounts on the computer. If you don't see one, create one first. Click on the user account and click on the button “Change account type".
Change “Account Type” to “Administrator” and click “OK” to confirm.
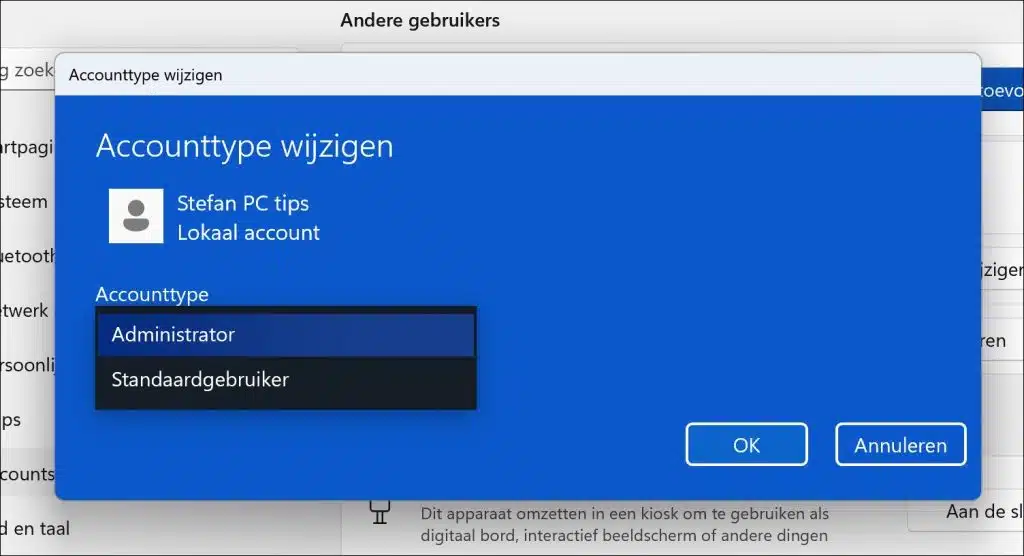
You now have the administrator account changed in Windows 11.
Through local users and groups
If you want more control over the user account you want to change to administrator, you can use “lusrmgr.msc”. It stands for “Local Users and Groups” in Microsoft Windows. It is a tool used for managing user accounts and user groups in Windows. Through this console, administrators can perform various tasks related to user management and group management.
Right-click on the Start button. Then click on “Computer management” in the menu. In Computer Management, click on “Local Users and Groups” on the left.
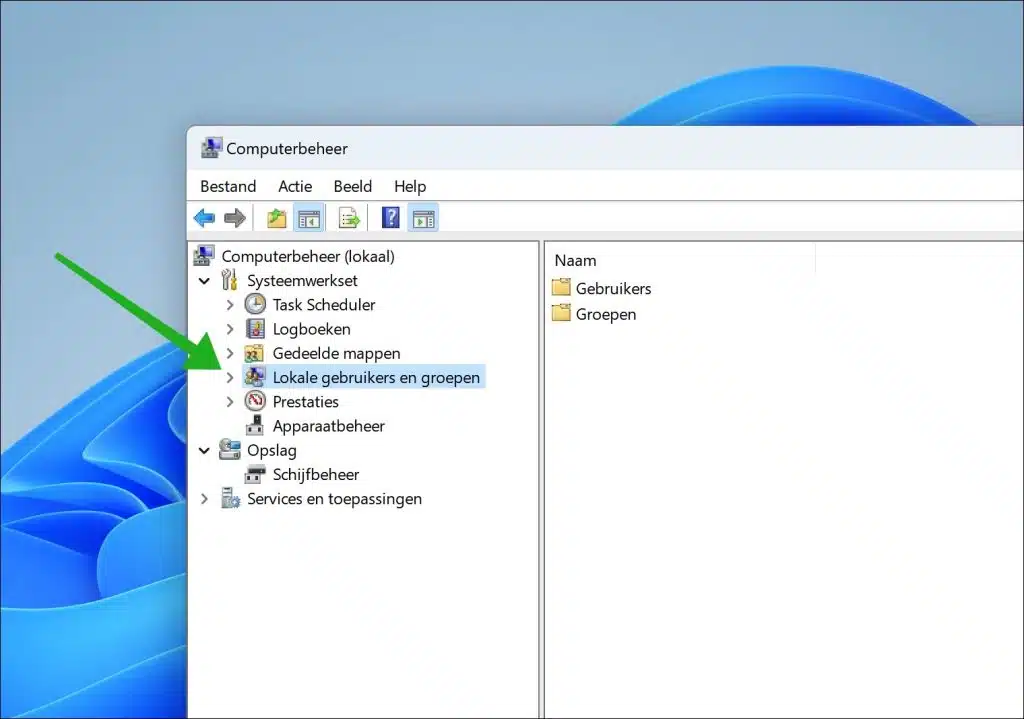
To change a user account to an administrator account, click on “Users” and double-click on the user account. Then click on the “Member of” tab and click on the “Add” button. In the “Enter object names” field, type “administrators” and then confirm with “Check names”. The administrators group is now added to this user account.
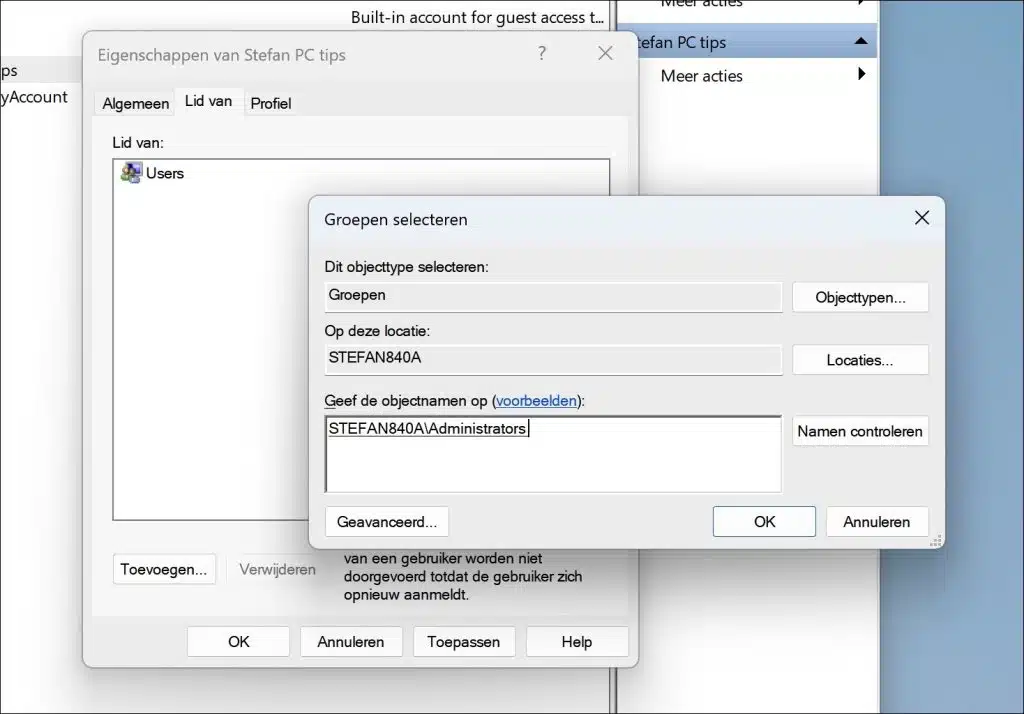
You have now made the user account a member of the administrator group on this computer. Now restart your computer.
Via Control Panel
Another way to change a user account to administrator is via the control panel.
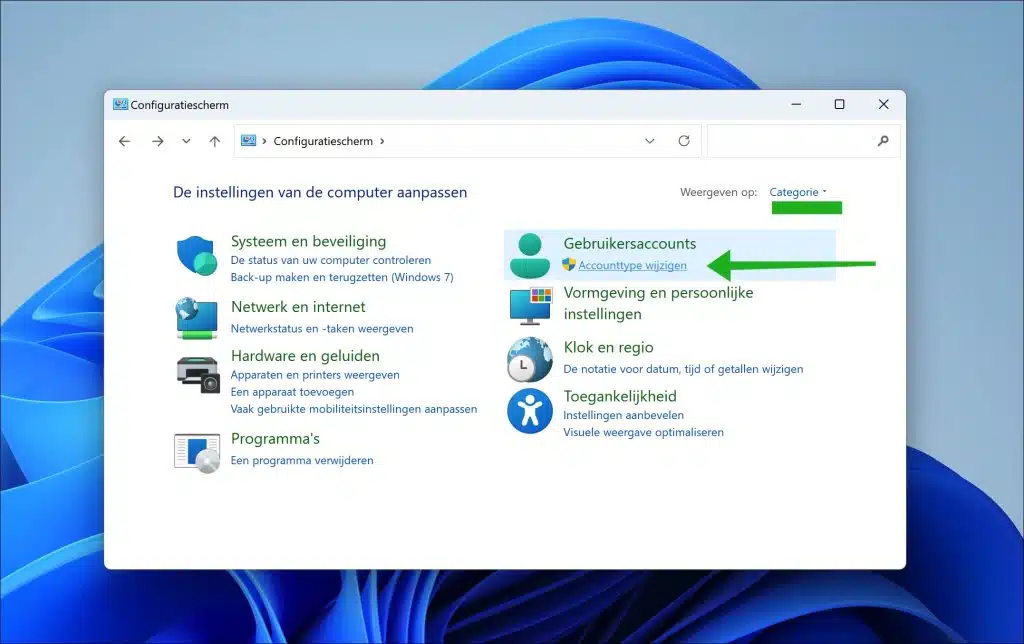
To begin open the Control Panel. Then click on “Change account type” under “User accounts”. If you don't see this view, change the view in the top right corner to “Category”.
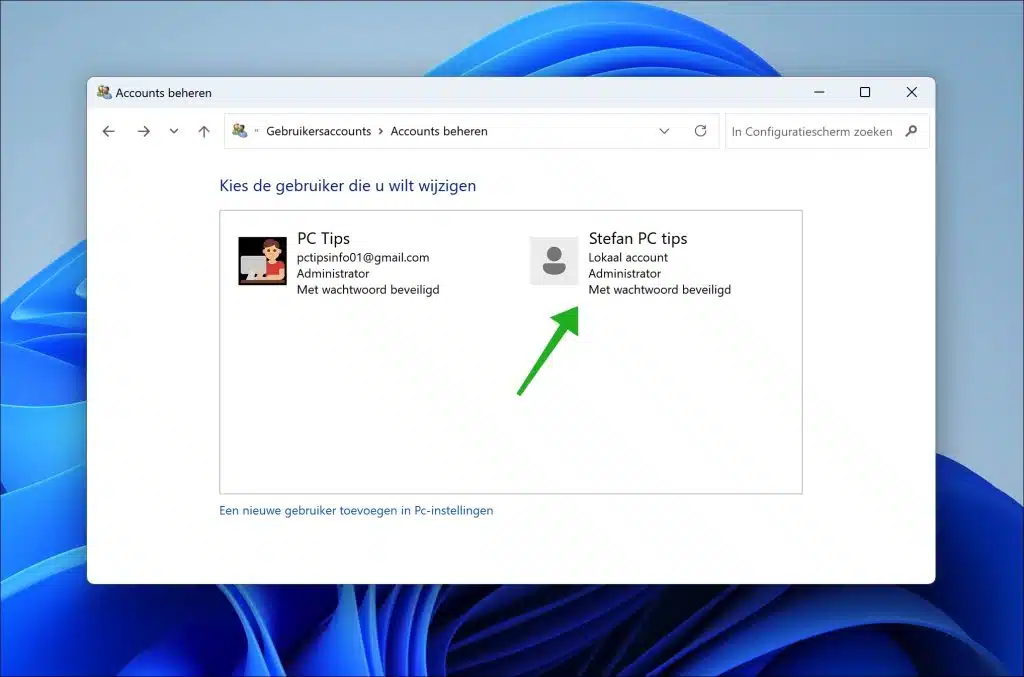
Choose the user you want to change.
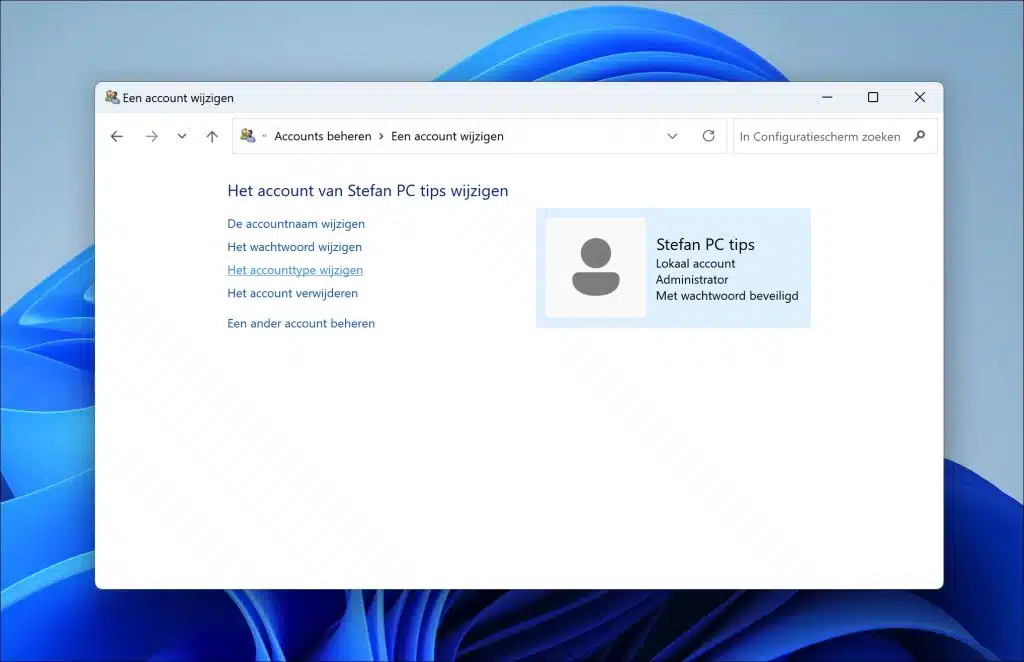
You now have four different options to change the administrator account.
- De change account name.
- Change the password.
- Change the account type.
- Delete the account.
By changing the account type you can change the account to an administrator account.
I hope this helped you. Thank you for reading!
Read more: Change Administrator's email address.