

When you create a new user, the new user always becomes part of a group. The first user is usually part of the “Administrators” group if you have just installed the operating system.
If you have a second user creates in Windows, this user becomes part of the “Users” group by default.
You can assign any user account to a group. You can add a user to the administrator group and vice versa. You can also use the Assign Windows user to a self-created group.
There are groups in Windows that are installed by default. However, there are also groups created by functions and Windows components. These groups are then specific to that part. Components that create groups in Windows IIS web server, Hyper-V, riding a Windows Sandbox.
Below is a list of the most common local groups on a Windows computer.
Administrators
Device owners
Backup operators
Cryptography operators
DCOM users
Remote desktop users
Guests
Users
Remote management users
Power users
Hyper-V administrators
IIS_IUSRS
Event log readers
Network configuration operators
Access control support operators
Performance log users
Performance Monitor users
Replication
System Managed Accounts Group
These are local groups, there are also global groups. These are groups that are managed from Active directory on a Windows server and apply to a domain.
The purpose of a group is to group users and thereby manage the rights for a group. This way you can add and remove users in a group. You can also set specific rights per group for the users in that group, such as a policy or scripts.
There are several ways to add a user to a specific group in Windows.
Add user to group in Windows 11 or Windows 10
Add user to group via Computer Management
To add a user on a local PC to a group, right-click on the Start button. Click Computer Management in the menu.
Then click on “Local users and groups” on the left. Then click on “Users” and double-click on the account you want to add to a group.
Then click on the “Member of” tab and then on the “Add” button at the bottom. Enter the object names (the name of the local group) and click “Check Names”. Once the group is found it will be added. Click OK to confirm.
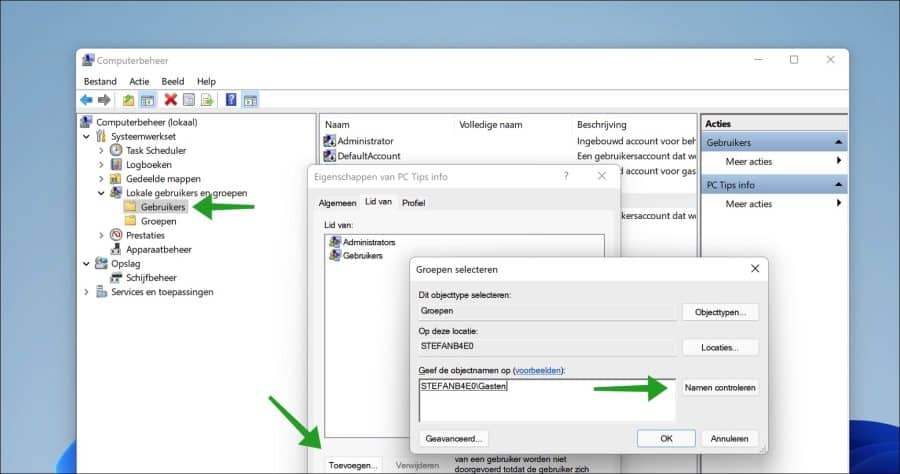
You have now assigned a user account to a group in Windows 11 or Windows 10.
Add user to group via Command Prompt
If you do not have access to computer management or you prefer to work via Command Prompt, you can also add a user to a group via Command Prompt.
To add a user to a group, first query all users created on the computer using the command:
net users
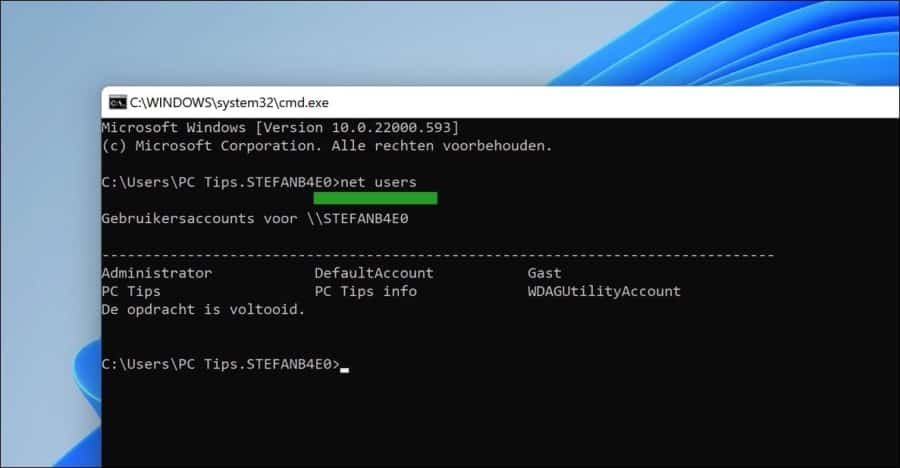
Then you will see a list of users, make sure you remember the user's name. To then query the local groups, type the following command:
net localgroup
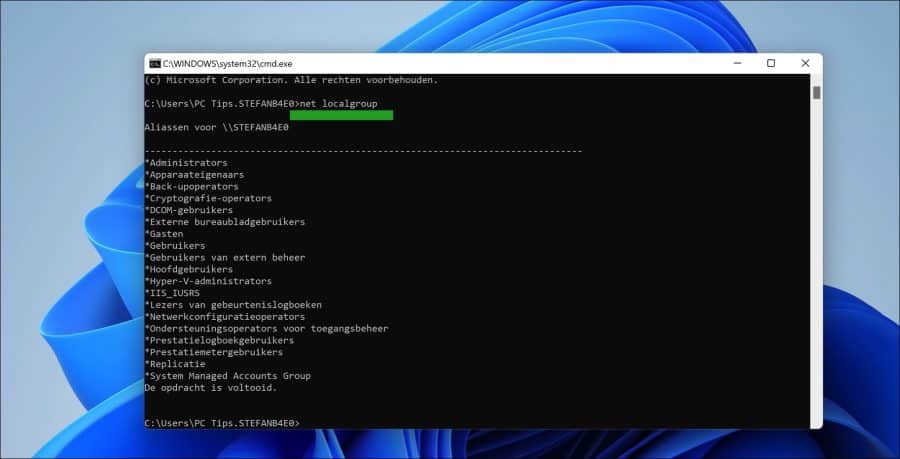
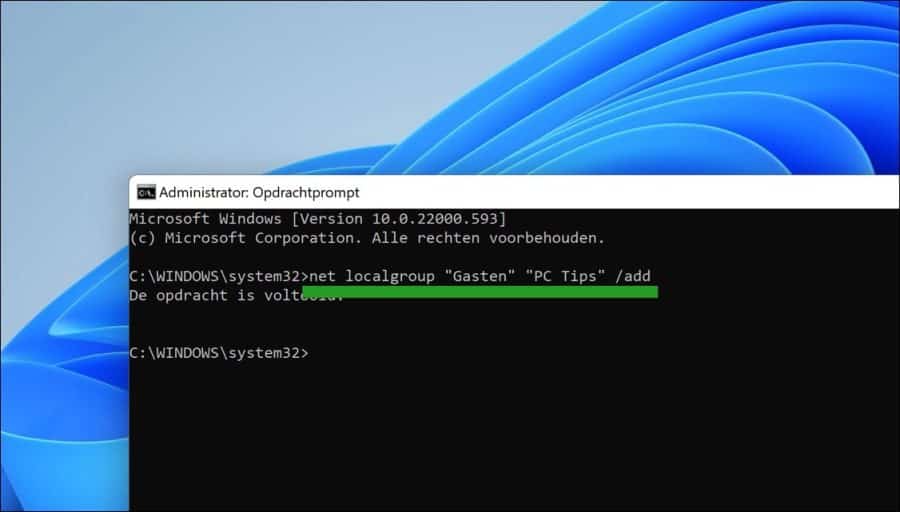
Remembers the name of the local group. Then you can add the user account to the local group with the following command.
The Command Prompt must be run as Administrator to add a user to a local group.
net localgroup "groepsnaam" "gebruikersnaam" /add
I hope this helped you. Thank you for reading!
Also read: