

Windows 11 is an operating system where you can change a lot. This way you can make various adjustments to the desktop. An adjustment that you cannot make via the settings or via the configuration can adjust the distance between the desktop icons.
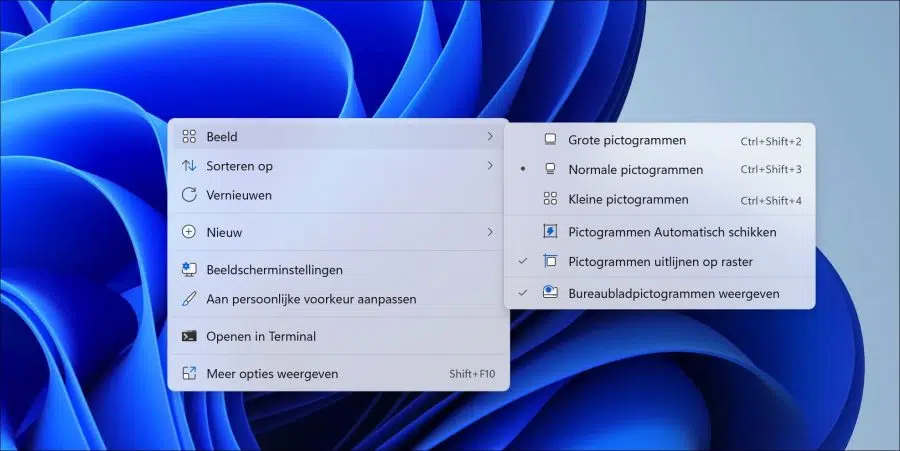
In Windows 11 you can only use the change the size of the desktop icons, automatically arrange the desktop icons, snap to raster of show or hide desktop icons.
To change the distance between desktop icons, either use a free app or change some values in the Windows registry. I explain both in this article.
How to change desktop icon spacing in Windows 11
Change desktop icon spacing via the Windows registry
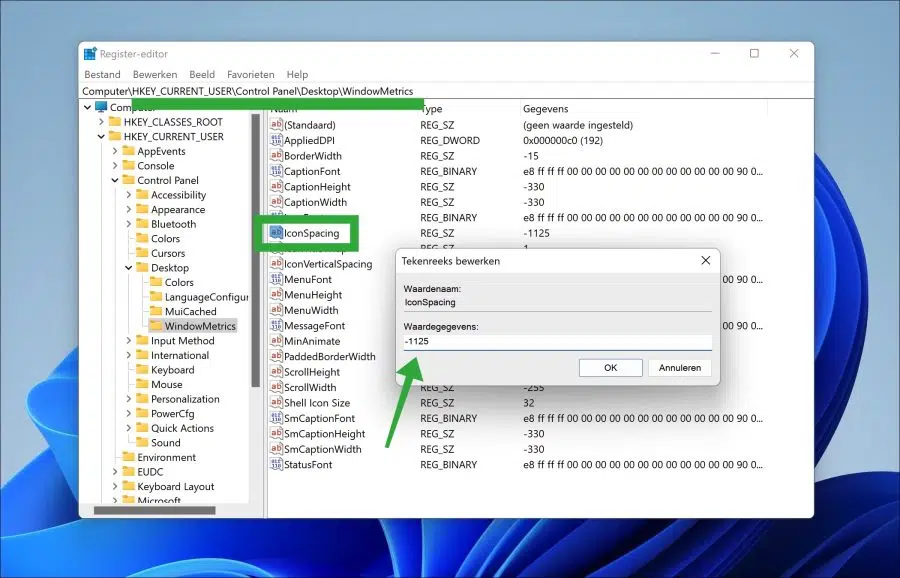
Open the Windows registry. On the left open the following key:
Computer\HKEY_CURRENT_USER\Control Panel\Desktop\WindowMetrics
Here you will see two values, the “IconSpacing” value and the “IconVerticalSpacing” value. The “IconSpacing” value is the horizontal spacing.
The vertical spacing is “IconVerticalSpacing”.
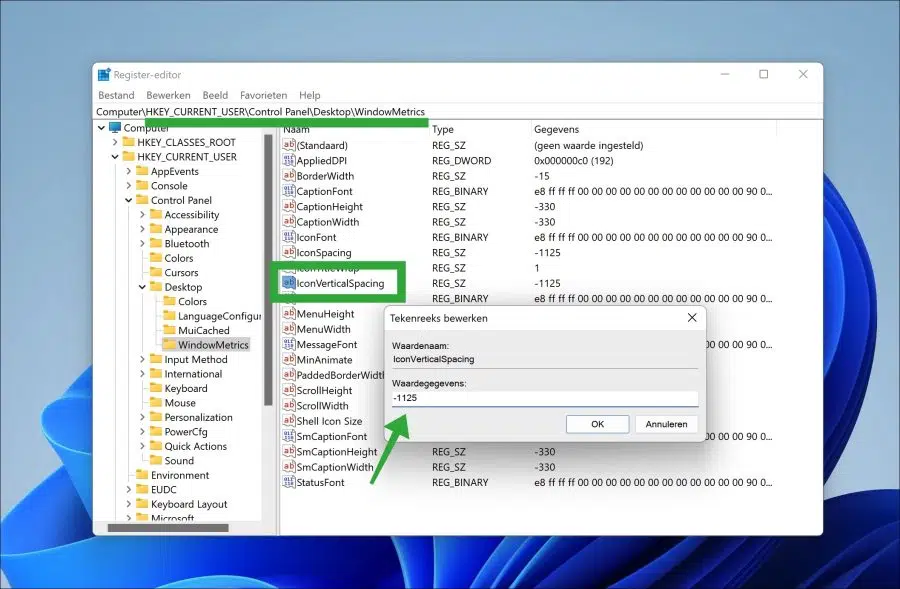
The default value for both is “-1125”. If you change this value to, for example, “-1200” you will increase the distance.
If you have changed the value, you must restart the computer to see the result.
Change distance between desktop icons via Winaero Tweaker
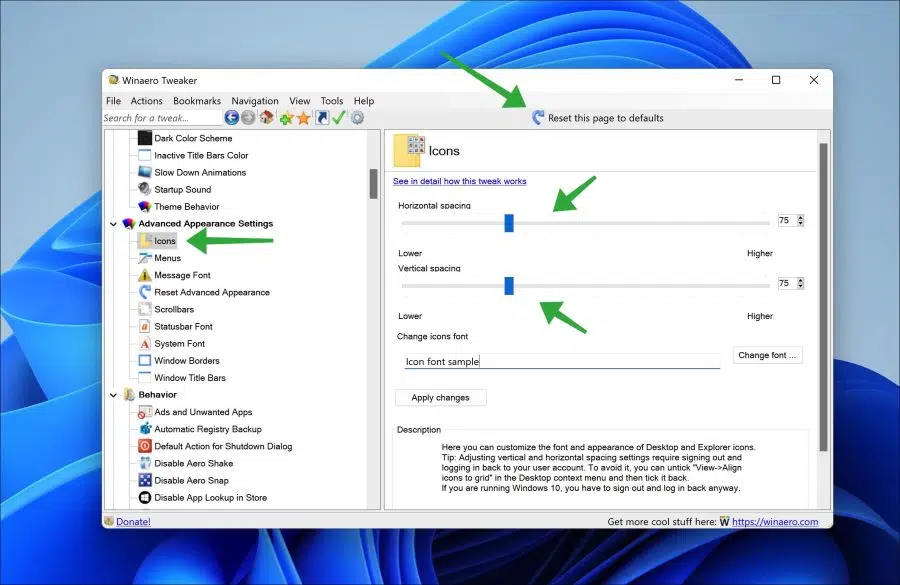
You can also change the distance between the desktop icons via an app. This is the free “WinAero Tweaker” app that you can download for Windows 11.
Winaero Tweaker helps us to change the distance for the desktop icons via a slider via the “Icons” settings on the left under “Advanced Appearance Settings”.
Moving the slider to the right increases the distance for the desktop icons. To the left and you decrease the distance for the desktop icons.
Click “Apply changes” when you are done. If the change is not satisfactory, click “Reset this page to defaults” at the top to set the default spacing for the desktop icons.
I hope this helped you. Thank you for reading!
Also read:
hello stefan,
I get a message from device security that memory integrity is not enabled. when checking for incompatible drivers I get:
lvrs64.sys (2 times) and lvuvc64.sys (also 2 times)
After googling it turns out that these are drivers for the Logitech camera, especially for the sound.
I see complicated examples but I can't get rid of them
do you know a solution for this?
Hello. Yes I have. I made an instruction for this:
https://www.pc-tips.info/tips/windows-tips/geheugenintegriteit-is-uitgeschakeld/
This should do the trick. Please note that removing the incompatible drivers will cause the Logitech camera to no longer work in this case.
Success!
hello,
With Win10 I was able to give the icons a permanent place on the desktop
This does not work with Win 11; Every time a restart is needed everything is mixed up again
Do you know a solution for this?
Hello, you can set this by right-clicking on the desktop. Then click on “View” and then on “Align to Grid”. You can now move the icons to a fixed location. Make sure that the “Automatically arrange icons” option is unchecked.
This should be retained after a restart. Good luck!
hello stefan,
thank you; I didn't see those little checks.
Glad it worked! Thanks for the feedback