

In today's world, a fast and reliable internet connection is important for performing daily tasks such as browsing the web, streaming videos and downloading files.
However, despite the advanced technology available today, many Windows 10 users still experience slow internet speeds, which can be frustrating and time-consuming.
There can be numerous reasons for a slow internet connection on Windows 10, such as outdated drivers, network congestion, incorrect network settings, or a malware infection.
In this context, it is important to identify the root cause of the problem and take appropriate measures to improve internet speed and performance. In this article you will read several tips to improve internet speed in Windows 10.
Improve internet speed in Windows 10
Check your current internet speed
To check how fast your internet is, perform an internet speed test Speedtest.net.
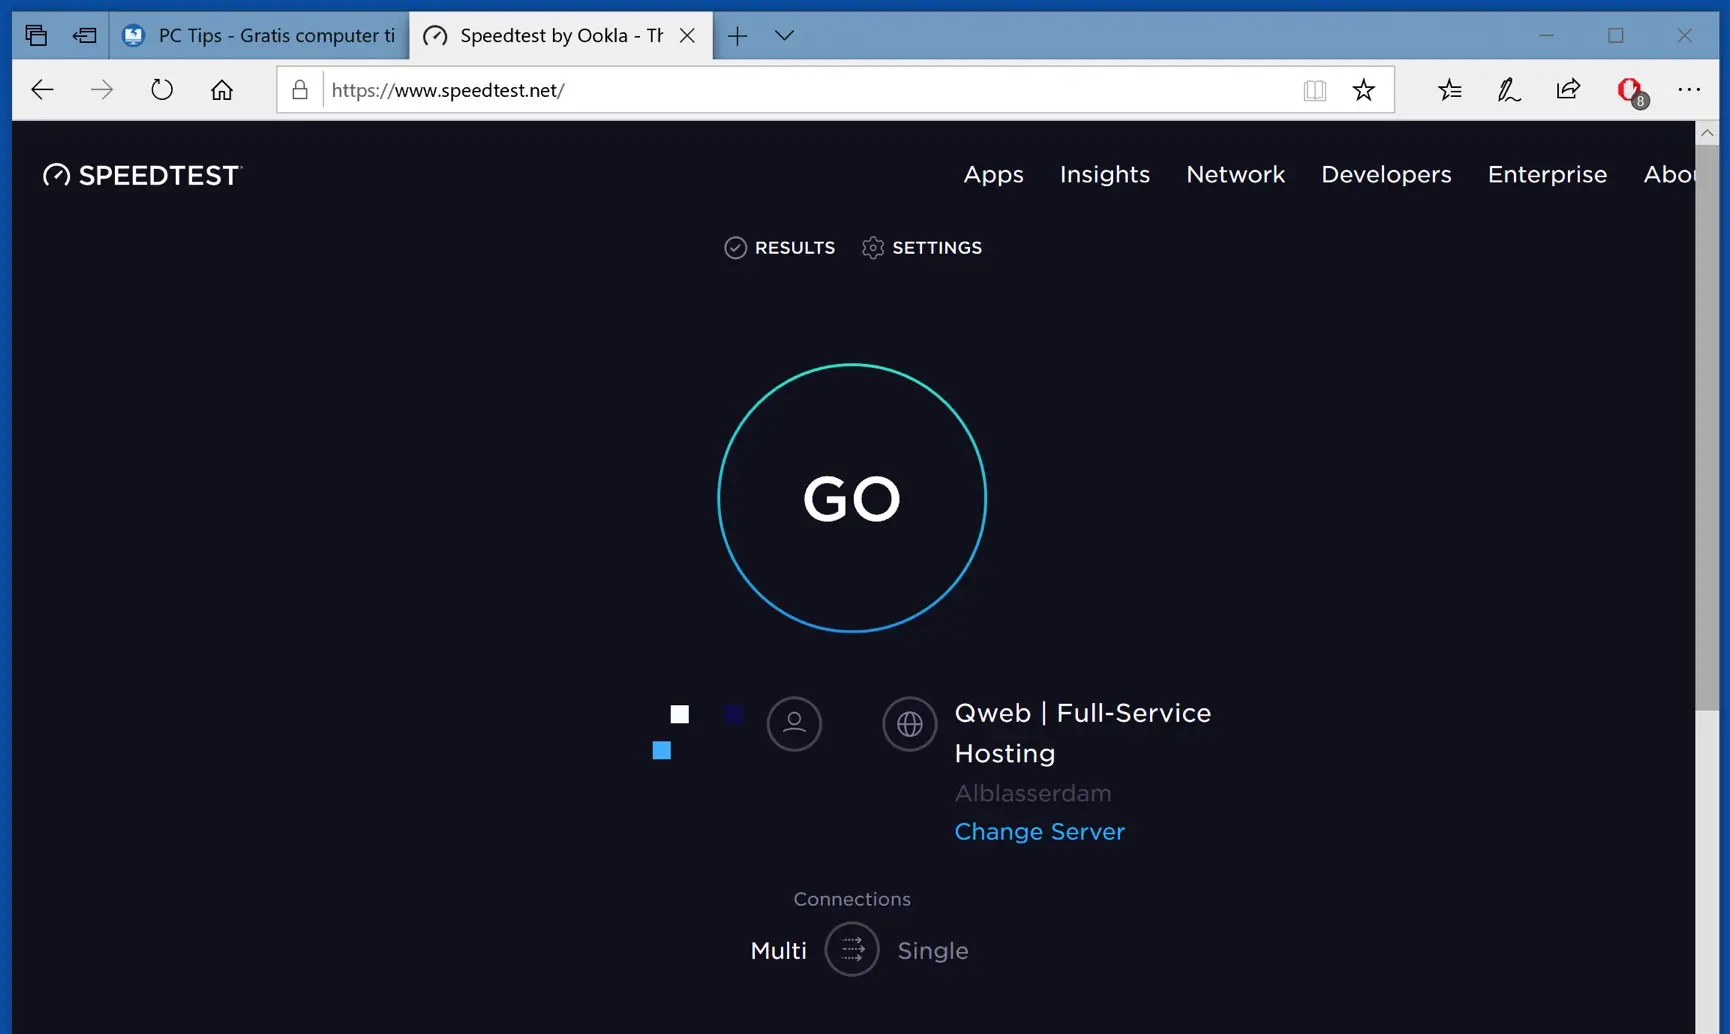
Go to the Speedtest website via your web browser and click Go. In the results you can see how many KB/sec or MB/sec your internet speed is at the moment.
Please note, this depends on the actions you are performing at that moment. So do not stream YouTube videos or download files during the internet speed test, as this will obviously be detrimental to the internet speed test.
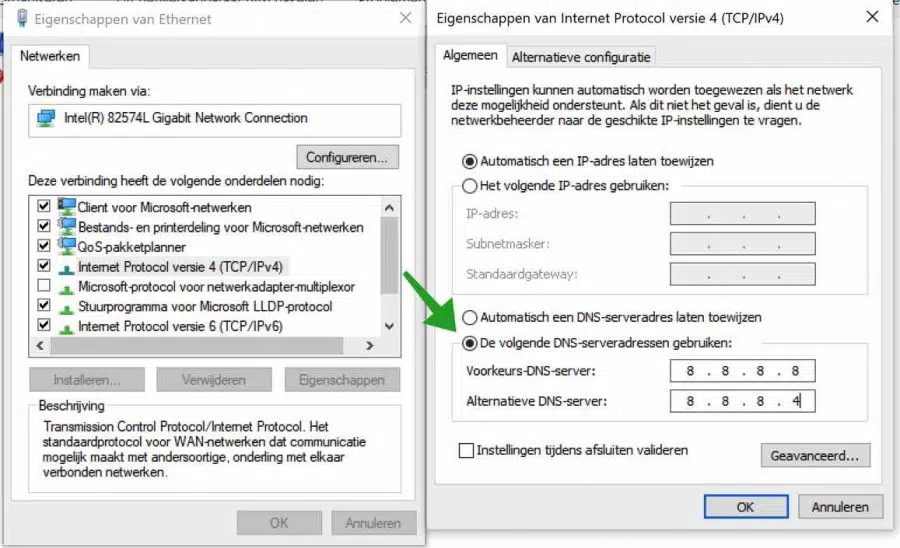
Faster DNS servers
The next step is to set up new DNS servers in Windows. In this case, DNS servers managed by Google. Google's DNS servers are faster than those of your internet provider.
DNS stands for Domain Name Server and is a server used to convert domain names to IP addresses. This process may cause delays to your own provider's DNS server. I advise you to test, make a note of your current DNS servers before replacing the DNS server addresses!
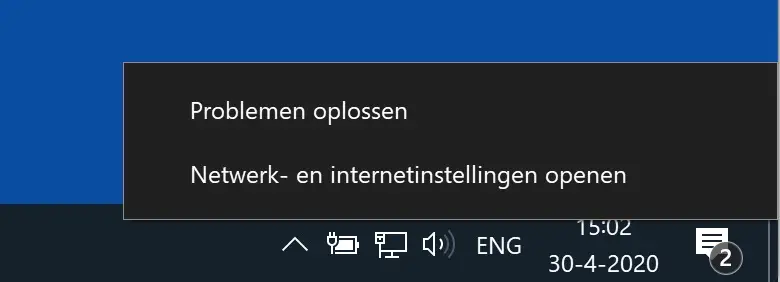
Click with the right mouse button on the internet logo on the right side of your Windows taskbar. Choose Open network and internet settings.
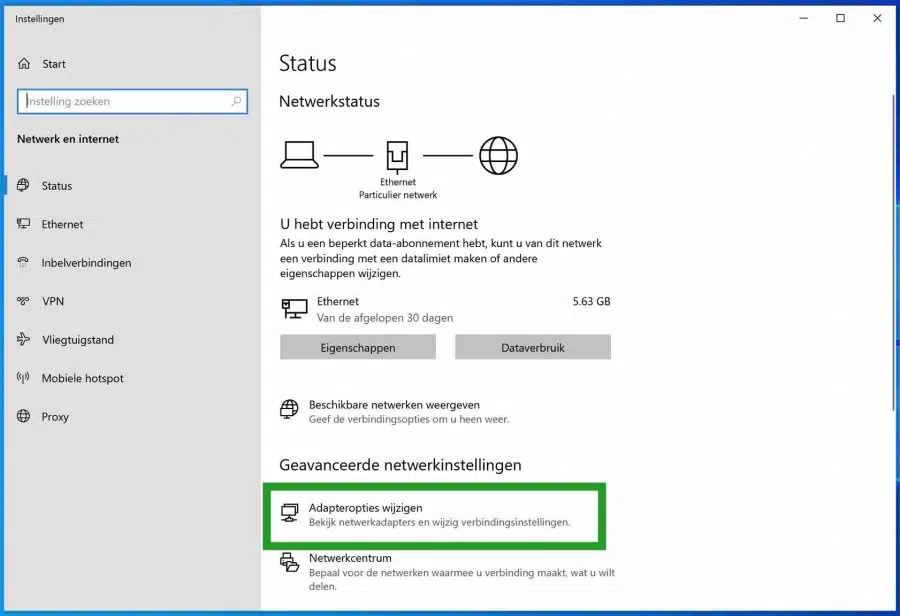
In the adapter options, choose Change adapter options.
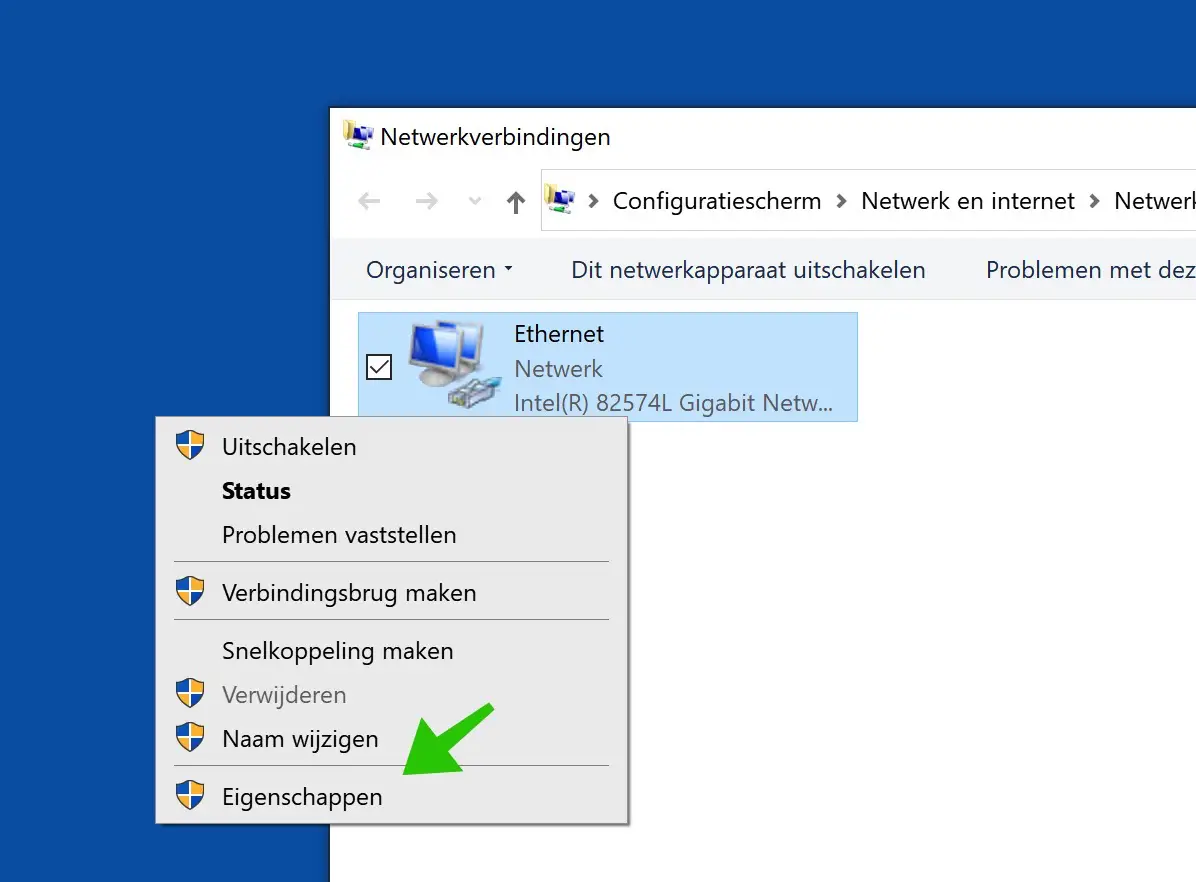
Right-click on your active internet adapter called Ethernet or WiFi. This depends on the computer. Click Properties in the menu.
Click Internet Protocol Version 4 (TCP/IP) and click Properties. In the properties window enable: Use the following DNS server addresses.
Back up your current DNS servers!! Make a note of the settings.
In the preferred DNS server type the IP address: 8.8.8.8.
In the alternate DNS server address type: 8.8.4.4. (the image below contains a typo)
Click OK to confirm.
Continue to the next step.
Disable background apps
This is a tip that many people overlook. Your internet speed is related to your system processes. If you use a lot of computer memory, your internet will become slower because the system has insufficient power to write data from the memory to your hard drive.
In this step, I will show you how to disable unnecessary background applications that consume unnecessary memory in Windows 10.
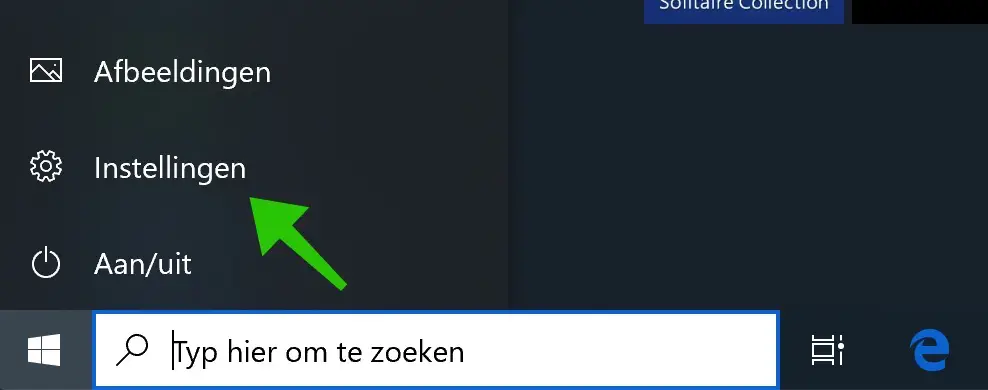
Click on the Windows start button. In the left menu click on Settings.
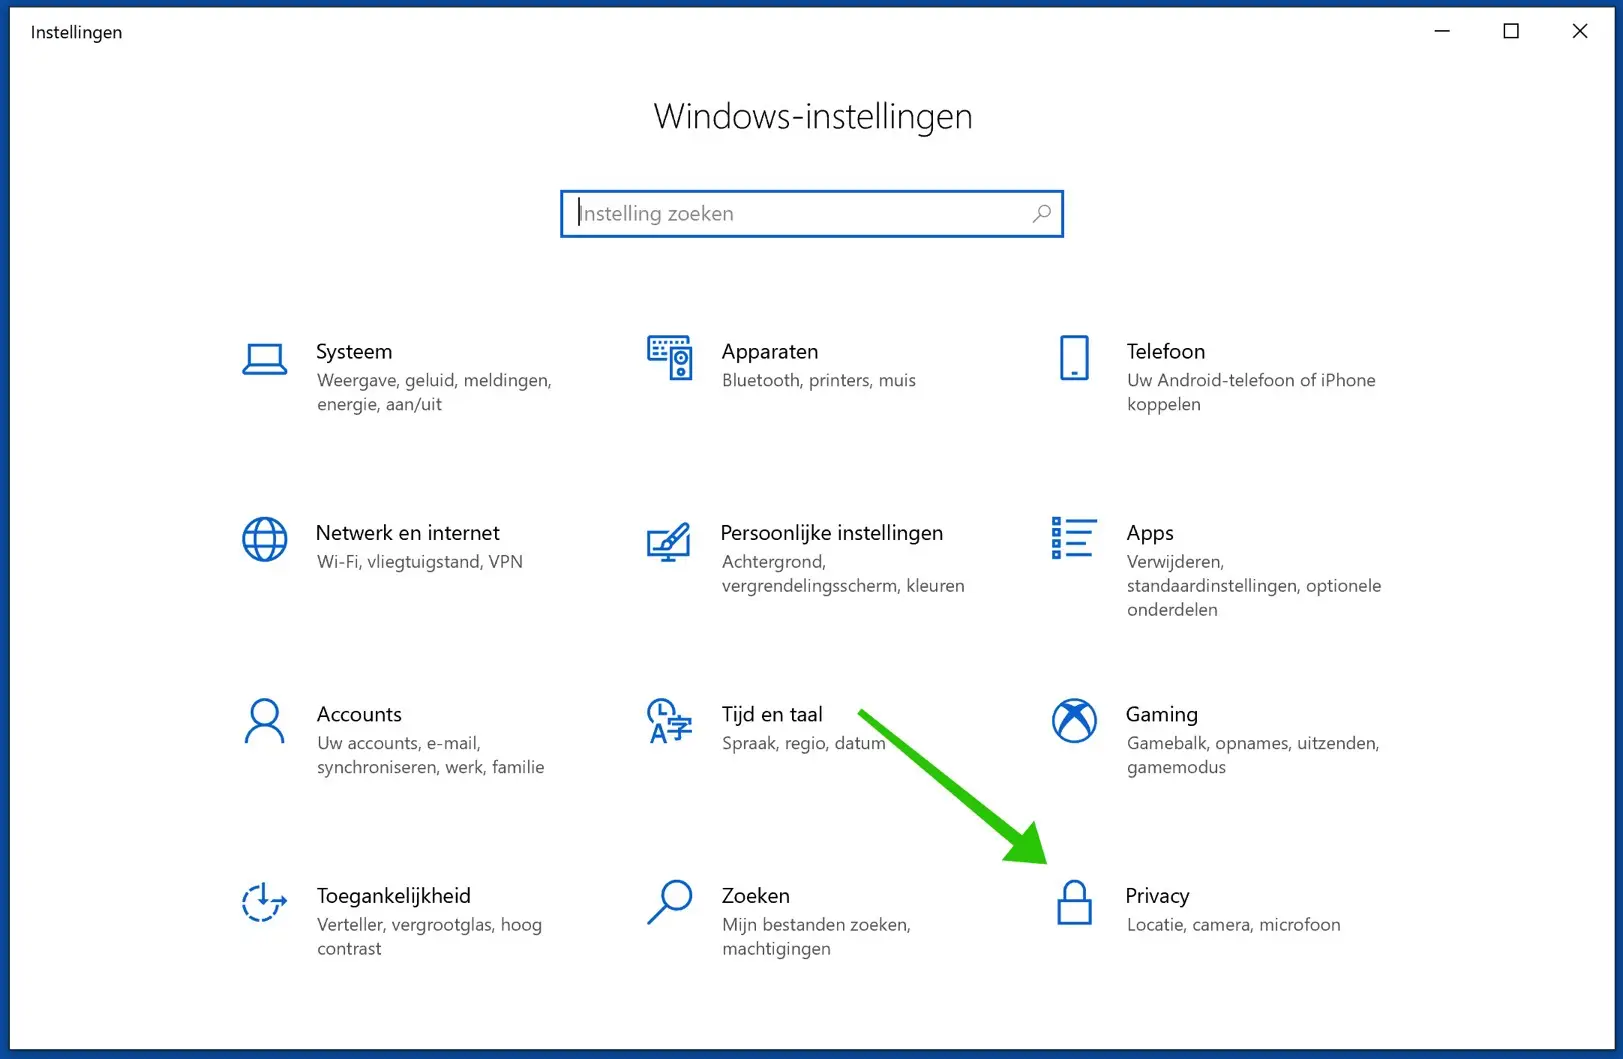
In the Windows settings click on Privacy.
Go to Background Apps in the left menu. To do this, you need to navigate a bit down in the left menu.
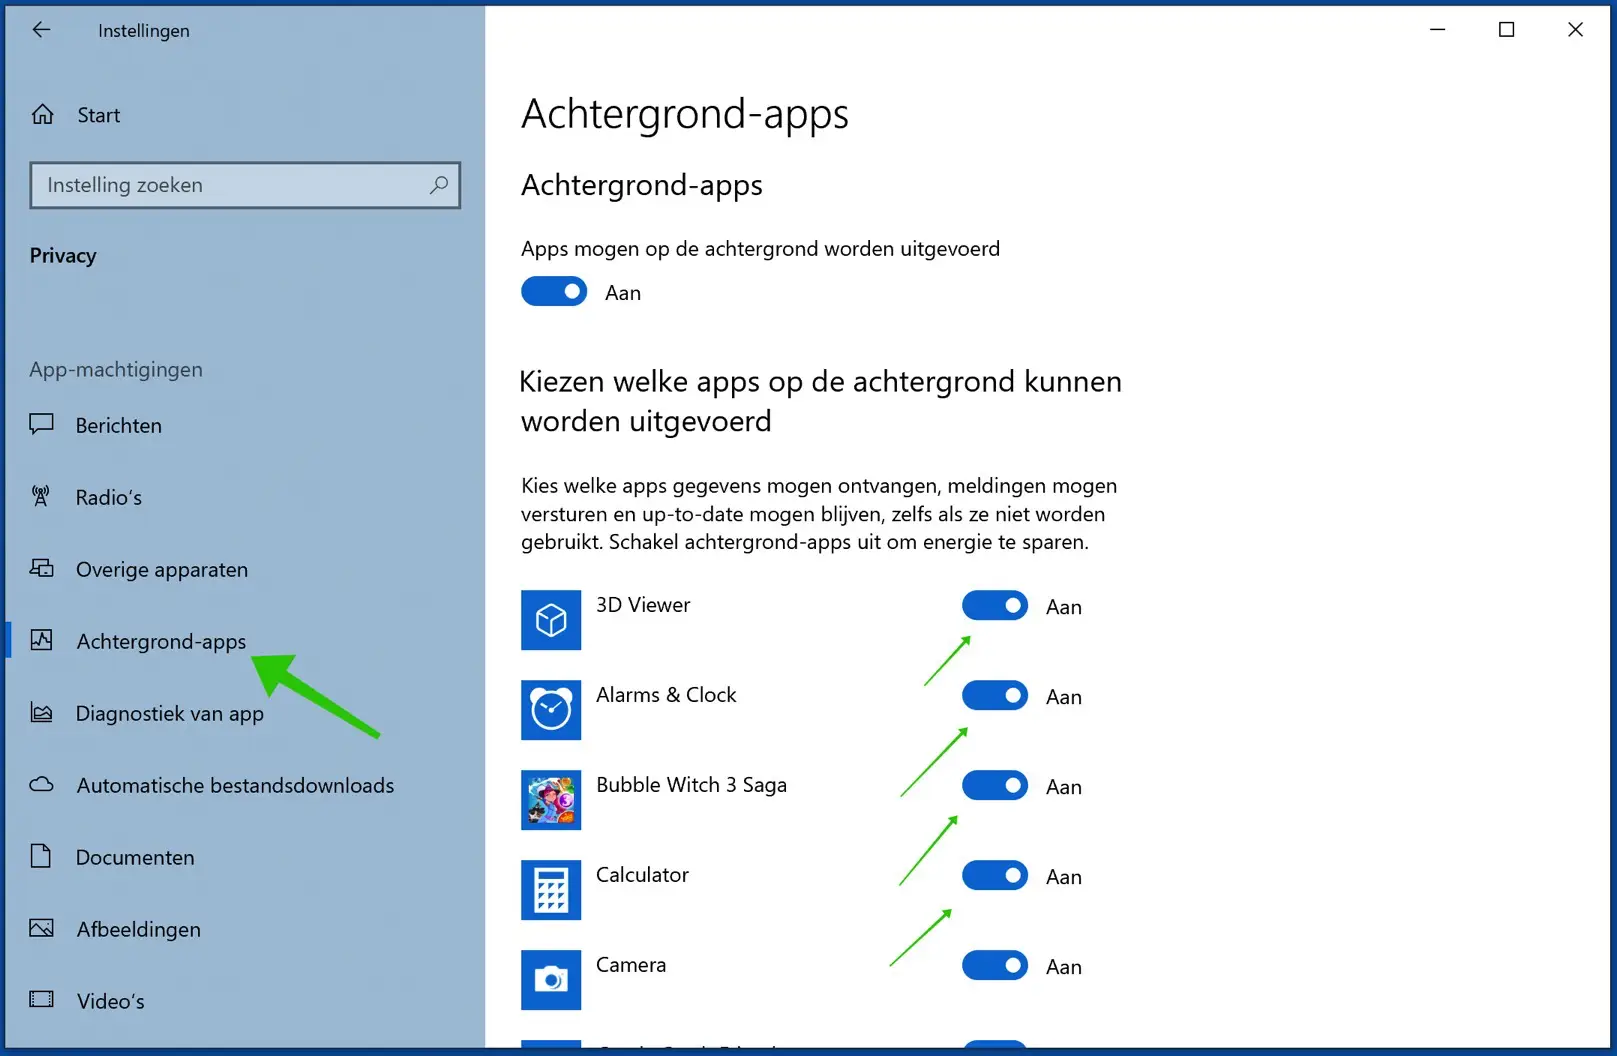
Click the ON button to disable the background application processes to Off. Do this for every application that you know does not add anything by actively running as a background application. This list therefore depends on the applications you install on your computer.
Go to the next step.
Disable Allow downloads from other PCs
If you disable the “Allow downloads from other PCs” option, you don't have to worry about other computers in your house or other connected computers using your internet speed to download files.
Go to the Windows settings by clicking Start.
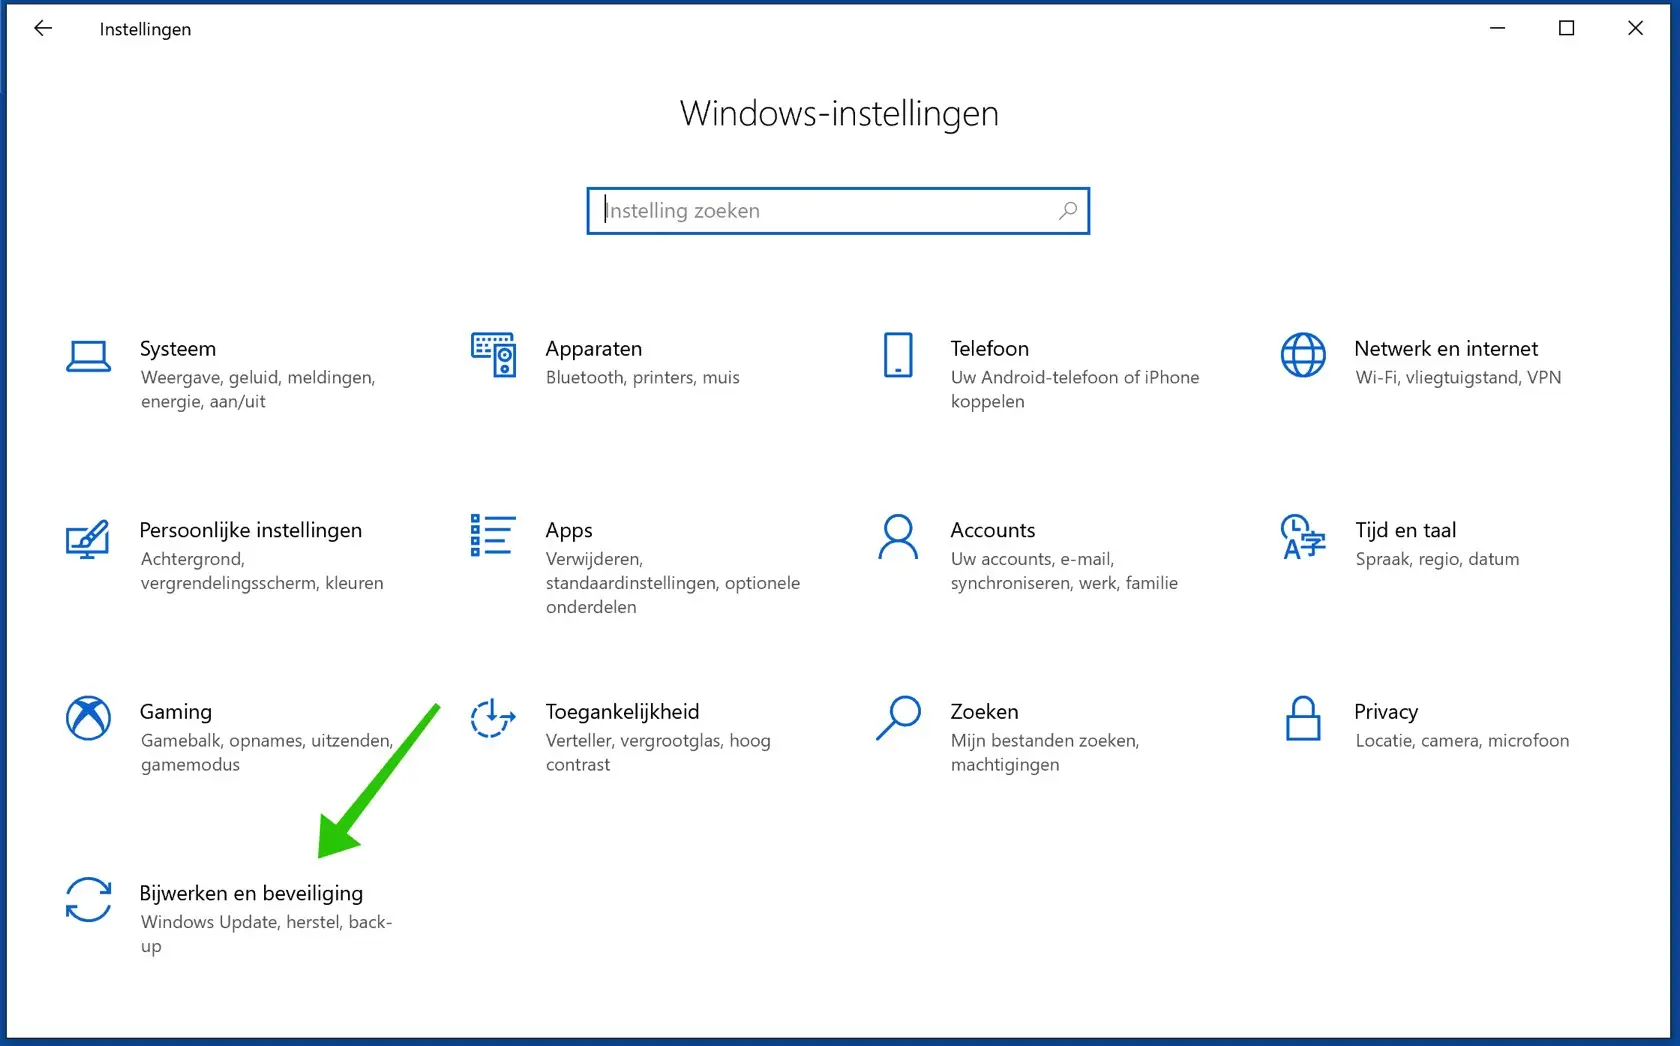
Open the Update & security settings.
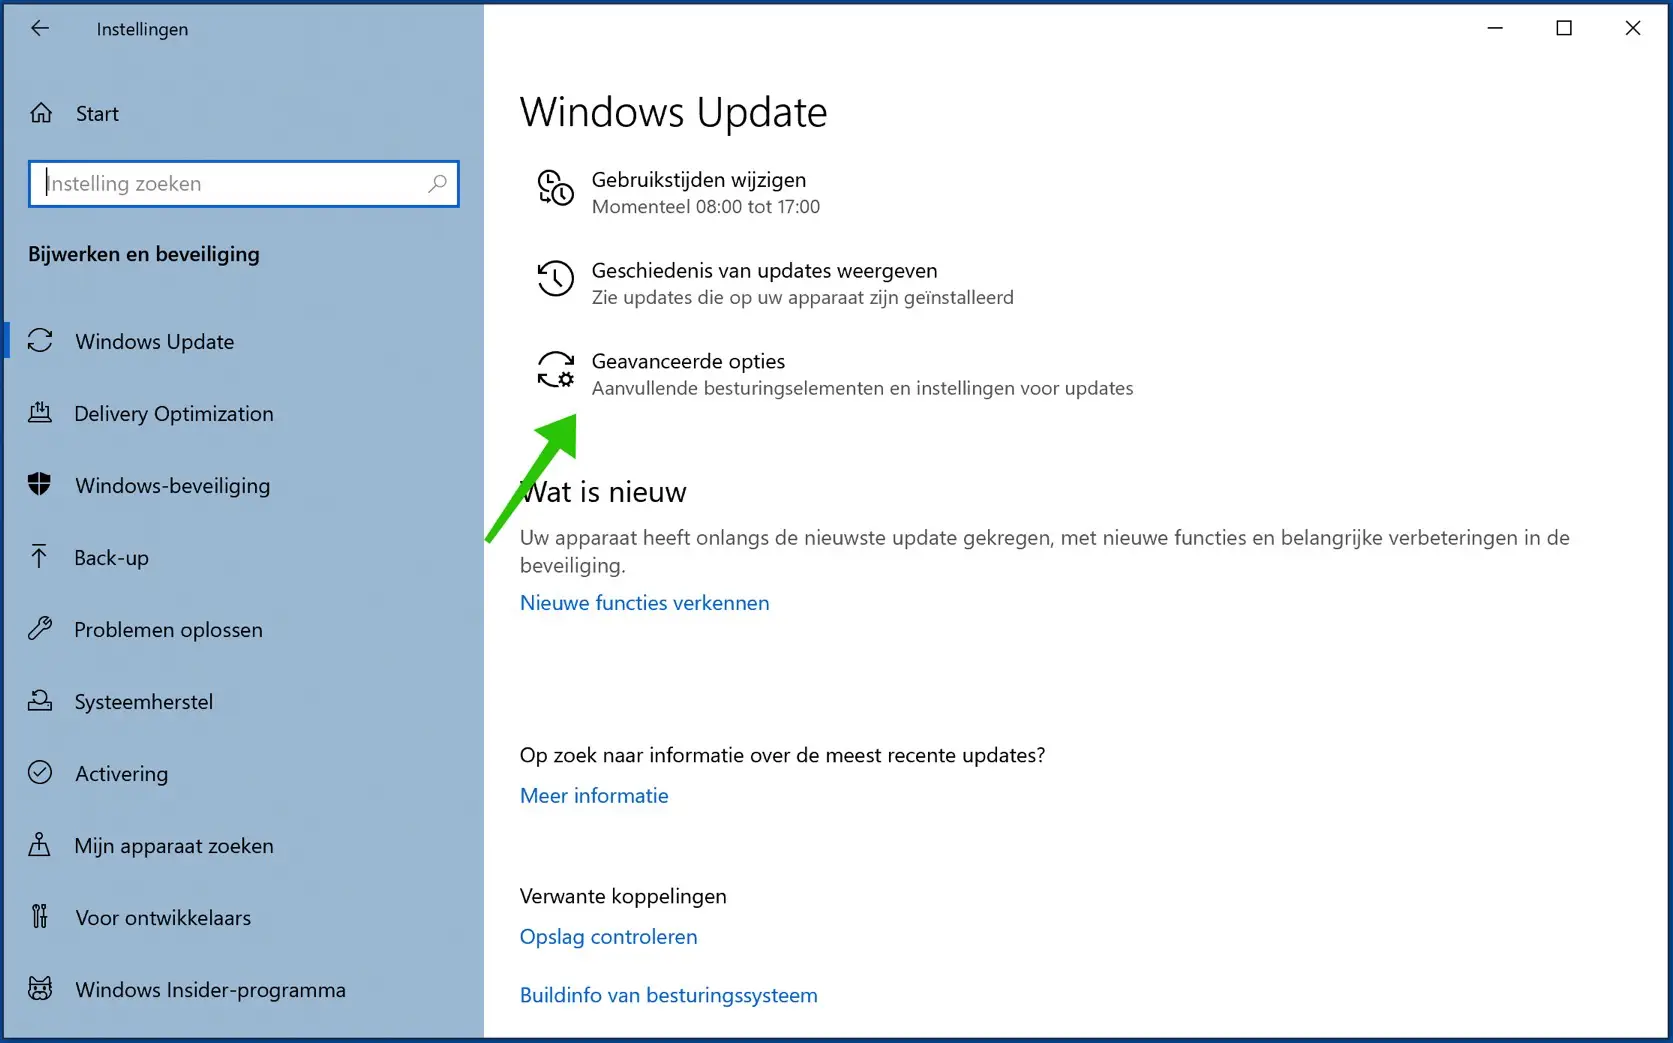
In the Windows Update window, find and click Advanced Options.
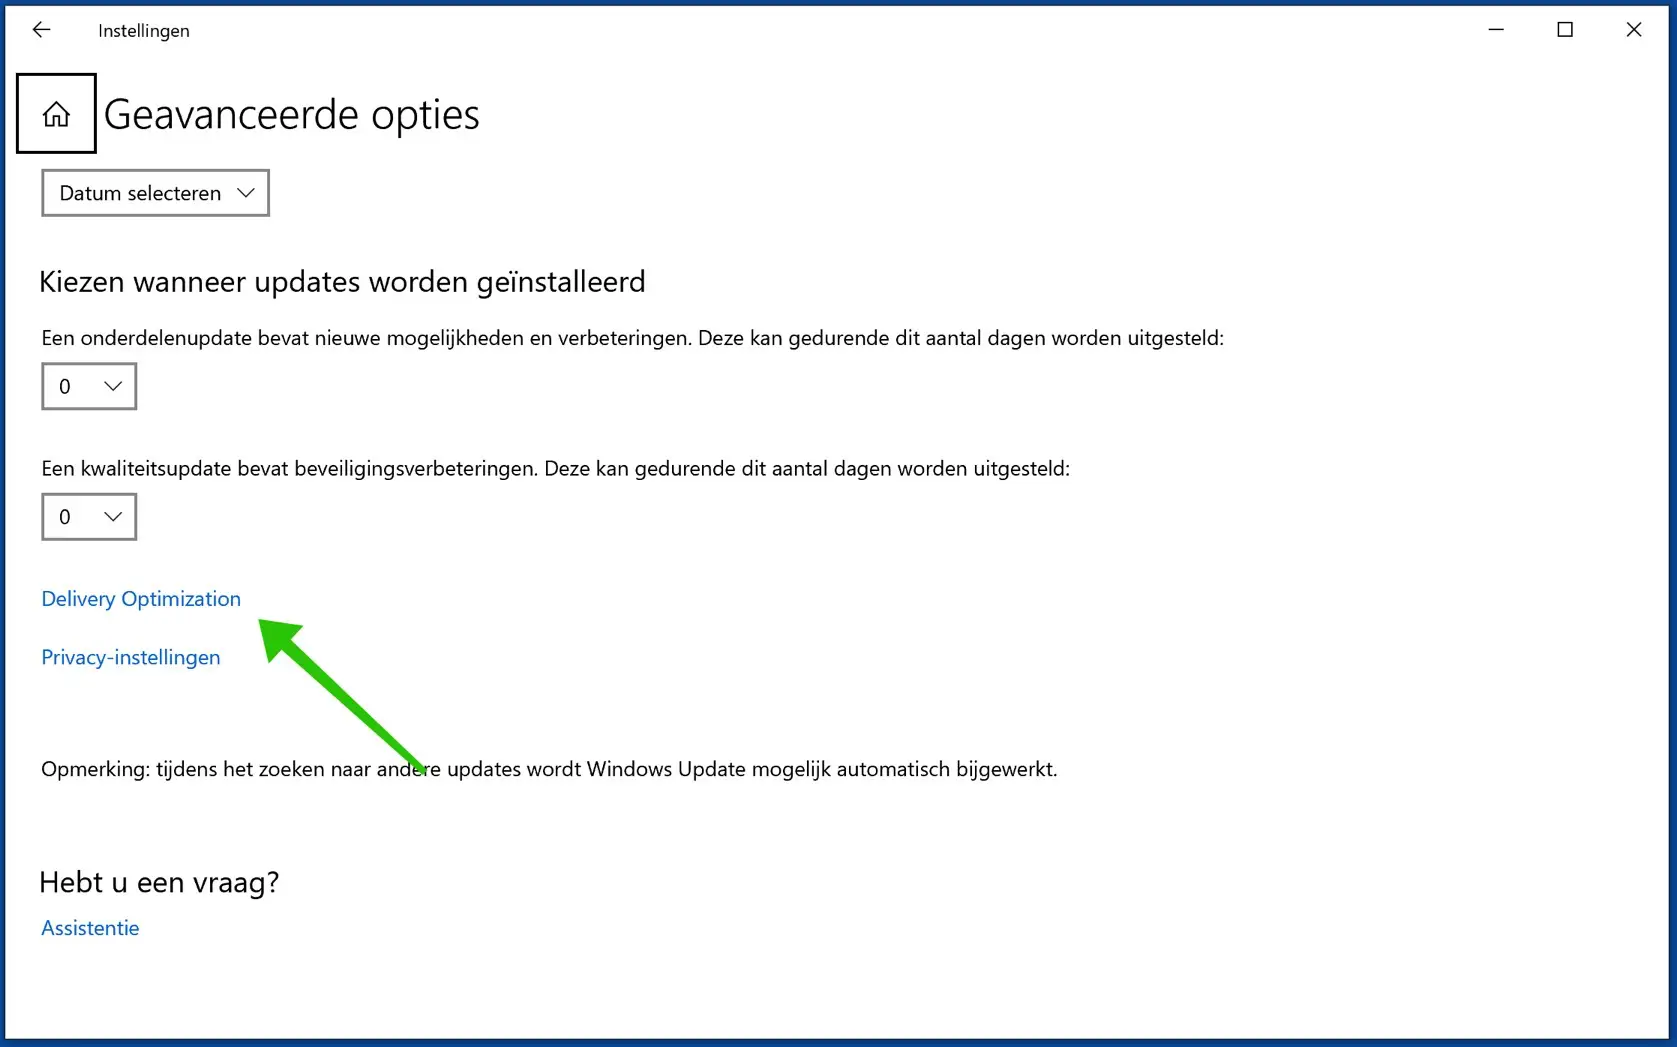
Navigate a little down to Delivery Optimization.
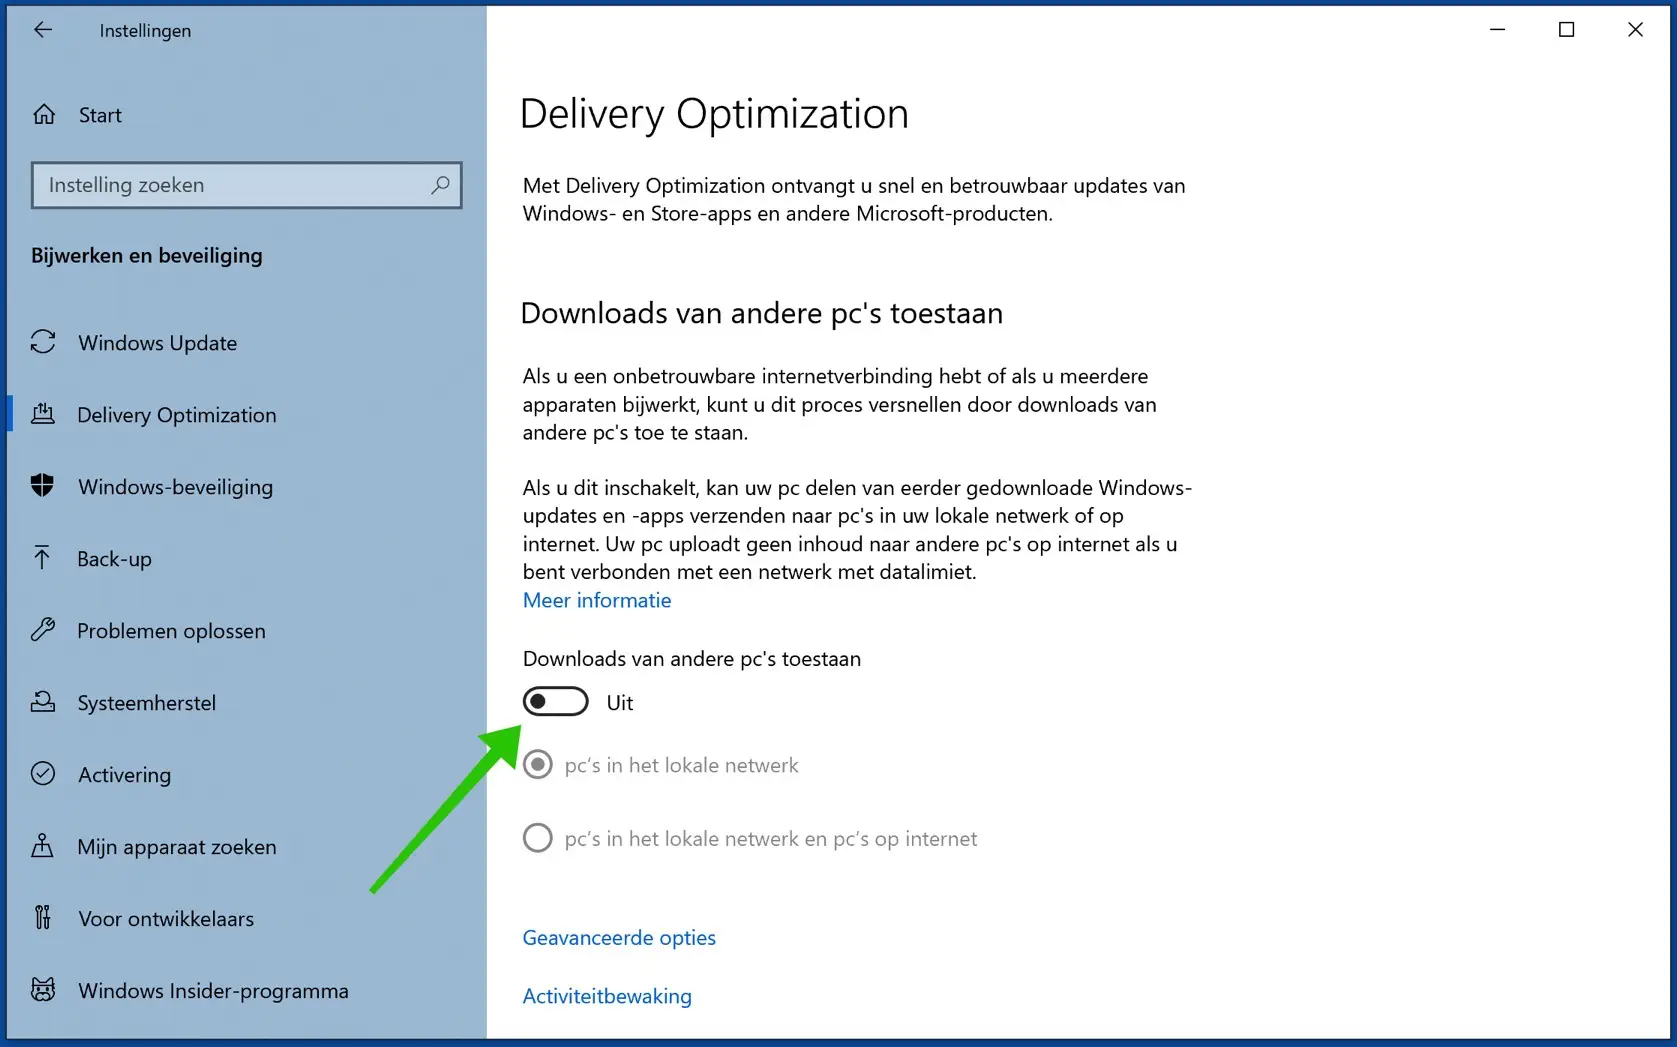
Switch the setting: Allow downloads from other PCs from ON to OFF.
Continue to the next step.
Change WiFi channel
Do you use a wireless WiFi connection? Then you can apply this step. Please note that this is a slightly advanced step.
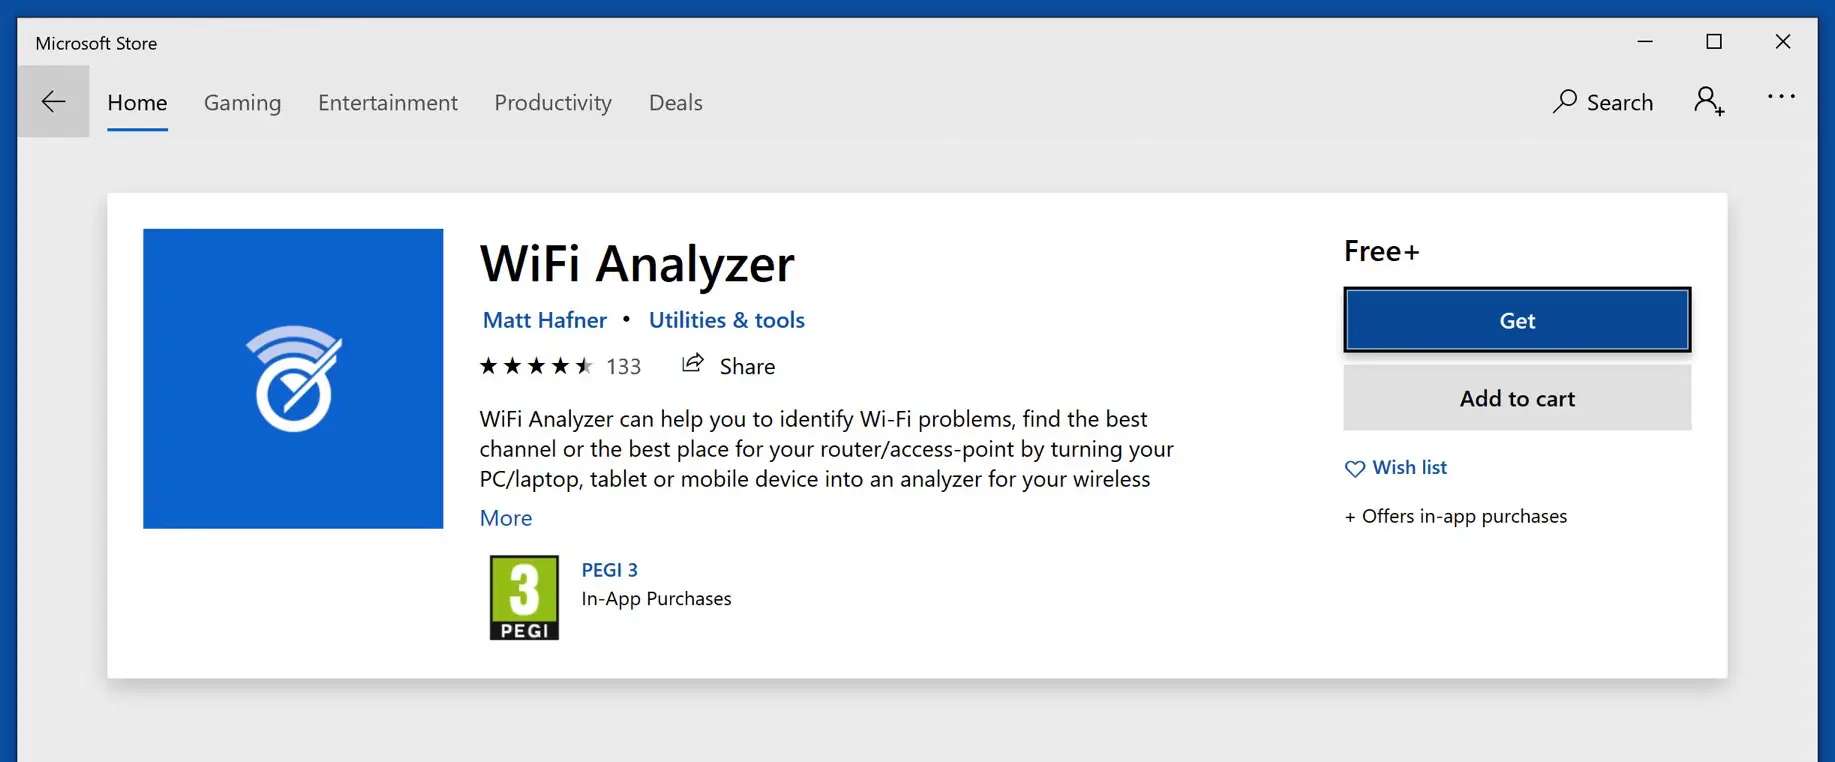
If you live in a busy area such as a city or an apartment complex, it is advisable to Check which channel your WiFi signal is on now communicates. You can check the crowding through channels with WiFi Analyzer. You can download this app for free from the Windows Store in Windows 10.
If you have checked whether the channel to which the router is connected is too busy, you can change the channel through your router settings. This is different for every device and I therefore cannot explain further in these instructions.
Disable large send offload
Large Send Offload is a network device setting that should allow you to improve network performance and reduce CPU overhead. In practice, however, this is disappointing and it is advisable to disable the LSO setting.
Right-click on the Windows start button. Select Device management from the menu.
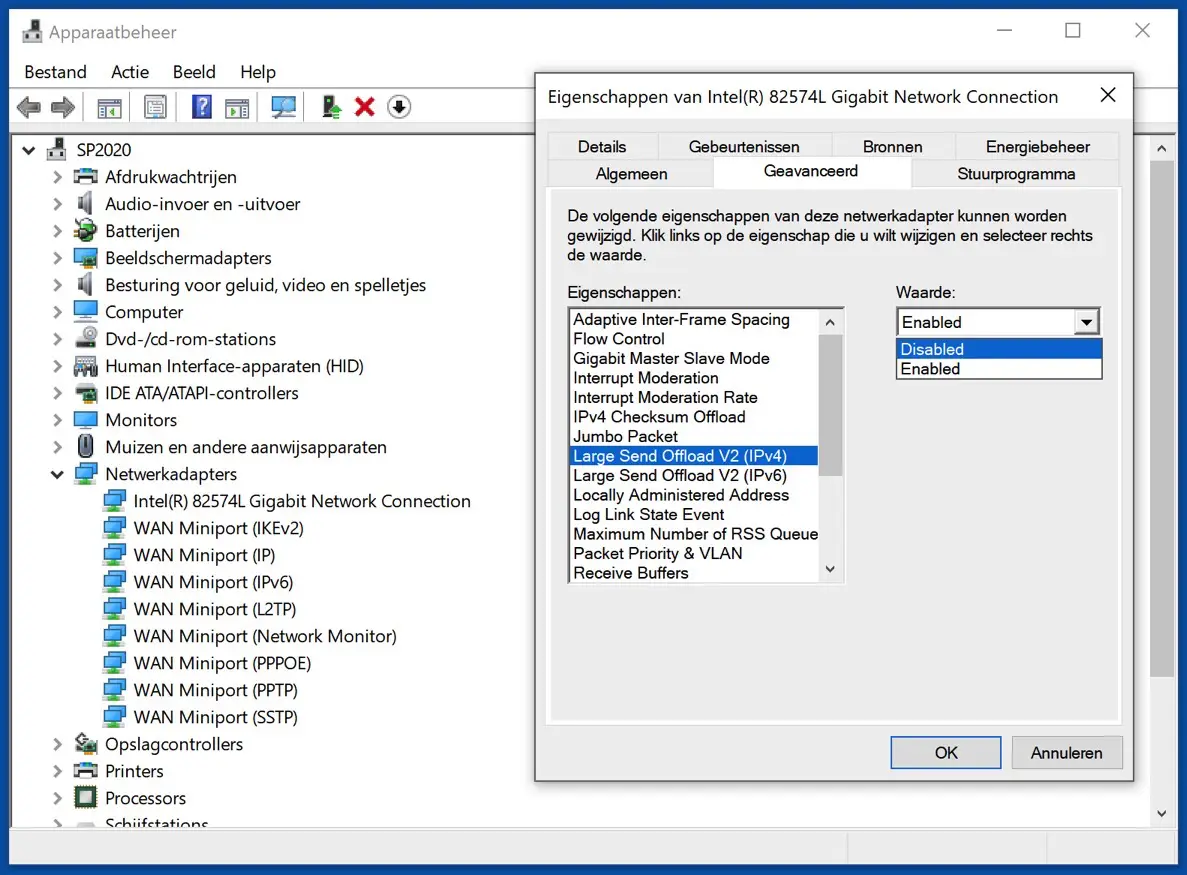
Go to Network adapters. Select your network adapter from the list. If you use WiFi, search for “Wireless adapter” and if you use wired internet, search for “Ethernet adapter”. Double click to change the settings.
Go to the tab: Advanced. Click on the setting: Large Send Offload V2 (IPv4) and change the value to: Disabled.
Click on the setting: Large Send Offload V2 (IPv6) and also change the value to: Disabled. Click OK to confirm.
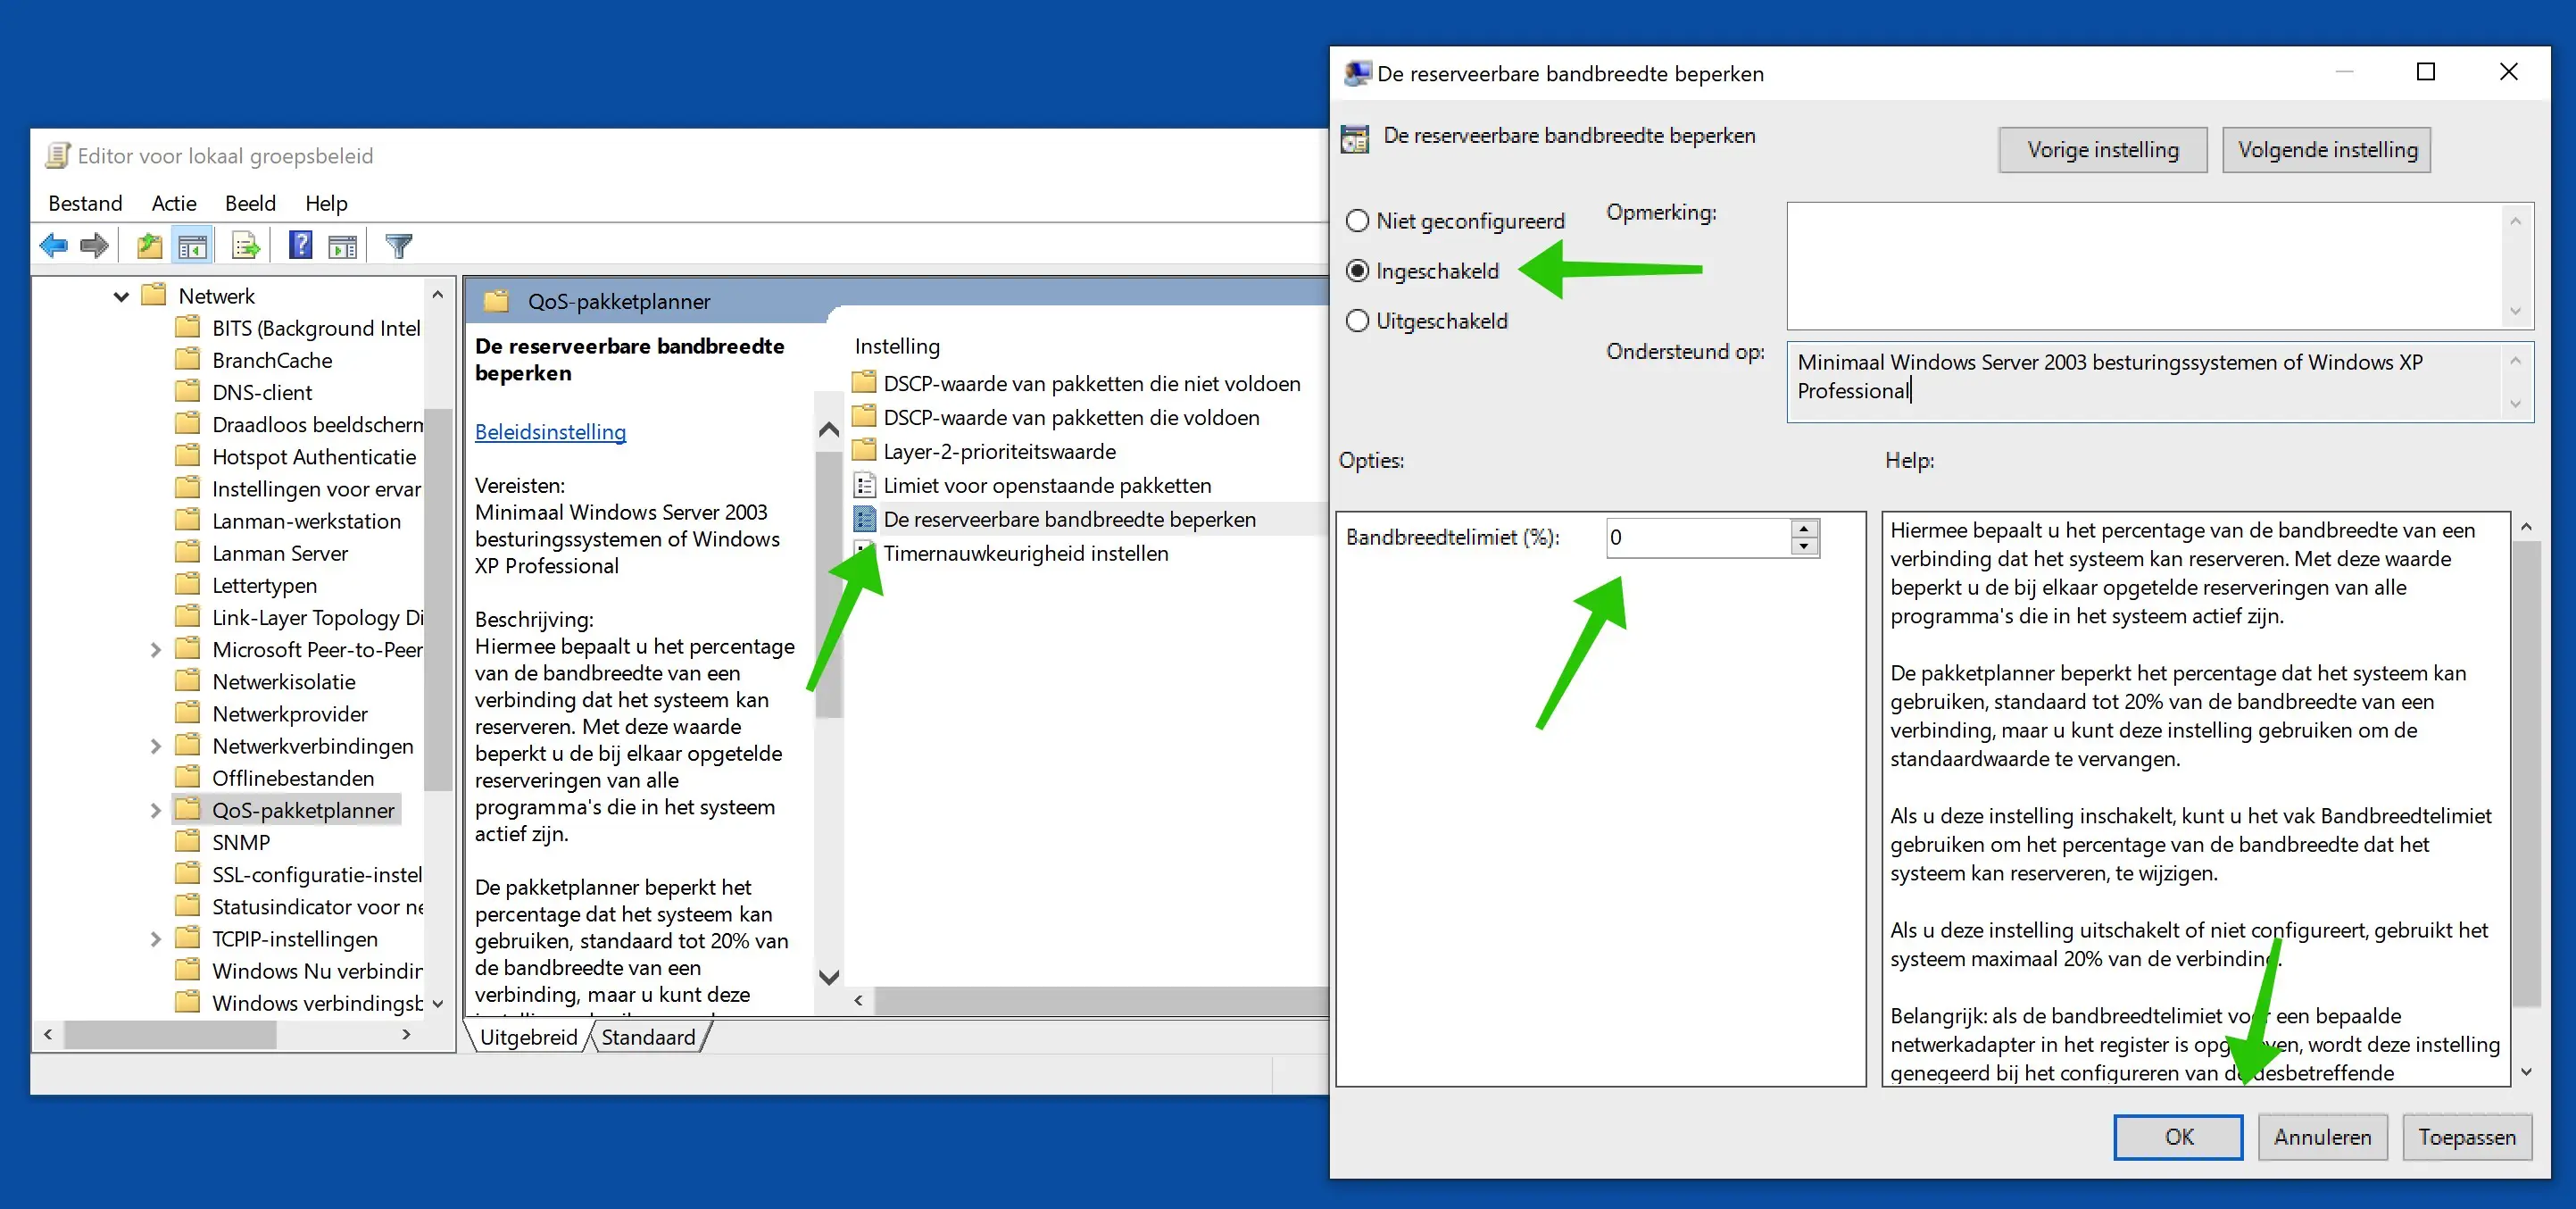
Activate full internet speed
Did you know that Windows keeps 20 percent of your internet bandwidth available for Windows? The remaining 80 percent are for you to use while you use the internet. You can change the settings in Windows to use 100 percent of your internet speed.
please note: For this I use the Group policy editor. This editor is only available in Windows 10 Professional by default. Windows 10 Home does not have this group policy editor available. In this article I will explain to you how the group policy editor in Windows Home.
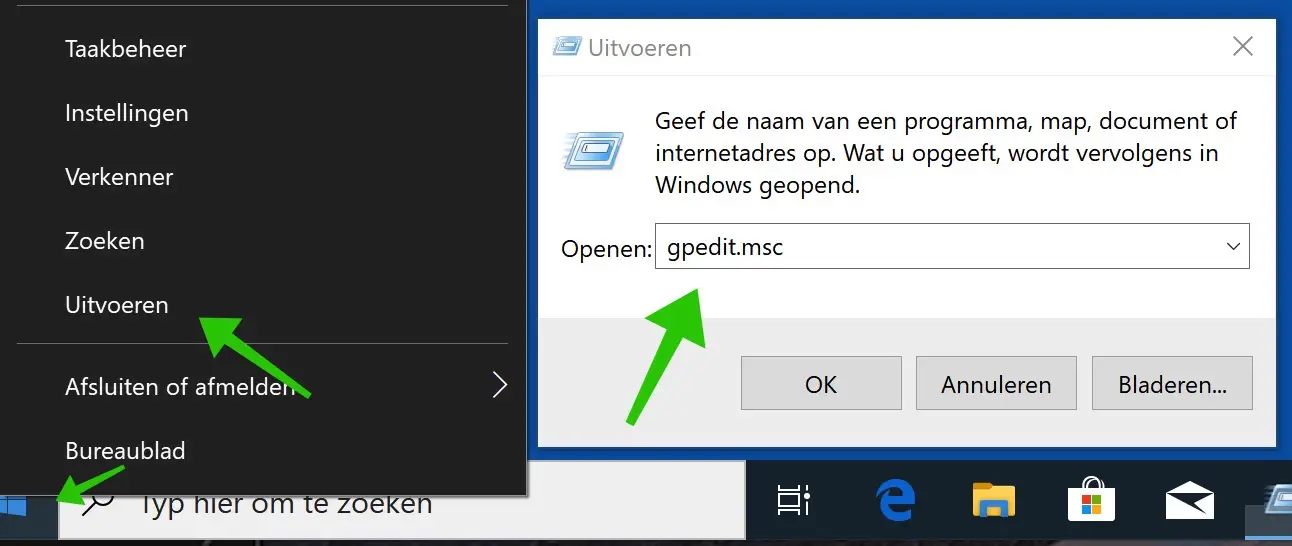
Right-click on the Start button in Windows. Select Run, in the run window type: gpedit.msc
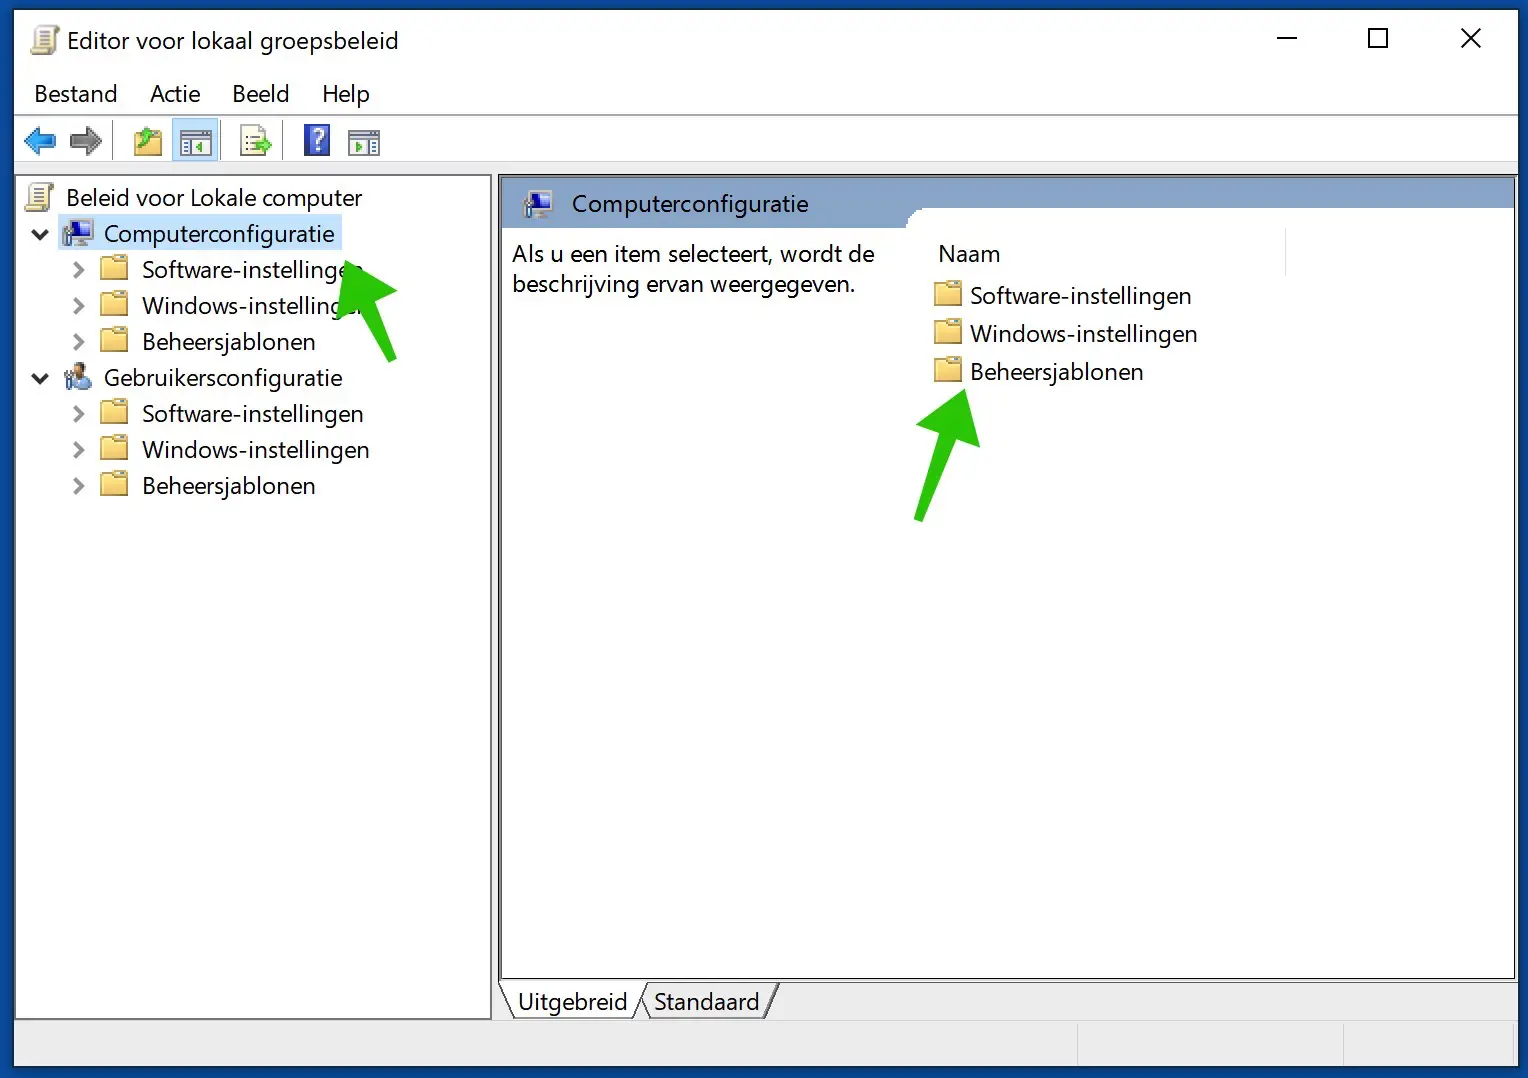
The Group Policy Editor is now launched. Click Computer Configuration > Administrative Templates.
Click on Network > QoS Packet Scheduler.
Double-click the setting: Limit reservable bandwidth. Enable the setting by clicking Enabled. Change the bandwidth limit to 0%. Click OK to confirm.
I hope this helps you. Thank you for reading!
Is the speed of the WiFi network also determined by the processor or RAM of the computer? In other words, does it make sense to buy a heavier/more expensive computer in order to download videos faster, for example?
Hello, it depends a bit on how old. In general, no, there is no point. What you can try is to perform a speed test on the same WiFi network via a mobile phone (smartphone, Android, iPhone). If the speed test via the mobile smartphone is much faster than the PC, then you can consider it.
Success!
It says DNS servers 8.8.8.8 and 8.8.8.4.
In the last comment you use 8.8.8.8 and 4.4.4.4. Which is the Google DNS server that should be used?
Hi Mike, clearly a typo. The good DNS servers have now been adjusted in the article. The image contains a typo.
Greetings, Stefan
I can't find 'administrative templates' in gpedit.msc in the left column under computer configuration? (To set up QoS packet scheduler). I am logged in as admin at gpedit.msc
You can install this again. However, the article is in English, technical knowledge is required and you need to know which Windows update version you have installed.
https://docs.microsoft.com/nl-nl/troubleshoot/windows-client/group-policy/create-and-manage-central-store
Success!
Thanks Stefan, I installed the Administrative Templates files based on the operating system version 2004 => NOPPES !What kind of nonsense is all that? And who among the Windows (home) users does not yet have version 2004 running on their computer? What now? (Sometimes I pity you Stefan... all those (Microsoft) worries 🙂 But already a great initiative, especially your working method, from you here )
Try the following. In the Windows search bar at the bottom of the taskbar type: cmd.exe. Right-click on Command Prompt and choose Run as Administrator.
In the command prompt type: regsvr32.exe gptext.dll. You will now receive a message that gptext.dll has been successfully registered. Restart Windows and see if the Administrative Templates are now available in GPO.
Where can I find the data from the DSN servers?
How do I backup the current DSN–?
On the Internet Protocol Properties screen, everything is set to “Automatically assign”
Hello, Google DNS details are in the article. That is 8.8.8.8 and 4.4.4.4. You can make a backup by recording your current DNS (if it is set) somewhere. Windows does not offer the option to backup DNS settings. Most computers indeed have the DNS setting set to automatic assignment. By automatically setting up, a DNS server is assigned by the internet provider. Manually setting the Google DNS servers as in this article will overwrite the automatically assigned DNS by the internet provider.