
In Windows 11 is een DNS server een server die domeinnamen vertaald naar een IP-adres. Op deze manier kunnen computers (servers) met een browser op het internet en andersom.
Een DNS server wordt door uw internetprovider standaard toegewezen aan de internetinstellingen. Zodra u van uw internetprovider een IP-adres ontvangt wordt de DNS server ook ingesteld. Ditzelfde geldt voor de internetinstellingen in Windows 11.
Als u direct verbinding maakt met het internet via uw Windows 11 computer dan ziet u de externe DNS server adressen terug in de instellingen. Als u verbinding maakt via een router dan ziet u de DNS instellingen op de router en ontvangt Windows 11 interne DNS server IP-adressen van de router. Deze interne DNS server IP-adressen kunt u ook aanpassen.
Meld u dan aan voor onze nieuwsbrief.
4 manieren om de DNS server te wijzigen in Windows 11
DNS Server wijzigen via Opdrachtprompt
De eerste manier is gelijk een technische manier om het DNS-server adres te wijzigen, namelijk via het Opdrachtprompt.
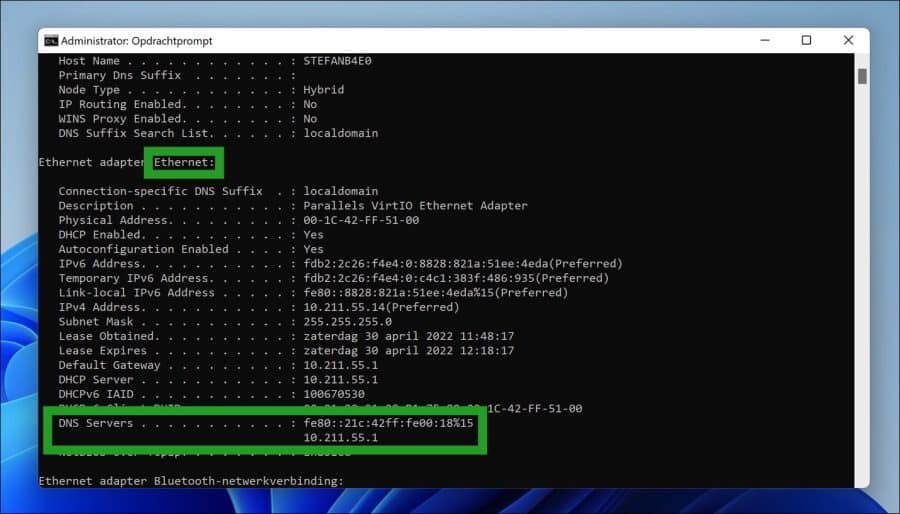
Open het Opdrachtprompt als administrator.

In het Opdrachtprompt type het commando:
ipconfig /all
Noteer daarna de naam van de netwerkadapter. In dit geval “Ethernet”.
Type daarna het volgende commando om de DNS server instellingen te wijzigen. Let op dit is een voorbeeld met de interface naam “Ethernet” en statisch DNS IP: 8.8.8.8.
netsh interface ip set dns name="Ethernet" static 8.8.8.8
Om een alternatieve DNS-server in te stellen wijzigt u het commando met “index2” erachter.
netsh interface ip set dns name="Ethernet" static 8.8.4.4 index=2
DNS Server wijzigen via PowerShell
De tweede manier om een DNS-server te wijzigen in Windows 11 is via PowerShell. Ook dit is vrij technisch.
Klik met de rechtermuisknop op de Startknop. In het menu klik op Windows Terminal (beheerder) or PowerShell (Admin).
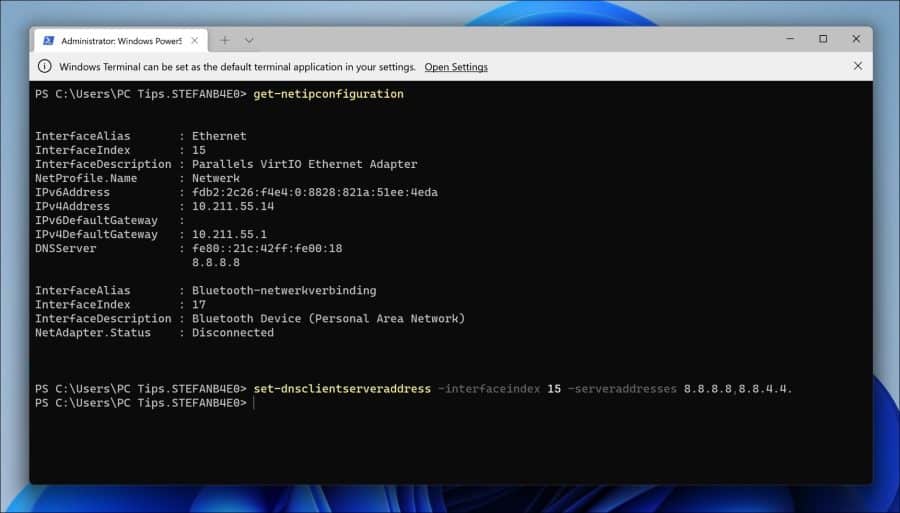
In PowerShell dient u eerst de interfaceindex op te vragen. Dit kunt u doen door het volgende commando in te geven:
get-netipconfiguration
Noteer daarna de “InterfaceIndex” van de netwerkadapter waarvan u de DNS-server(s) wilt wijzigen.

Geef daarna het volgende commando in om de DNS-Server instellingen te wijzigen via PowerShell.
Zorg ervoor dat u de interfaceindex aanpast en dat u de beide DNS-servers ingeeft, pas dus onderstaand commando aan:
set-dnsclientserveraddress -interfaceindex 15 -serveraddresses 8.8.8.8, 8.8.4.4.
DNS Server wijzigen via Instellingen (aanbevolen)
De instellingen in Windows 11 is waar u de DNS-Server instellingen het makkelijkst kunt aanpassen.
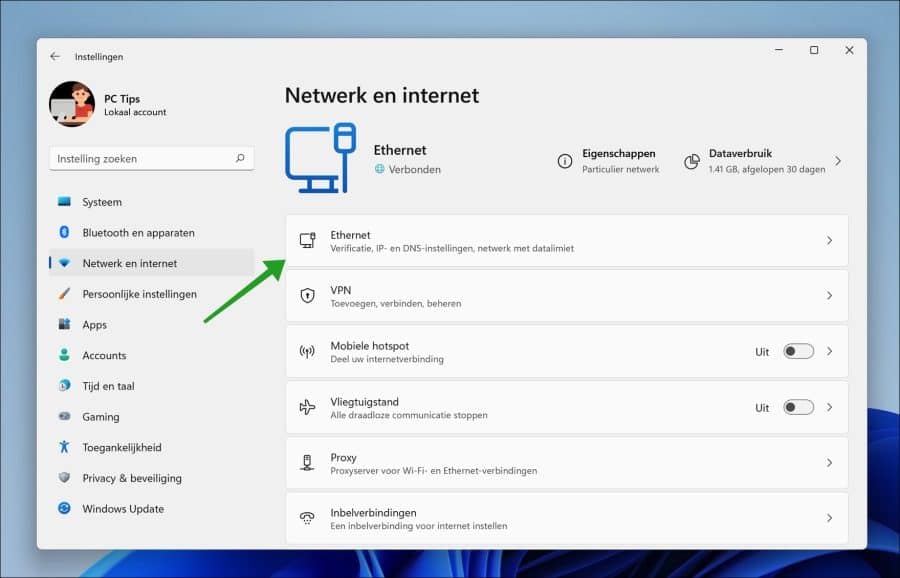
Klik met de rechtermuisknop op de Startknop en klik op Instellingen in het menu. In de instellingen klik links op Netwerk en internet.
Klik vervolgens op de soort internetverbinding die u gebruikt. Dit kan zijn “Ethernet” via de kabel of “Wi-Fi” draadloos.
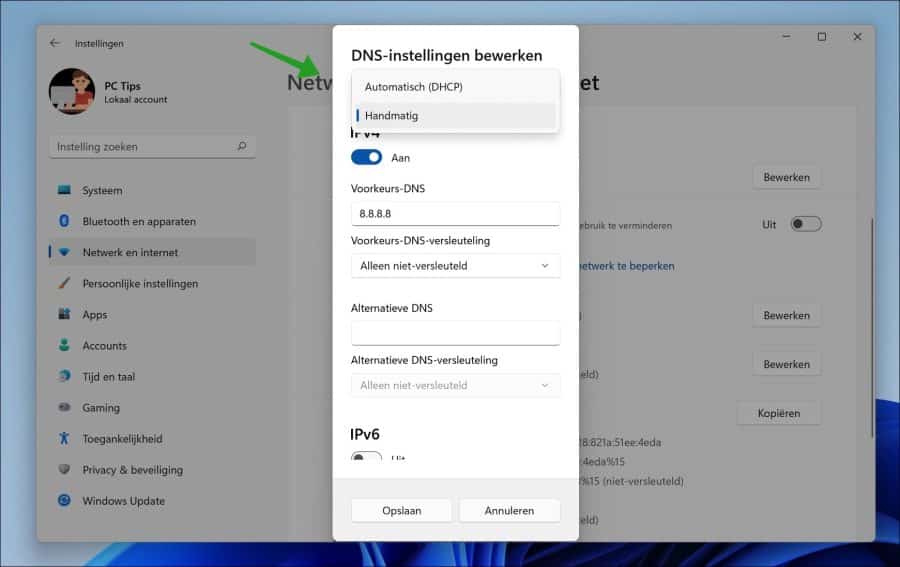
Klik vervolgens op de “Bewerken” knop naast “DNS-server-toewijzing” en “IPv4-DNS-servers”.
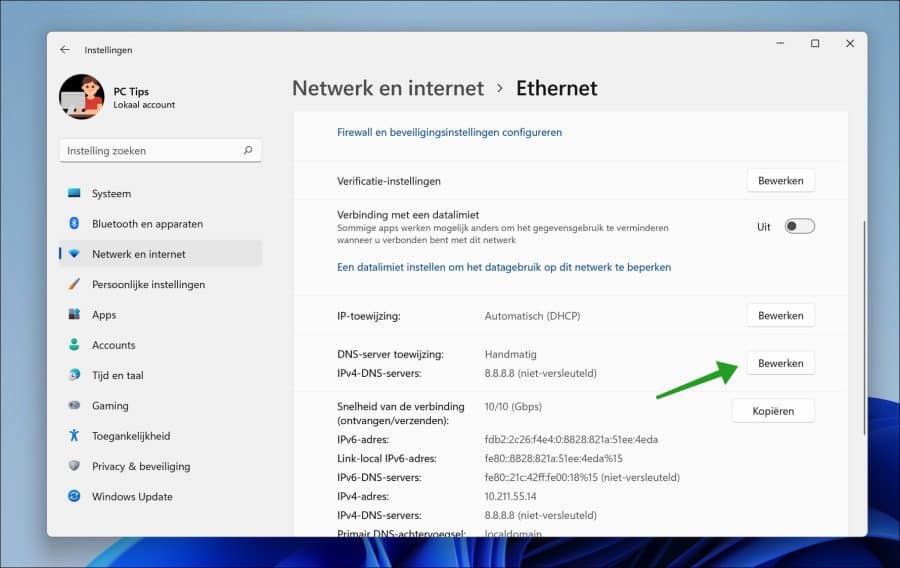
Wijzig de DNS-Server instellingen naar Automatisch of Handmatig, afhankelijk van wat u nodig heeft.
Geef bij “Handmatig” de DNS-server voorkeurs- en alternatieve DNS-Server adressen in en klik op Opslaan.
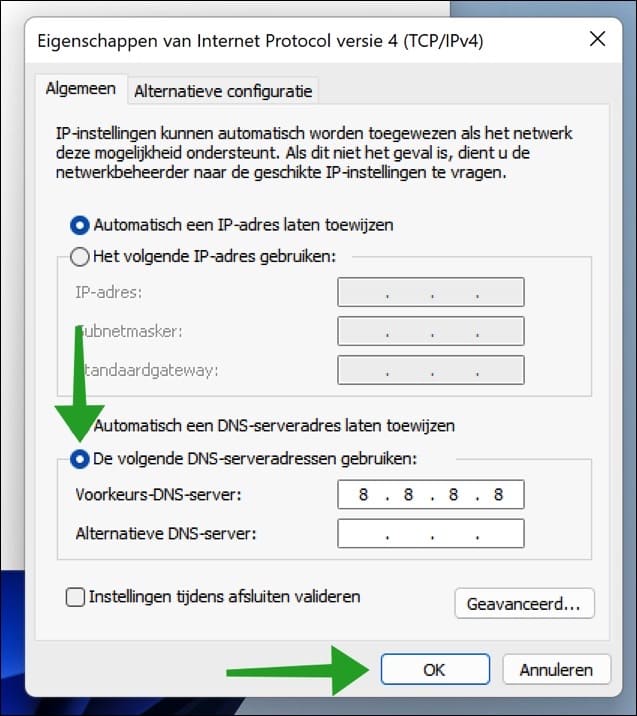
DNS Server wijzigen via Configuratiescherm
De ouderwetse manier is om de DNS-Servers in te stellen via het Configuratiescherm.
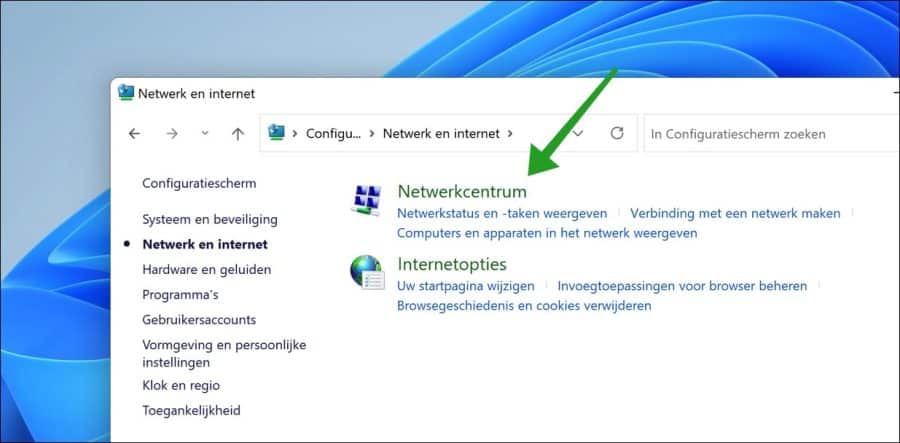
Open het Configuratiescherm. Klik vervolgens op “Netwerk en internet” en daarna op “Netwerkcentrum”.
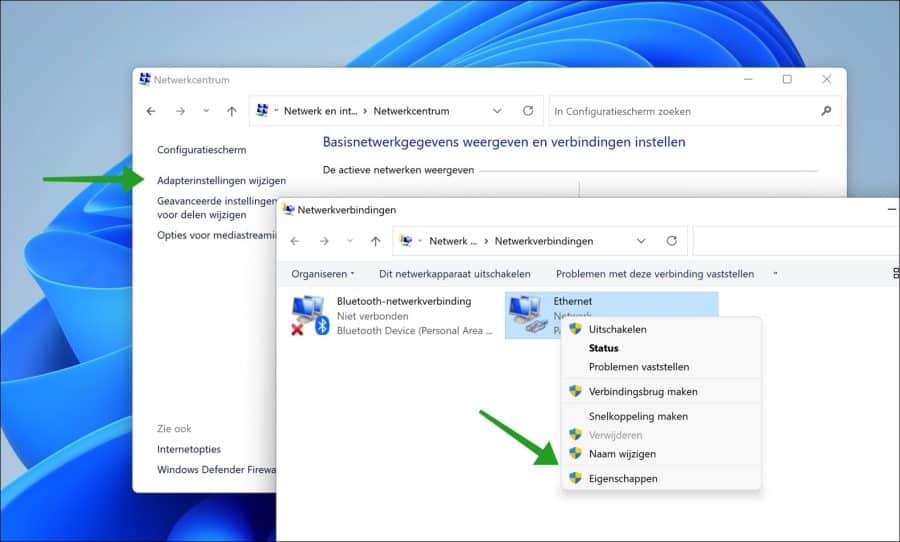
Klik daarna links op “Adapterinstellingen wijzigen” en klik vervolgens met de rechtermuisknop op de actieve adapter “Ethernet” voor kabelverbinding of “Wi-Fi” voor draadloos.
In het menu klik op Eigenschappen.
Klik vervolgens op “Internet protocol versie 4 (IPv4)” en daarna op de Eigenschappen knop.
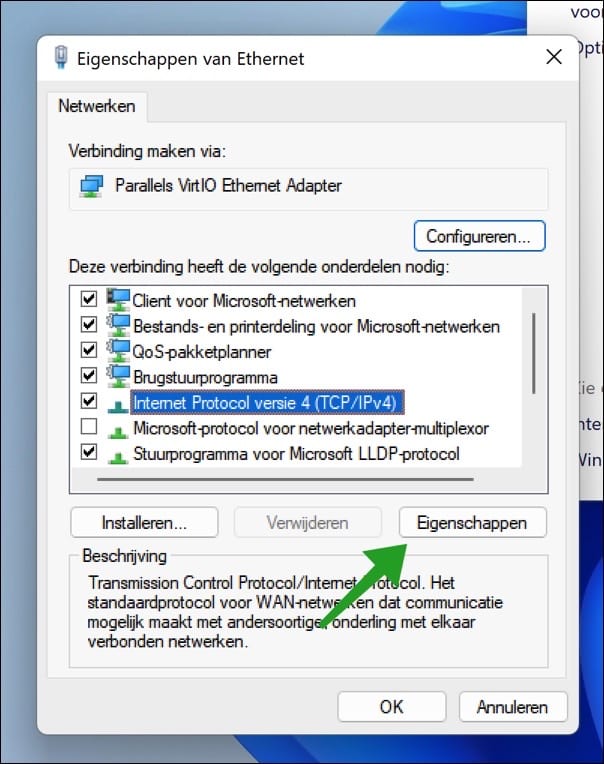
Selecteer de optie “De volgende DNS-serveradressen gebruiken” en geef de voorkeurs- en alternatieve DNS servers in. Klik vervolgens op OK om te bevestigen.
Ik hoop dat het hiermee is gelukt om de DNS-servers in Windows 11 te wijzigen. Bedankt voor het lezen!
Lees ook:
Heb via deze site mijn dns adres weten te wijzigen, nu werkt wifi via telefoon naar laptop weer. Veel dank voor de super goede handleiding.