

If you set a fixed IP address in Windows 11 or 10, then this has some advantages. A device on a network receives data via DHCP router an IP address. This IP address has an expiration date, this is called a “lease”.
When the lease has expired and the device is restarted, it will receive a new IP address via DHCP. This can cause confusion as to which device exactly is involved, as well as problems with network connections.
This is, for example, the case if you want to share a network device by opening a port in the router. If the device receives a dynamic IP address from the router via DHCP, port forwarding will no longer work.
The solution to this similar problem is a fixed IP address. You then retrieve a series of IP addresses via the router and manually assign them to, for example, a Windows 11 or Windows 10 computer. This way, the computer is always recognizable on the network and you have less chance of network conflicts.
Set a fixed IP address in Windows 11 or 10
Set a fixed IP address in Windows 11
You can assign a fixed IP address to a network adapter. This could be the “Ethernet” (cable) network adapter, or a WiFi (wireless) network adapter.
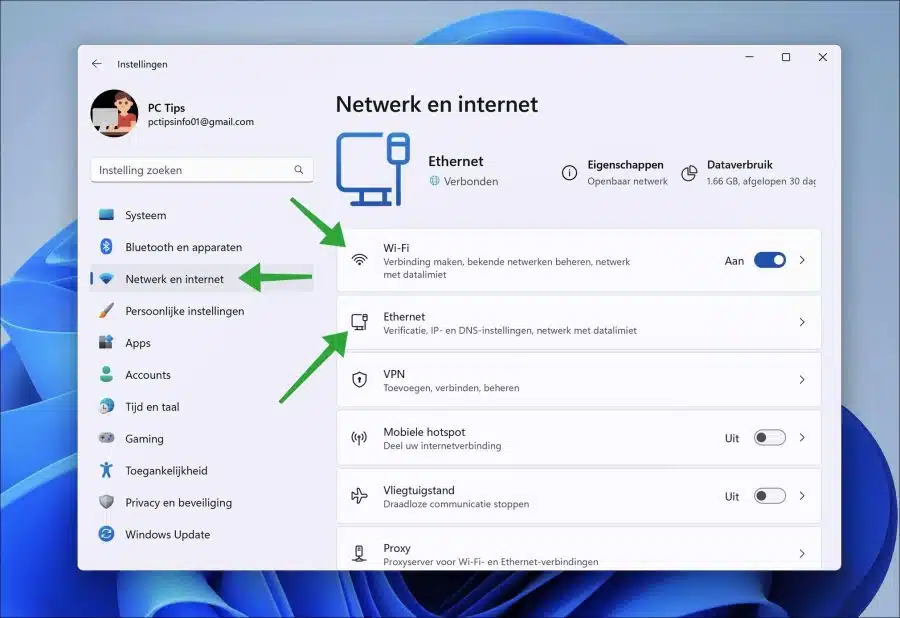
Open the settings. Then click on “Network and Internet” on the left in the settings.
Then make your choice to set a fixed IP address in the “Wi-Fi” or in the “Ethernet” network adapter.
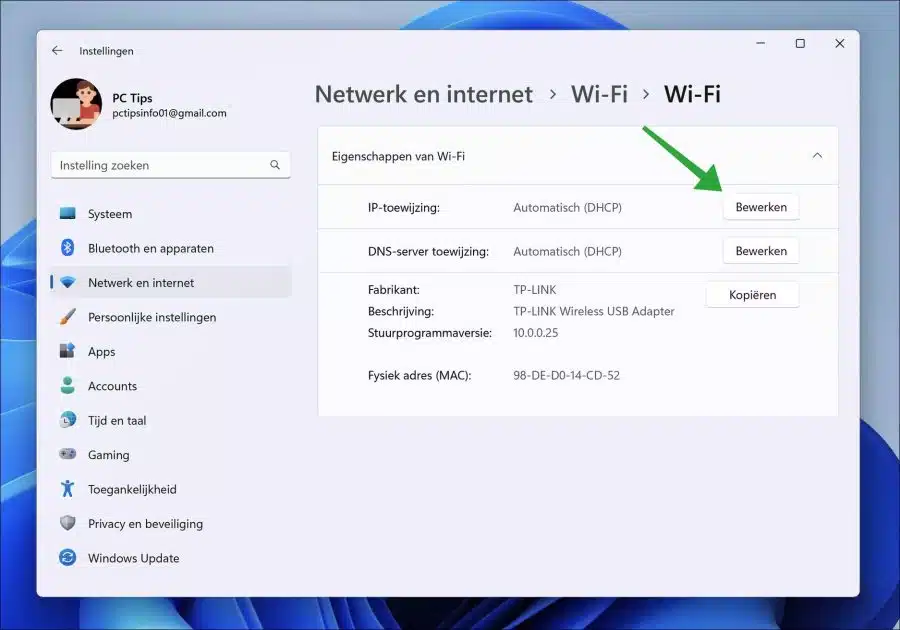
Set fixed IP address for WiFi in Windows 11
Then click on Wi-Fi. At the very bottom, click on “Hardware properties”. Then click the “Edit” button to the right of “IP assignment”.
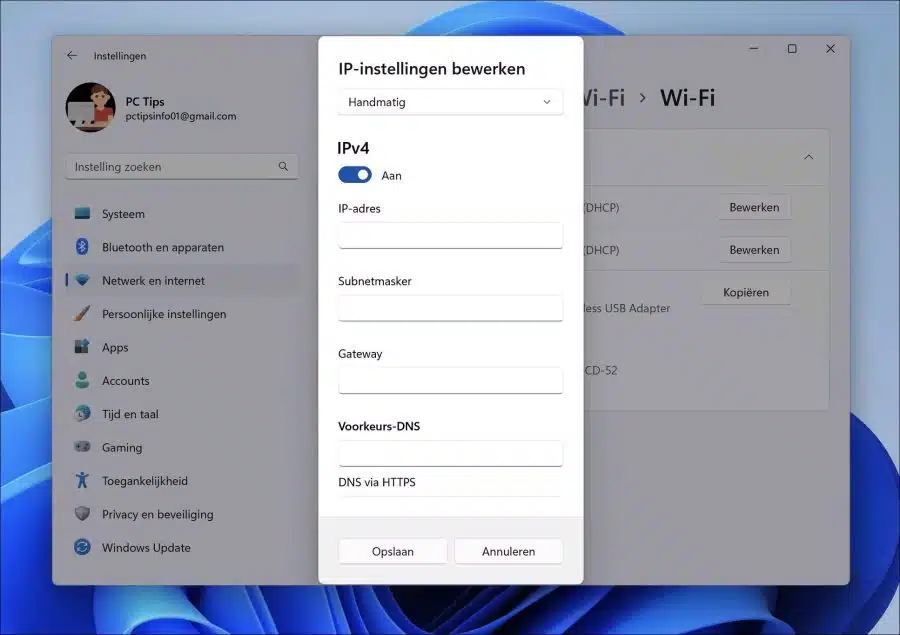
In the “Edit IP Settings” edit setting, change “Automatic” to “Manual”.
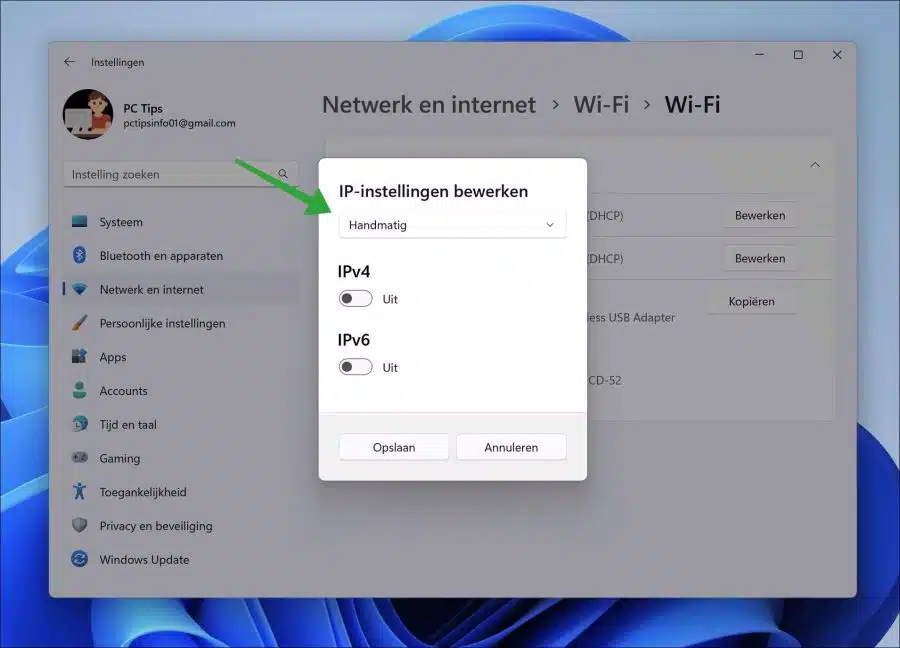
If you want to set an IPv4 (default) fixed IP address, enable the “IPv4” option and enter the fixed IP address, subnet mask, gateway and DNS server. Click Save to confirm.
Are you having problems with WiFi? Then read: WiFi not working in Windows 11.
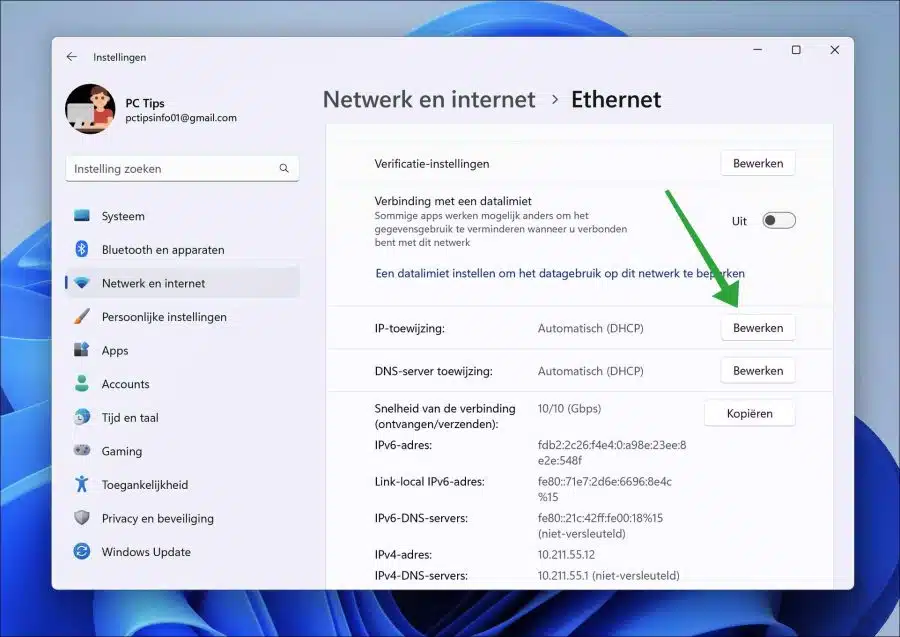
Set a fixed IP address for Ethernet in Windows 11
In the “Network and Internet” settings, click “Ethernet”. Click on the “Edit” button at the bottom of the “IP assignment” settings.
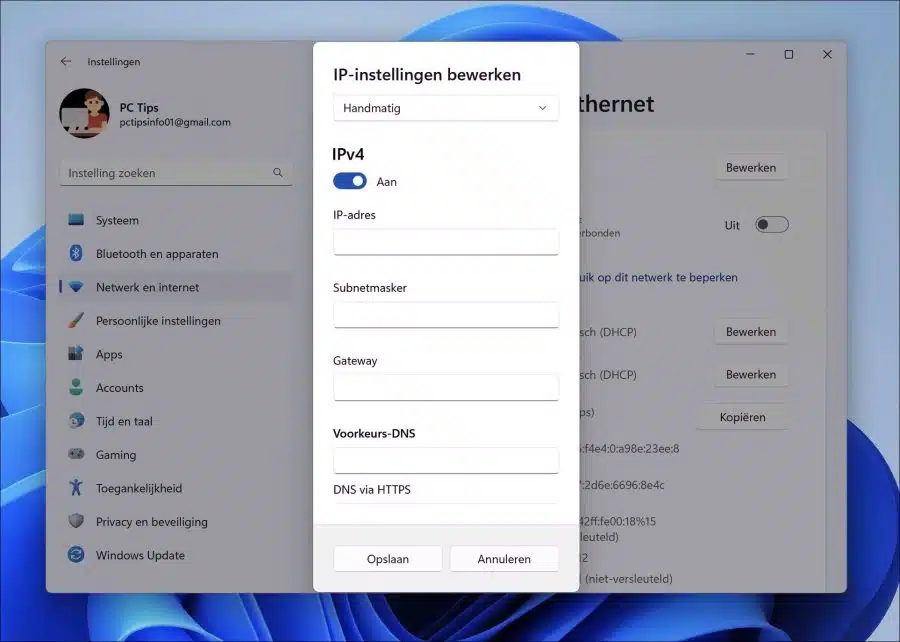
In the “Edit IP Settings” edit setting, change “Automatic” to “Manual”.
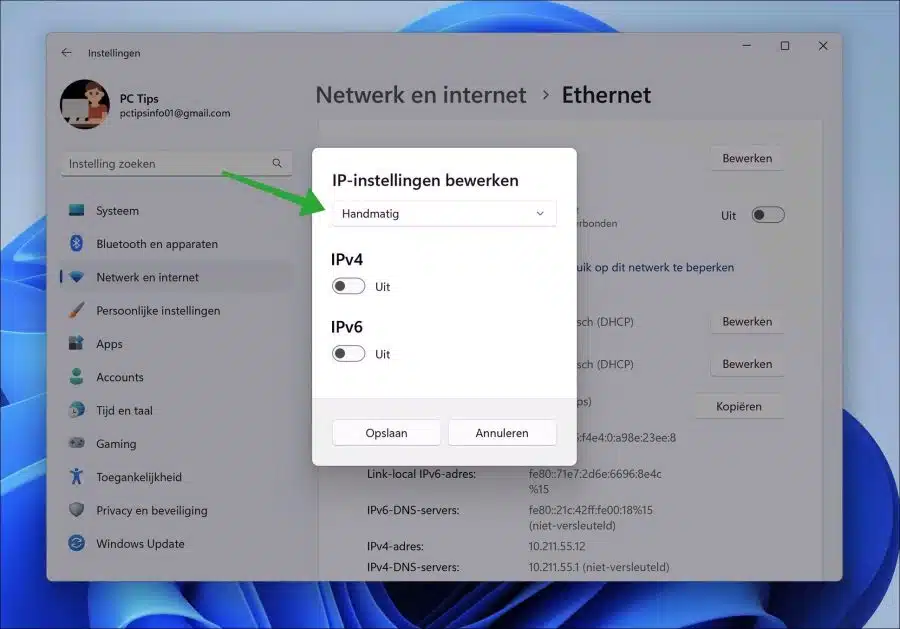
If you want to set an IPv4 (default) fixed IP address, enable the “IPv4” option and enter the fixed IP address, subnet mask, gateway and DNS server. Click Save to confirm.
Set a fixed IP address in Windows 10
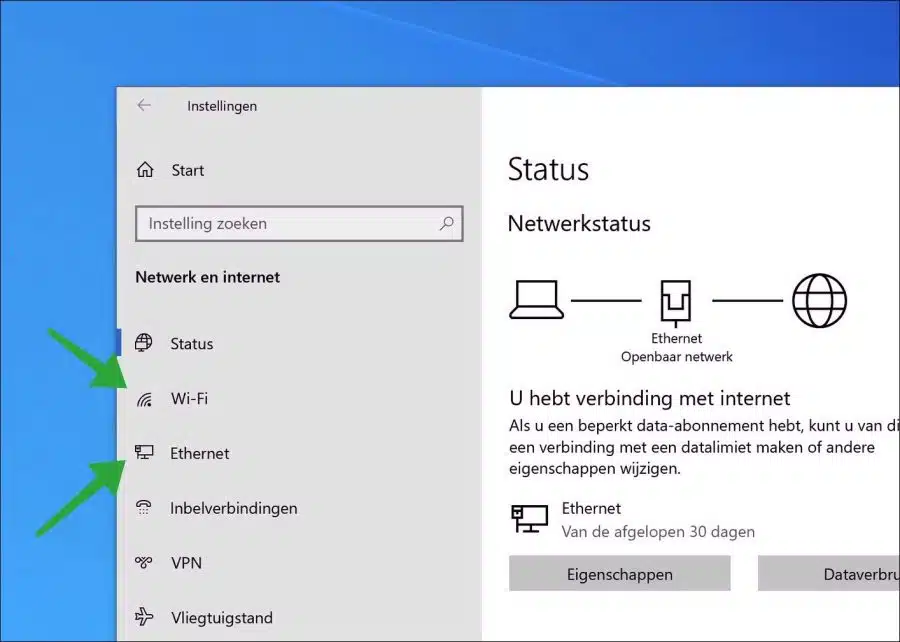
You can use a fixed IP address set up for the wifi or the Ethernet network adapter. Wifi is the wireless connection and Ethernet is the connection via a cable.
Right-click on the Start button. Then click on “Settings”. In the settings click on “Network and internet”.
Then make your choice to set a fixed IP address in the “Wi-Fi” or in the “Ethernet” network adapter.
Set fixed IP address for WiFi in Windows 10
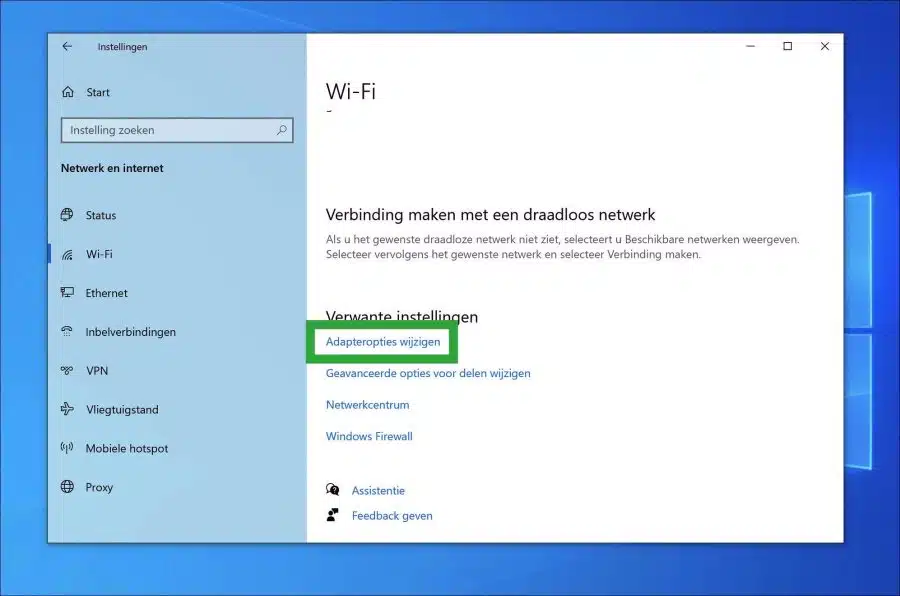
Then click on Wi-Fi. Click on “Change adapter options” at the bottom.
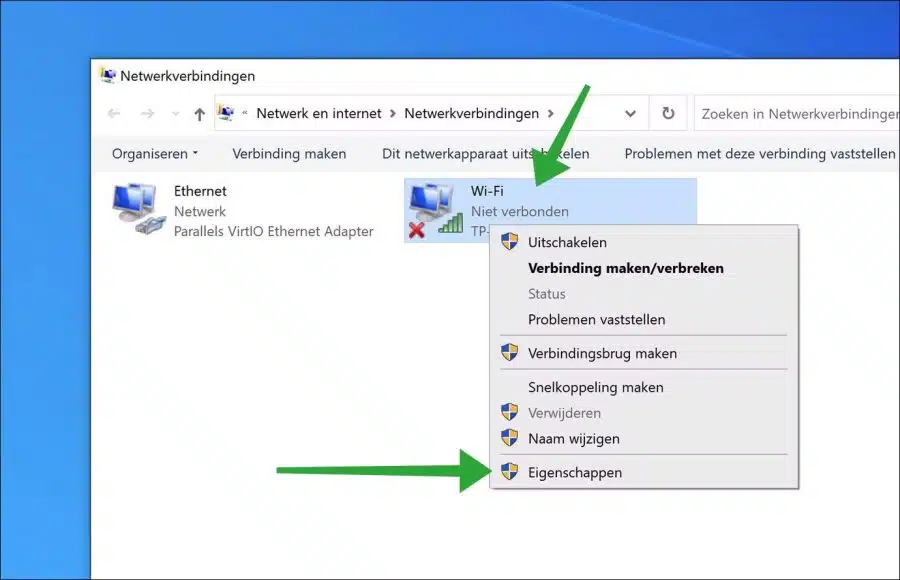
Right-click on the “Wi-Fi” network adapter. Then click on “Properties” in the menu.
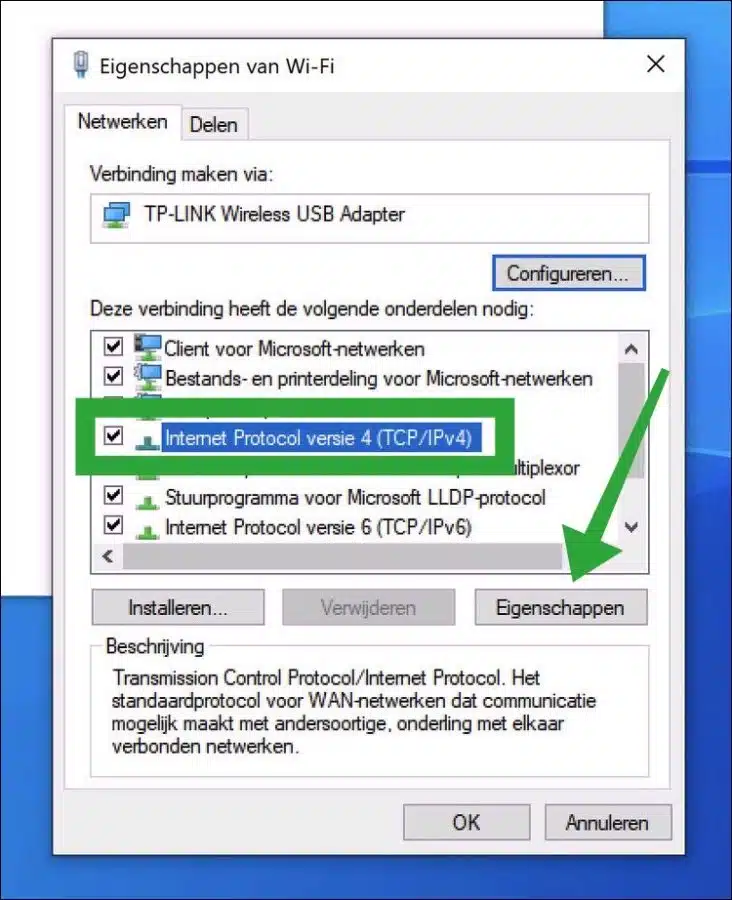
Click on “Internet Protocol Version 4” and then click on “Properties”.
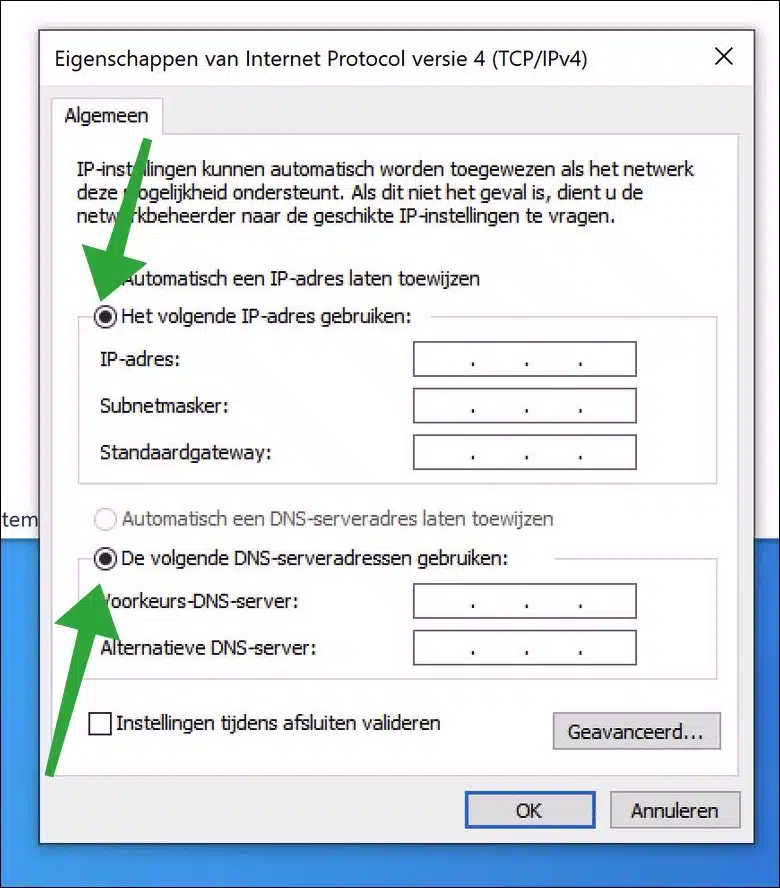
Enable the “Use the following IP address” option and specify the IP address, subnet mask, and default gateway. If necessary, you can select a preference and alternative twice DNS server Set up.
Click “OK” to confirm the fixed IP address.
Set a fixed IP address for Ethernet in Windows 10
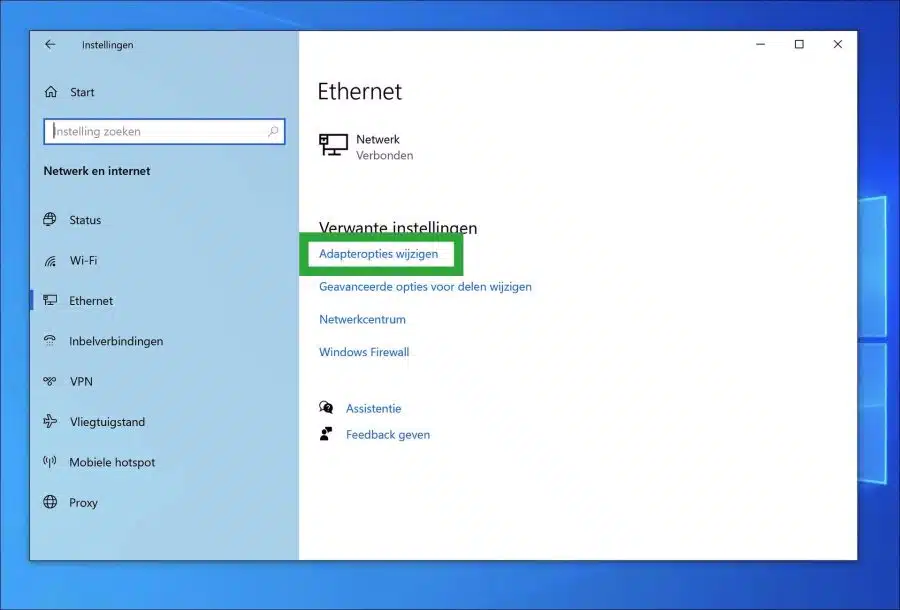
Click on “Ethernet” in the “Network and Internet” settings. These are the properties of the network connection via the cable.

Click on “Change adapter options” at the bottom of the Ethernet settings.
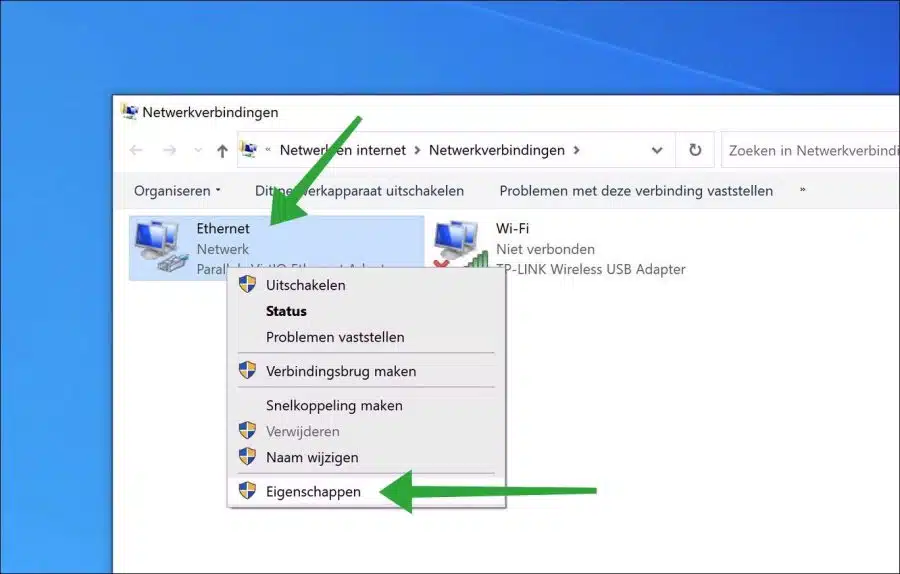
Right-click on the “Ethernet” network adapter. In the menu click on “Properties”.
Click on “Internet Protocol Version 4” and then click on “Properties”.
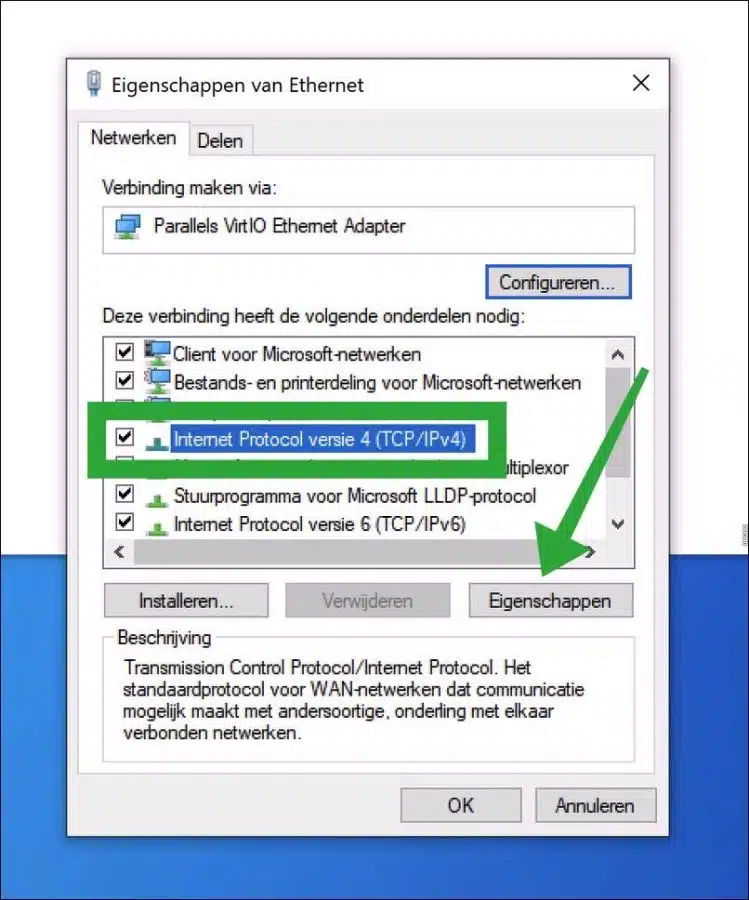
Enable the “Use the following IP address” option and specify the IP address, subnet mask, and default gateway. If necessary, you can set a preference and alternative DNS server twice more.
Click “OK” to confirm the fixed IP address.
I hope this helped you. Thank you for reading!