Om uw computer te personaliseren kunt u een schermbeveiliging instellen. Schermbeveiliging beschermt uw beeldscherm tegen inbranden etc., maar wordt ook gebruikt om als achtergrond te dienen op het moment dat de computer niet wordt gebruikt.
Windows biedt standaard enkele screensaver aan waaruit u kunt kiezen. In deze gids leg ik uit hoe u zelf een screensaver kunt instellen met een video. Hiermee kunt u een videobestand selecteren op uw computer en deze instellen als screensaver.
Dit videobestand kunt u bijvoorbeeld ook aanmaken via YouTube. Stel dat u een bepaalde YouTube video wilt instellen als screensaver, dan is dit mogelijk. Dit is hoe het werkt.
Meld u dan aan voor onze nieuwsbrief.
Video instellen als schermbeveiliging
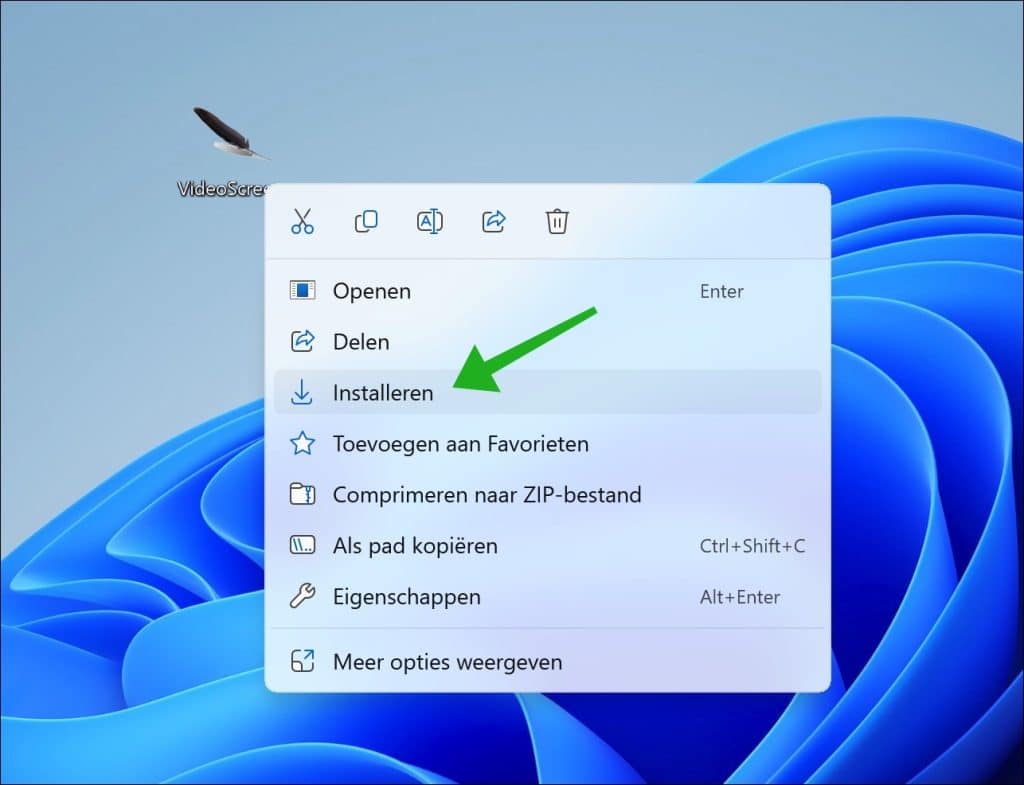
Om te beginnen download u “Video Saver” naar uw computer. Klik vervolgens met de rechtermuisknop op VideoScreensaver.scr en klik op “Installeren” om de screensaver te installeren in Windows 11 of 10.

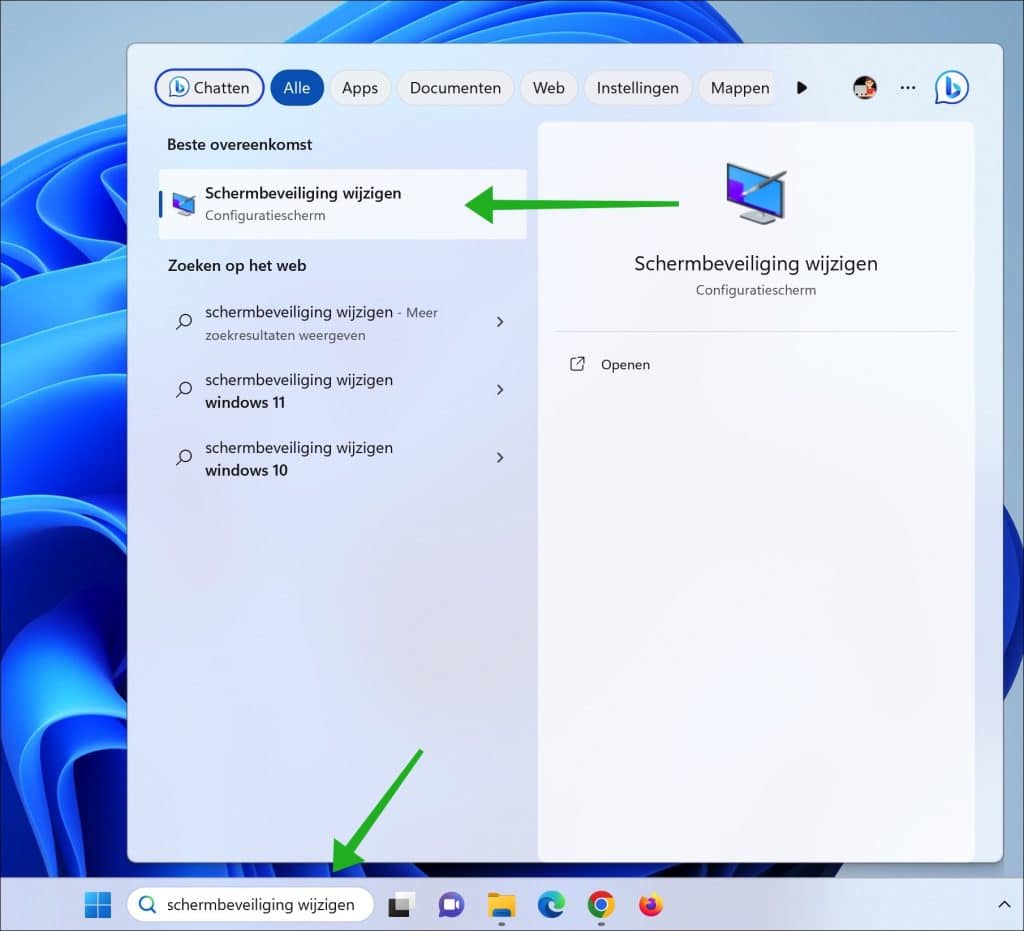
Via de taakbalk, zoek op “Schermbeveiliging wijzigen” om de schermbeveiliging instellingen te openen.

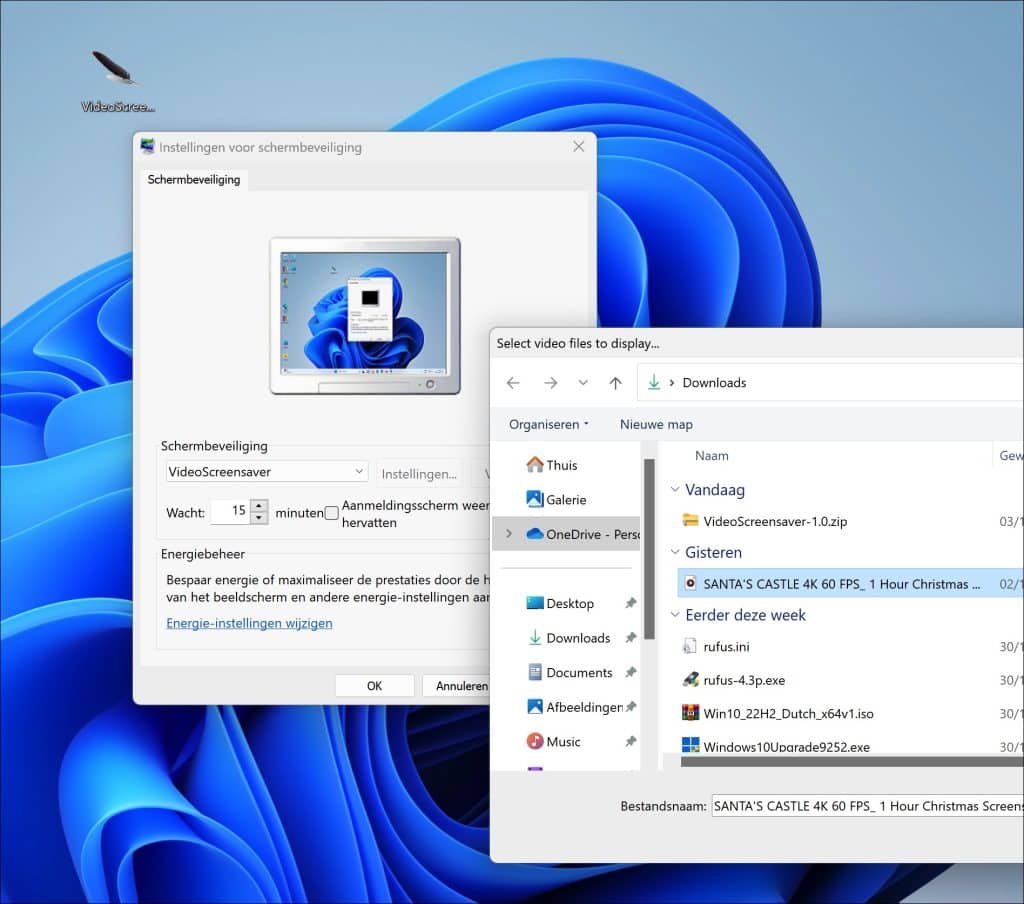
Selecteer “VideoScreenSaver” als schermbeveiliging en klik op de “Instellingen” knop om een videobestand te selecteren.

U heeft nu een video als schermbeveiliging ingesteld. Stel dat u liever een video van YouTube gebruikt, dan dient u eerst de YouTube video om te zetten naar een videobestand. Dit kan via de SaveFrom.net website.

Geef de URL in van de YouTube video die u als screensaver wilt instellen. Klik vervolgens op de “Download” knop om de YouTube video als videobestand (mp4) naar uw computer te downloaden. Selecteer vervolgens via bovenstaande instructie het videobestand en stel het in als schermbeveiliging.
Ik hoop u hiermee geïnformeerd te hebben. Bedankt voor het lezen!
Lees ook:


Ik heb ook een tip.
Als ik Windows opnieuw wil installeren doe ik dat meestal op een externe USB-ssd, zodat ik rustig alles kan opbouwen, tunen en instellen. Dat kost nogal wat tijd, daarom doe ik het zo. Het probleem is echter dat Windows tijdens het updaten ziet dat de OS op een USB-schijf staat en dat wordt niet ondersteund (die melding krijg je meestal na downloaden van een update en tijdens het installeren daarvan). Door een register de waarde van een register sleutel te veranderen is het opgelost.
HKEY_LOCAL_MACHINE\SYSTEM\CurrentControlSet\Control Wijzig de waarde van de registersleutel PortableOperatingSystem van 1 naar 0 of andersom als je het weer aan wil zetten.
Als Windows volledig klaar is op de externe schijf maak ik er een image van en zet het terug op C: interne schijf of als je geen image programma hebt klonen kan ook. Hoop dat ik er iemand mee kan helpen, vriendelijke groet, Evert
geweldig. Dank voor de inspanning en oplossingen
mooie site met veel handige tips