
Als het niet lukt om uw Windows 11 of 10 computer uit te schakelen, dan kan dit verschillende oorzaken hebben.
De meest voor de hand liggende oorzaken zijn; Windows updates die nog moeten worden geïnstalleerd. Als dit het geval is dan zal Windows eerst de update installeren en vervolgens vanzelf afsluiten.
Het komt ook voor dat systeembestanden zijn beschadigd, dat er foutieve stroom opties zijn geconfigureerd of dat de functie snel opstarten het afsluiten van de computer verhinderd. In enkele zeldzame gevallen betreft het bepaalde aangekoppelde hardware die voorkomt dat de computer kan worden uitgeschakeld. Dit kunt u allemaal oplossen door de stappen in dit artikel te volgen.
Meld u dan aan voor onze nieuwsbrief.
Windows 11 of 10 computer uitschakelen lukt niet
Er zijn verschillende manieren om de computer af te sluiten, deze leest u in het volgend artikel.
Als u problemen ondervindt met het afsluiten van de computer kunt u de volgende stappen uitvoeren om te zien of hiermee het probleem is opgelost.
Snel opstarten uitschakelen
Snel opstarten is een functie waarmee uw computer sneller opstart nadat hij is afgesloten. Dit wordt bereikt door de toestand van de computer op te slaan wanneer deze wordt afgesloten, en vervolgens die opgeslagen toestand te gebruiken wanneer de computer weer wordt opgestart.
Dit betekent dat de computer in plaats van het gebruikelijke opstartproces te doorlopen, de opgeslagen toestand kan gebruiken om sommige stappen te omzeilen en sneller aan te melden.
Deze functie is vooral nuttig voor degenen die hun computer vaak moeten afsluiten en opnieuw opstarten, omdat het de tijd die nodig is om te wachten tot de computer is opgestart, kan verkorten. Het is echter belangrijk op te merken dat deze functie niet voor alle computers en voor alle versies van Windows beschikbaar is. Bovendien geven sommige gebruikers er de voorkeur aan om Snel opstarten uit te schakelen, omdat dit ook voor problemen kan zorgen zoals het niet correct afsluiten van de computer. Het is dus het proberen waard om snel opstarten eens uit te schakelen om te bekijken of hiermee het probleem is opgelost.
Klik met de rechtermuisknop op de Startknop. In het menu klik op “uitvoeren”. In het uitvoeren venster type: powercfg.cpl.
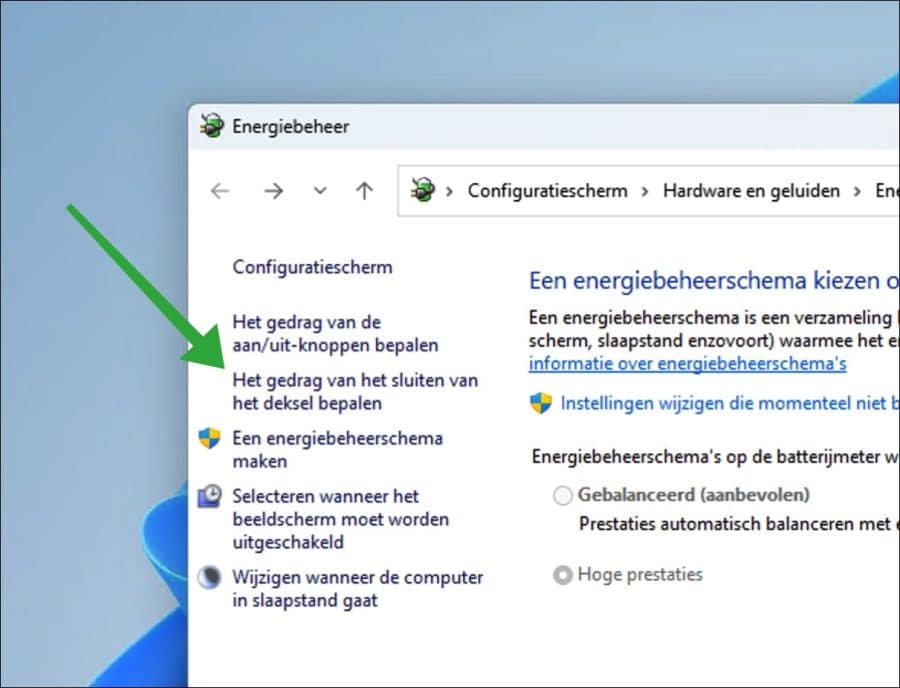
In de energiebeheer instellingen klik links op “Het gedrag van het sluiten van de deksel bepalen”.
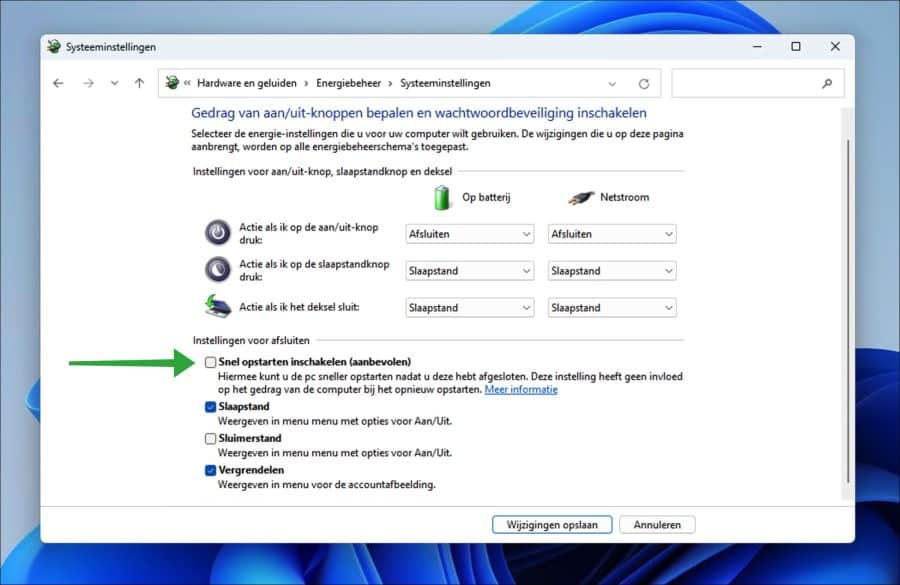
Klik vervolgens op “Instellingen wijzigen die momenteel niet beschikbaar zijn”. Schakel daarna “Snel opstarten” uit door de optie uit te vinken.
Energiebeheer probleemoplosser uitvoeren
Energiebeheer probleemoplosser is ontworpen om u te helpen problemen met de energie-instellingen van uw computer te diagnosticeren en op te lossen. Deze probleemoplosser kan problemen vaststellen met betrekking tot de slaapstand, energiebeheer, energieschema’s en meer. Het kan u vervolgens helpen deze problemen op te lossen, dit gebeurt automatisch. Deze probleemoplosser kan zelf problemen detecteren en oplossen.
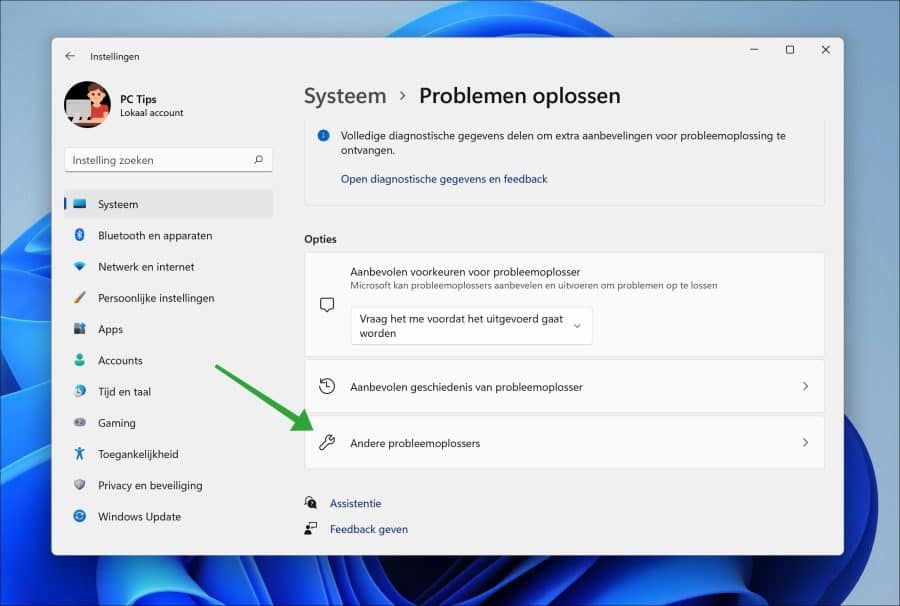
Om de energiebeheer probleemoplosser te openen, opent u de instellingen. In de instellingen klikt u links op “Systeem” en vervolgens op “Problemen oplossen”.

Klik vervolgens onderin de “Opties” op “Andere probleemoplossers”.
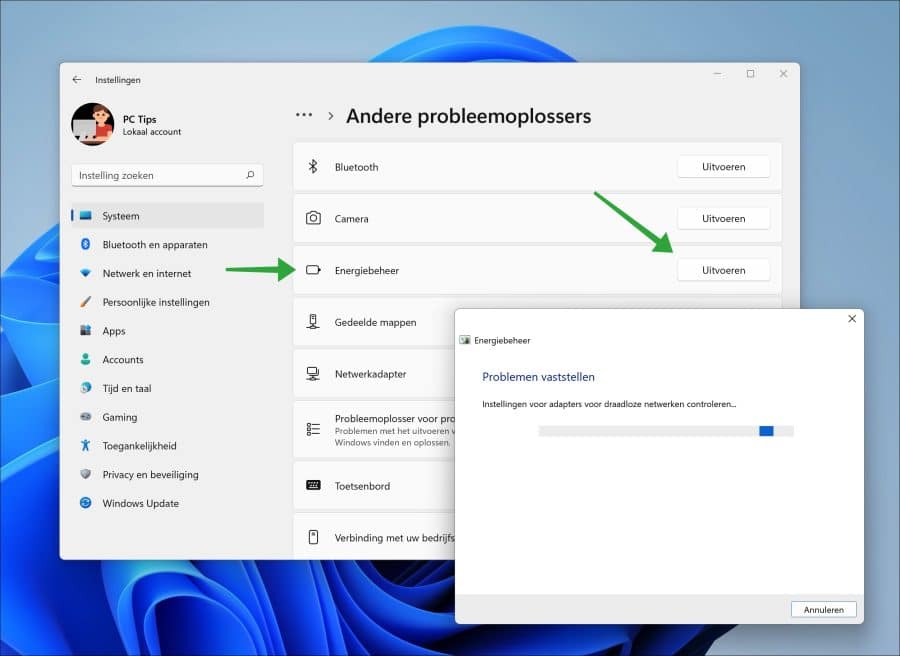
In de lijst van probleemoplossers klikt u vervolgens op “uitvoeren” in de “energiebeheer” probleemoplosser.
De energiebeheer probleemoplosser wordt uitgevoerd. Er wordt zelf naar problemen gezocht. Indien gevonden zal de probleemoplosser het probleemoplossen en een samenvatting tonen met de opgeloste problemen.
Controleer op updates
Het klinkt voor de hand liggend. Echter, ik raad aan om te controleren op Windows updates en deze ook allemaal te installeren. Wacht tot het installeren is voltooid en herstart vervolgens de computer.
Open instellingen. Klik vervolgens links op “Windows update”“. Klik op de “Naar updates zoeken” en laat de update installeren.

Beschadigde systeembestanden automatisch herstellen
In enkele gevallen beschadigen er soms systeembestanden. Deze systeembestanden kunnen worden beschadigd door software installaties, stuurprogramma updates, systeem wijzigingen, hardware installaties en meer.
Er zijn in Windows 11 of 10 twee functies beschikbaar die systeembestanden automatisch kunnen herstellen, dit zijn SFC en DISM.
DISM uitvoeren
DISM (Deployment Image Servicing and Management) is een ingebouwd hulpmiddel dat kan worden gebruikt voor het onderhouden en beheren van Windows-images, zoals die worden gebruikt voor de installatie van Windows.
Het kan worden gebruikt voor het installeren, verwijderen, configureren en bijwerken van Windows functies, pakketten, stuurprogramma’s en instellingen. Het kan ook worden gebruikt om Windows-functies in- of uit te schakelen en om Windows-images te repareren.
Om het Windows-image te repareren kunt u het volgende commando uitvoeren. Het reparatieproces wordt dan zelf uitgevoerd.
Open het Opdrachtprompt als administrator. Geef het volgende commando in:
DISM.exe /Online /Cleanup-Image /Restorehealth
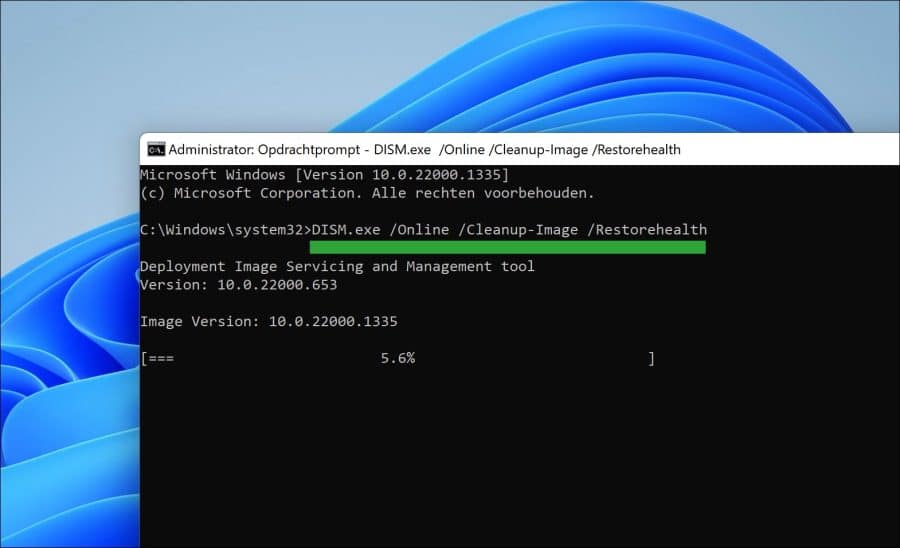
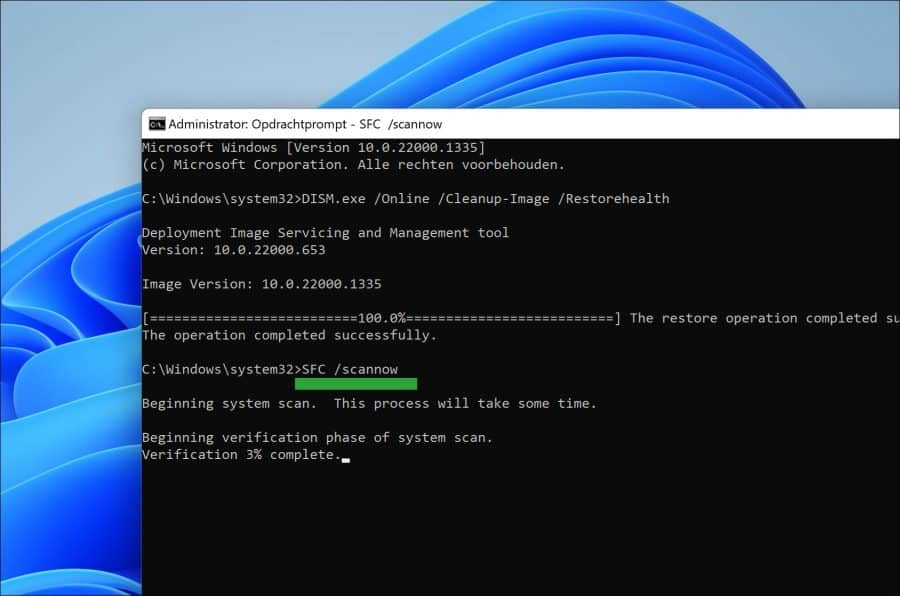
Als het DISM RestoreHealth commando is uitgevoerd, dan voert u hierna SFC uit.
SFC uitvoeren
System File Checker (SFC) is een hulpprogramma in Windows 11 of 10 waarmee gebruikers kunnen scannen op beschadigingen in Windows systeembestanden en deze kunnen herstellen.
Het is een belangrijk onderdeel om Windows soepel te laten draaien, omdat gebruikers hiermee snel systeembestanden die beschadigd zijn geraakt, kunnen laten opsporen en repareren. SFC is een ingebouwd hulpprogramma in Windows en kan door iedereen veilig worden uitgevoerd.
Wanneer System File Checker wordt uitgevoerd, zal het alle beschermde systeembestanden scannen en beschadigde of ontbrekende bestanden vervangen door de juiste versies. Het is belangrijk op te merken dat hoewel SFC een nuttig hulpmiddel is, het geen vervanging is voor het regelmatig maken van een back-up van uw gegevens. Het is alleen bedoeld om systeembestanden te repareren en kan niet worden gebruikt om gegevens of persoonlijke bestanden te herstellen.
Open het Opdrachtprompt als administrator. Geef het volgende commando in:
SFC /scannow
Wacht tot SFC is afgerond. Sluit nu uw computer af en controleer of het probleem is opgelost. Als het probleem nu nog niet is opgelost, dan raad ik aan om de PC te herstellen.
Ik hoop u hiermee geholpen te hebben. Bedankt voor het lezen!
Help mee
Mijn computertips zijn gratis en bedoeld om andere mensen te helpen. Door deze pc-tip te delen op een website of social media, helpt u mij meer mensen te bereiken.Overzicht met computertips
Bekijk ook mijn uitgebreide overzicht met praktische computertips, overzichtelijk gesorteerd per categorie.Computerhulp nodig?
Loopt u vast met uw pc, laptop of software? Stel uw vraag op ons computerforum en krijg gratis computerhulp van ervaren leden en experts.