

Disk Management, as the name implies, is used to manage the storage drives associated with the computer system.
These drives can be either internal or external, and moreover, this utility is available on all versions (current and older) of the Windows operating system. This is a useful tool not only for computer technicians, but you can also use it at home to perform a number of tasks.
With Disk Management you can delete the format partition, change the drive letter of the disk, resize the partition, delete the entire volume, create a new volume, make the partition active, and check the hard drive status.
There are several ways to open Disk Management. In this article you will read 6 different ways to open Disk Management.
6 Ways to Open Disk Management in Windows 11/10
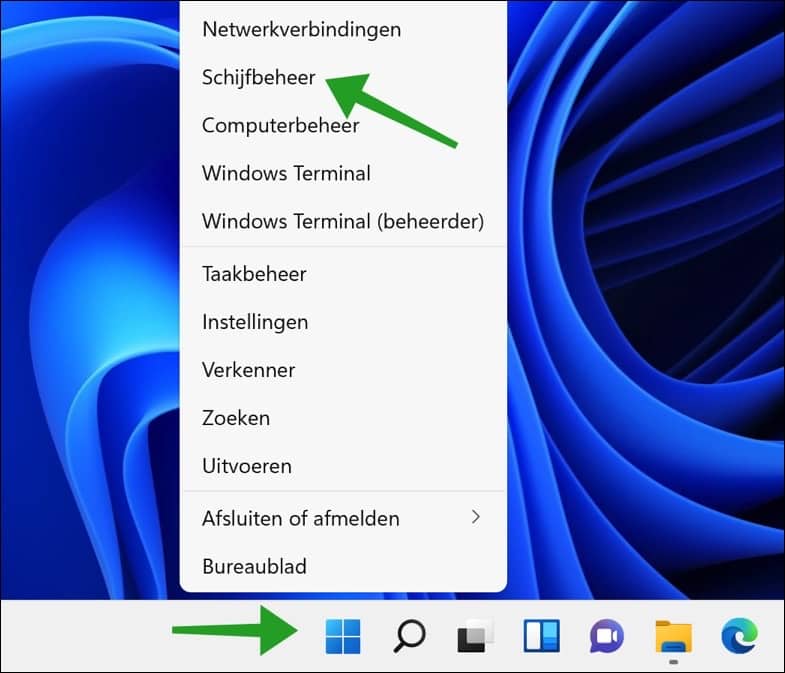
The first way to open Disk Management is through it Win-X menu. This menu immediately provides the user with the most commonly used tools to manage Windows and associated hardware.
Right-click on the Start button. Click on Disk Management in the menu.
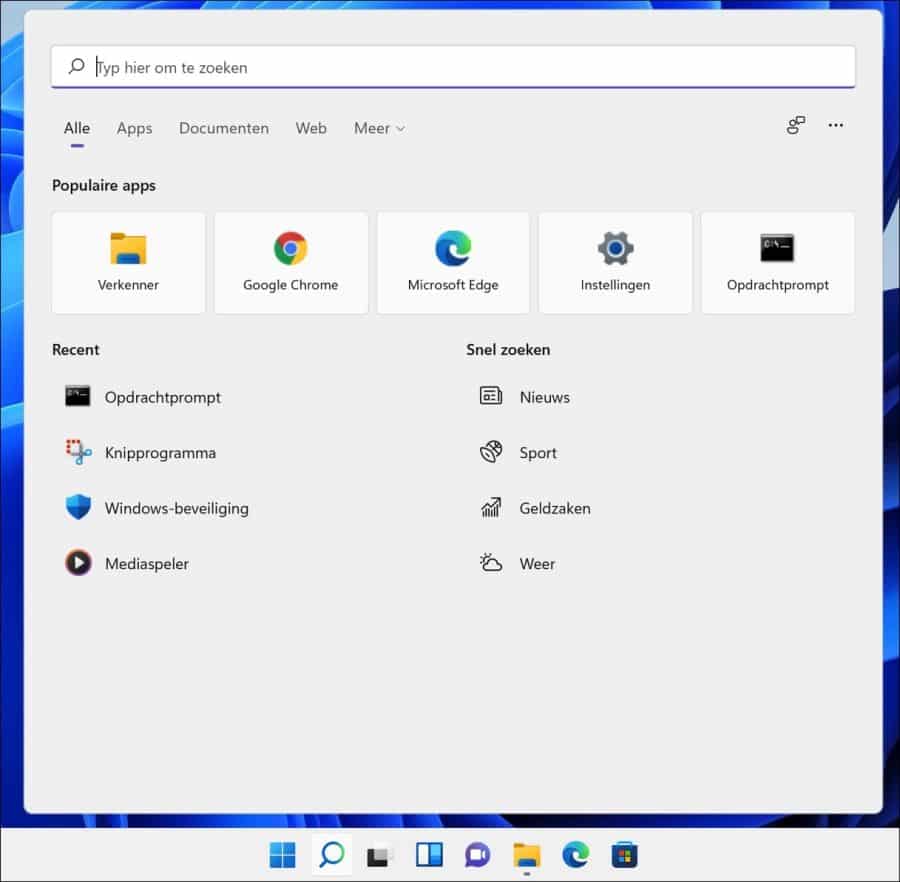
Open Disk Management via Windows Search
In Windows, searching for apps or settings can help you quickly find the result you want.
Click on the magnifying glass button in the taskbar or search directly for Disk Management via the taskbar. Then click on the first Disk Management result.
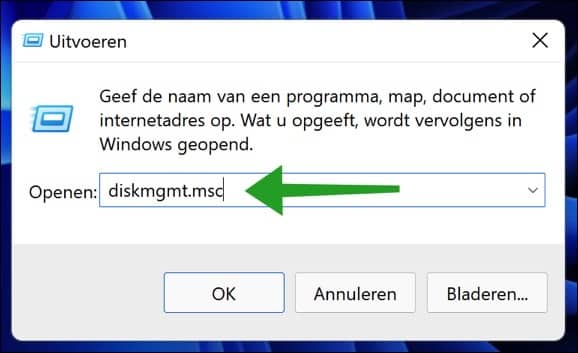
Open Disk Management via Run
The Run window is a tool to open apps and settings directly if you know the file name of the app or setting. This way you can open Disk Management quickly.
Right-click on the Start button. Click Run in the menu. In the Run window type:
diskmgmt.msc
Disk Management will open immediately.
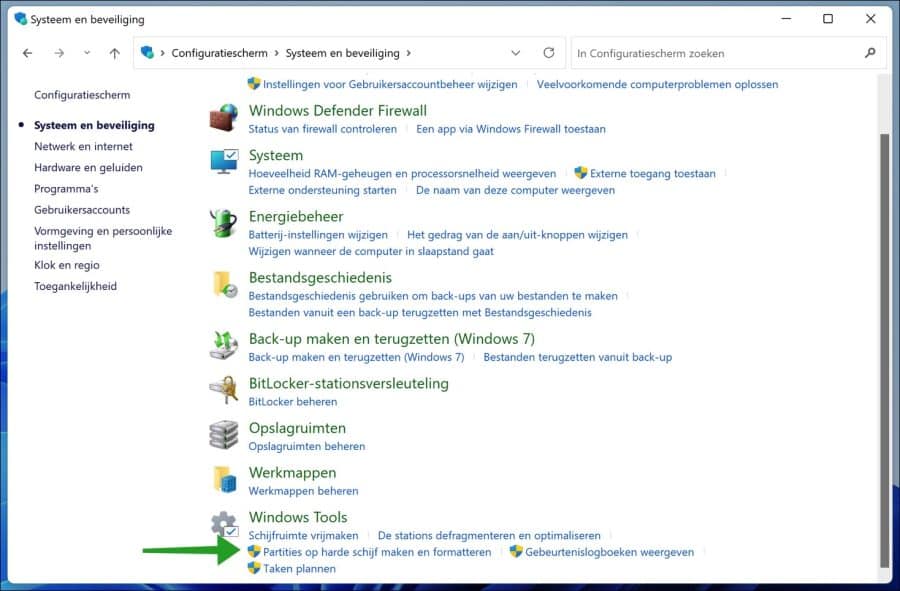
Open Disk Management via Control Panel
The Control Panel offers a lot of tools to manage Windows settings and app settings. This way you can also open the Disk Management app from the Control Panel.
Open Control Panel. Click System and Security. At the very bottom under “Windows tools” click on “Create and format hard drive partitions”. This shortcut immediately opens Disk Management.
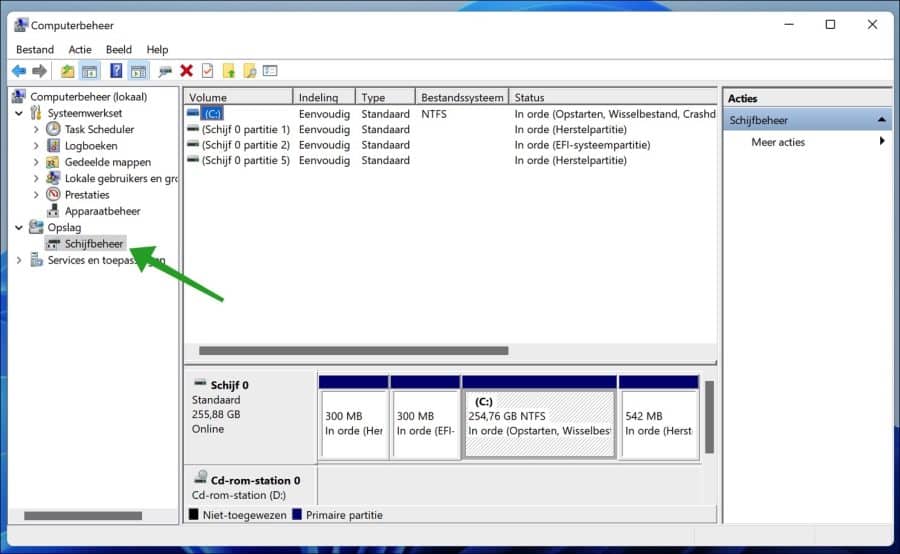
Open Disk Management through Computer Management
Computer Management contains all the tools to manage components in or on your computer, which you will also find here Device management. It also contains a direct shortcut to Disk Management.
Right-click on the Start button. Click Computer Management in the menu. In Computer Management, click on Disk Management on the left.
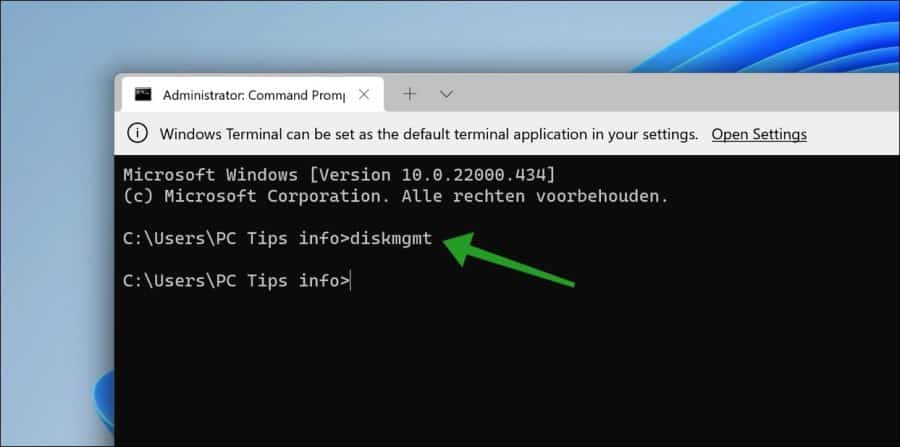
Open Disk Management via Command Prompt, Windows Terminal, or PowerShell
If you Command Prompt opened then you can basically launch any app. In most cases you will need to specify the location of the executable file, but for diskmgmt this is not necessary. So you can start diskmgmt or Disk Management directly.
I hope these 6 ways to open Disk Management have helped you and informed you a little about the possibilities. Thank you for reading!
This is very clear, great man
I'm trying to add my drive via disk management. I can't add it, I don't get a pop-up to add a drive. It is the new SSD Samsung T9 and I have Windows 10 on my laptop. I've tried everything but I can't add it. It shows in the settings that it is connected with the USB and then I could download the PSSD system. It also keeps indicating that it is not connected and needs to do this again. I have tried using USB several times but it doesn't work. What now?
Hello, have you restarted the computer yet? Try that first. Are you using an original USB cable? Check this too. If the SSD is found in settings, it is available in Windows. You should also see the disk in disk management. It is not possible to add a disk via disk management. Disk Management only shows all connected drives, such as an SSD. Are you sure that the SSD is not listed in disk management? Check this against the total size, as disk management does not show disk names. You may therefore be overlooking a drive. If the drive is there, assign a drive letter via Disk Management:
https://www.pc-tips.info/tips/windows-tips/schijfletter-wijzigen-in-windows/
After assigning a drive letter, you can use the SSD in Windows. Good luck!
Enable touchscreen on Acer Aspire 3, Windows 11.
How can I do this?
thanks in advance
Martin
Hallo, if you are sure that the Acer Aspire 3 does have a touchscreen, you should find this in the display settings. I also think it should work without changing anything.
Click on the Start button. Then click on “Settings” and click on “Display” on the left. Here you should find something like touchscreen. It may be in the advanced display settings.
I don't have an Aspire 3 so unfortunately I can't reproduce it. Otherwise, if you are unsure, please contact Acer. Good luck!
I am unable to turn the touchscreen function back on, so I will ask Acer how to do it.
Thanks for the effort!
Martin
Hello, here is how to disable and also enable touchscreen. Maybe this will help if you disabled it yourself:
https://www.pc-tips.info/tips/windows-tips/touchscreen-uitschakelen-in-windows-11-of-10/
Success!
I'm looking for a place where I can change the automatic action when inserting a USB drive.
I once set One-drive to search for image and video files, but I immediately ended up in an endless loop :((
Kind regards,
WB, BoZ
Hello, I understand your question about USB autoplay. Which Windows version do you have? 10 or 11?
Your other? Or additional question about OneDrive is not clear? That bit about endless loop? No idea what you mean by that.
Please let me know your response and I will see if I can advise you. Best regards
I removed a SATA drive from my old (defective) computer. Now I want to read the disk. I bought a SATA/USB connection. When I connect the drive to my PC, it spins but I don't see anything happening. What am I doing wrong and should I do something different?
Hello, if the disk works it should be visible in disk management. You can find the information in this article. If it is visible, assign a drive letter to the drive: https://www.pc-tips.info/tips/windows-tips/schijfletter-wijzigen-in-windows/.
The content will become visible next.
Success!