

User Account Control, also known as “User Account Control” or UAC for short, is a security feature of the Windows operating system that helps prevent unauthorized changes to the operating system. User Account Control was first introduced in Windows Vista and is now available in Windows 11. When a change is initiated by applications, users, viruses, or other forms of malware, UAC asks the administrator for your permission.
After approval by the administrator, a program may make changes to your computer. If the administrator does not approve the changes, they will not be implemented.
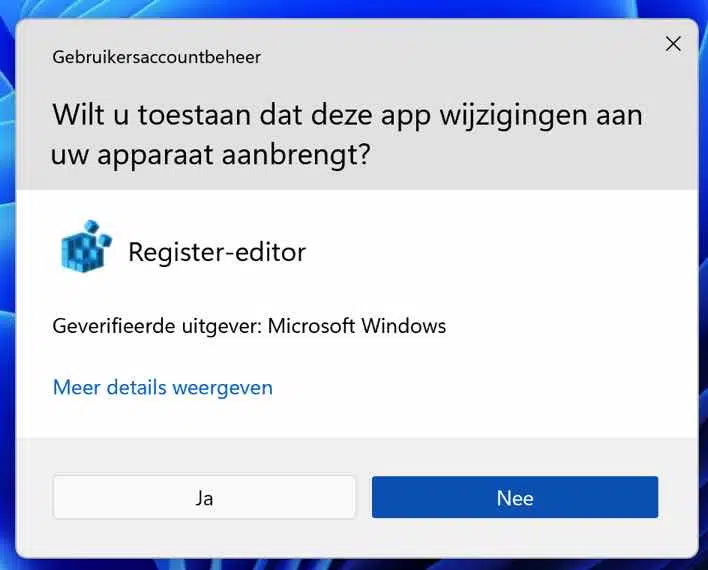
User Account Control doesn't open every time you open a file. It only opens and asks for approval when you or an application tries to make important changes to your Windows 11. For example, when you open the registry editor, the User Account Control dialog box appears asking “Do you want to allow this app to make changes to your device?”
Basically, User Account Control is a layer of security that a user needs to confirm changes to the system when you or an application tries to make changes. Although User Account Control is a security feature, some people find it annoying and want to disable User Account Control completely.
There are three ways to disable User Account Control in Windows 11. The first way is through Windows Settings. The second way is through the Group Policy editor and the third way is through the Windows registry.
Disable User Account Control in Windows 11
Manage User Account Control through Windows Settings
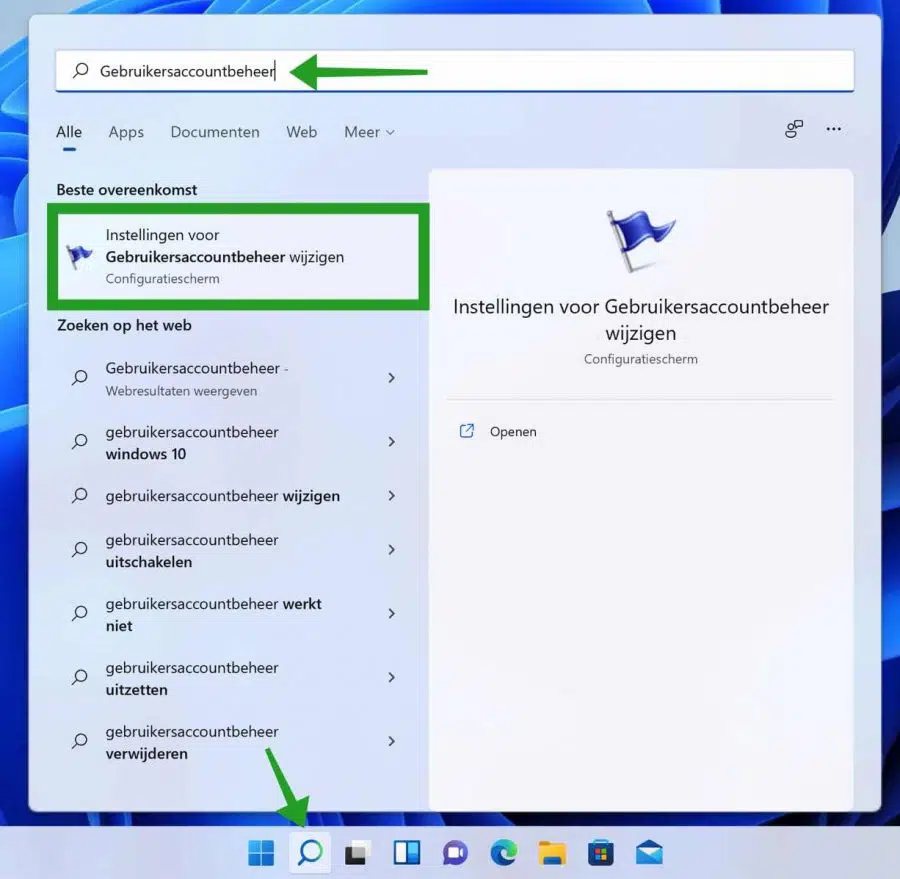
Click on the magnifying glass in the taskbar. In the search box type: User Account Control. Click “Change User Account Control Settings”.
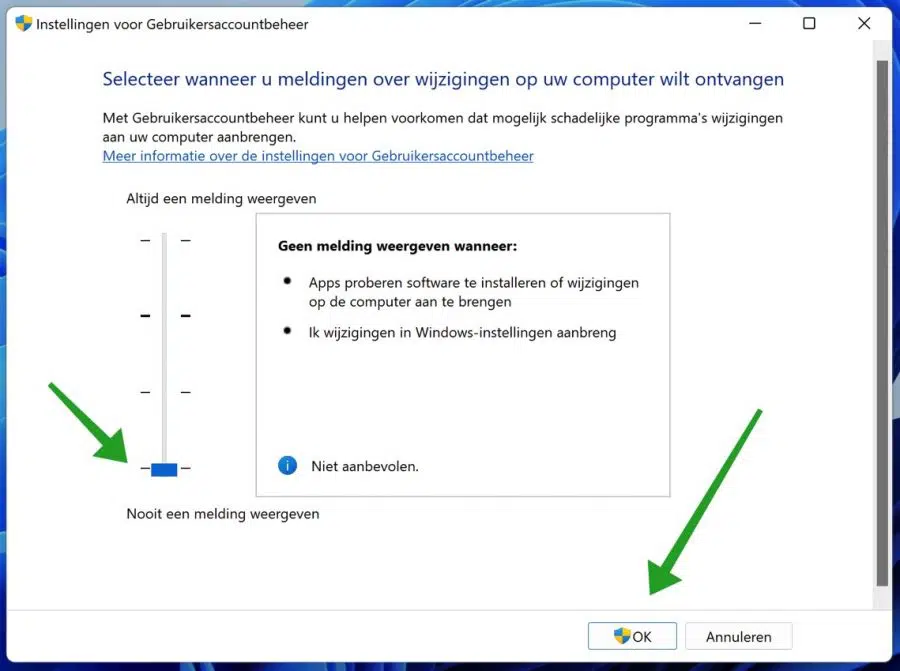
Drag the bar all the way down. You will no longer see User Account Control notifications when you try to install an app or make changes to your computer.
Keep the security aspect in mind when you disable User Account Control. This way you make it easier for malware to infect your computer. It is therefore advisable to re-enable User Account Control when you are done. To do this, drag the bar up again to the desired level. The second level is the default security level for User Account Control.
Manage User Account Control through Group Policy Editor
You can also disable User Account Control via a Group Policy. This only works in Windows professional or higher, not in Windows Home. You can use the Install Group Policy Editor in Windows Home edition.
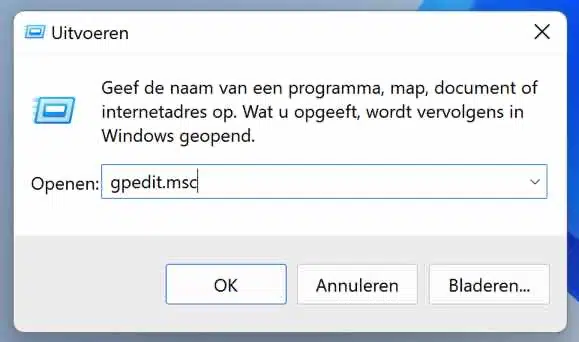
Right-click on the start button. Click Run in the menu. In the run window type: gpedit.msc.
Left click in the menu and open the following structure.
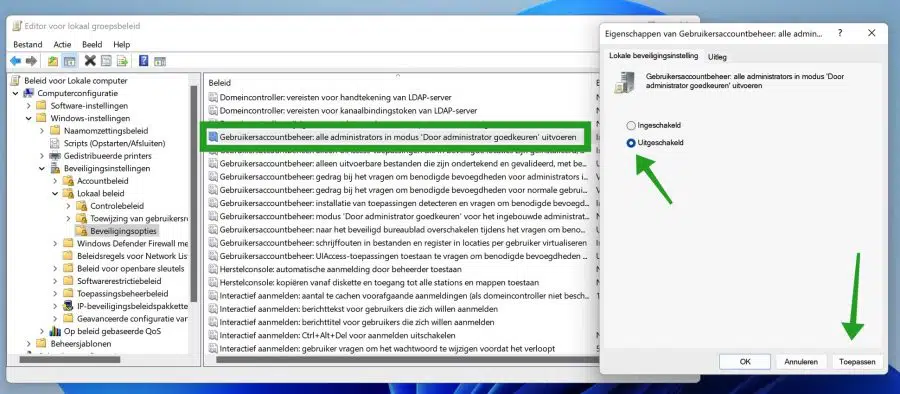
Computerconfiguratie > Windows-instellingen > Beveiligingsinstellingen > Lokaal beleid > Beveiligingsopties.
Then, on the right side (Policies), double-click on “User Account Control: Run all administrators in 'Administrator Approval' mode. A new window will open. Change the policy to “Disabled”.
User Account Control will no longer bother you asking you to allow changes. To re-enable User Account Control, repeat these steps and change the “User Account Control: Run all administrators in 'Administrator Approval' mode” policy to “Enabled”.
Manage User Account Control through the Windows Registry
If you wish to manage User Account Control through the Windows registry, you can make an adjustment to the registry value to disable or enable User Account Control.
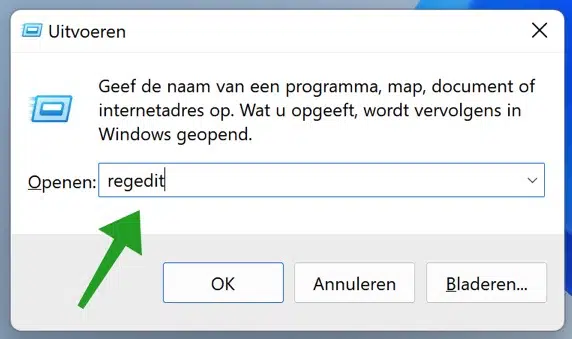
Right-click on the start button. Click Run. In the run window type: regedit.exe.
In the Windows registry, copy and paste the following line:
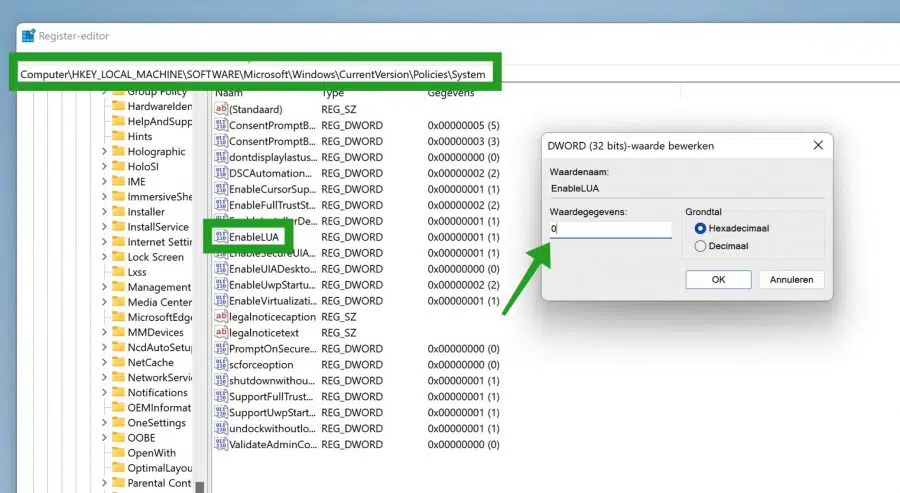
Computer\HKEY_LOCAL_MACHINE\SOFTWARE\Microsoft\Windows\CurrentVersion\Policies\System
Double-click the “EnableLUA” value and change the value to “0” to disable User Account Control and to “1” to enable User Account Control.
Now restart your computer.
Lees meer:
I hope this helped you. Thank you for reading!
I know these settings to disable the UAC, but in Windows version 22H2 it no longer seems to work. Every time I restart the PC the setting is reset to safe. Do you have a tip for the 22H2 version that is permanent?
Hello, I just tested it. If it is disabled it will remain disabled after a restart. Even if I manually change the level to “None” and restart Windows 11 22H2, the setting is retained. This is not related to Windows 11 22H2.
I suspect that there is software active on your PC that changes this back. Check security software installed on your PC. If you don't have this then it is something else.
It is also possible that your computer is part of a work environment via Azure or a domain. The security settings are then applied by an external server. If you change them, they will be reset after logging in again. You cannot change this yourself. In any case, the Windows 11 22H2 update is not the cause here.
If you are looking for an app to disable UAC, use “Winaero Tweaker”:
https://winaero.com/windows-11-disable-user-account-control-uac/
Success!
Thank you very much for your answer and you were right that it is security software that keeps resetting it. I have now adjusted. Always do the UAC adjustment via the registry, it works fine. Thanks again for the quick response.
Glad it worked, thanks for the feedback 🙂