
Als u met meerdere gebruikersaccounts werkt op één computer, dan kan het aanbevolen zijn om een schijfquota in te stellen voor gebruikers.
Door een quotum in te stellen voor gebruikersaccount is het voor deze gebruikers niet mogelijk om meer dan het ingesteld quotum te verbruiken aan schijfruimte.
Door een schijfquota in te stellen heeft u als beheerder van de PC meer controle over de totale schijfruimte door ieder gebruikersaccount een limiet toe te kennen.
Meld u dan aan voor onze nieuwsbrief.
In Windows 11 kunt u via de instellingen een schijfquota inschakelen en het aandeel toewijzen aan gebruikersaccounts die actief zijn op de PC. Om een schijfquota te gebruiken dient de harde schijf geformatteerd te zijn met het NTFS bestandssysteem. Elke ander bestandssysteem zoals exFAT of FAT32 ondersteunen geen schijfquota.
Schijfquota instellen en beheren in Windows 11
Schijfquota inschakelen
U kunt een schijfquota instellen via de Windows verkenner. Open de Windows verkenner. Klik vervolgens aan de linkerzijde op “Deze PC” en daarna met de rechtermuisknop op de primaire schijf (meestal de C schijf).
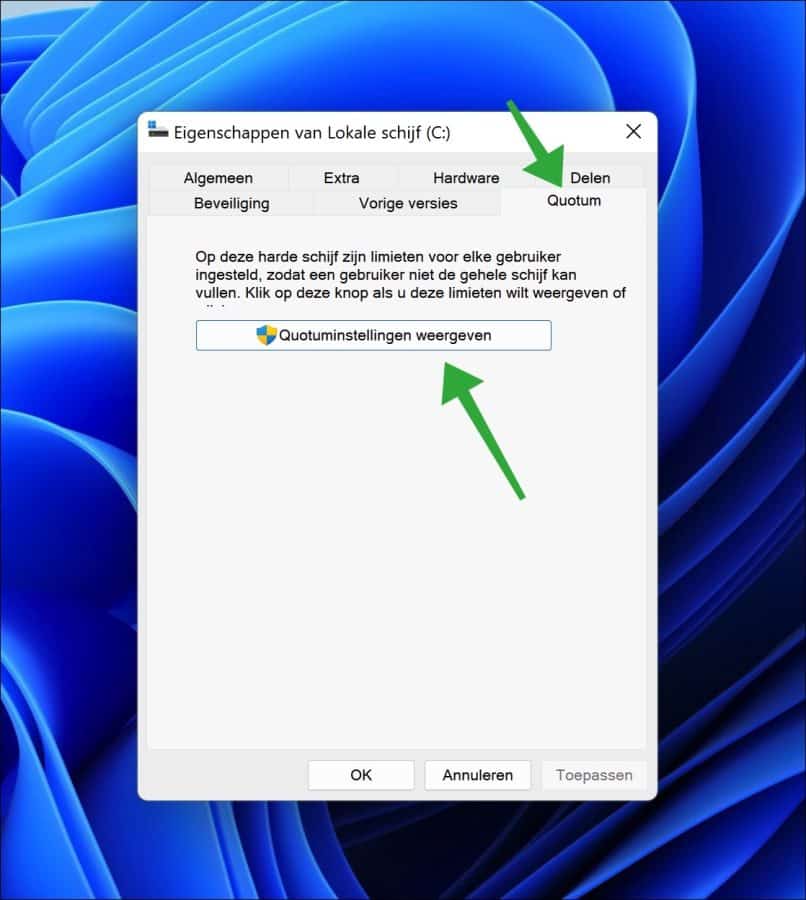
In het menu klik vervolgens op Eigenschappen en klik op tabblad “Quotum”.
Op deze harde schijf zijn limieten voor elke gebruiker ingesteld, zodat een gebruiker niet de gehele schijf kan vullen. Klik op “Quotuminstellingen weergeven” als u deze limieten wilt weergeven.
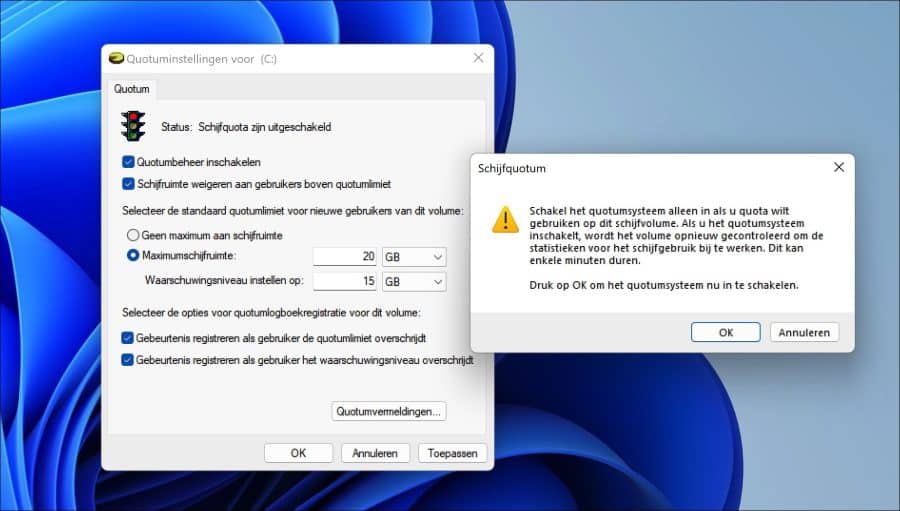
Schakel de optie “Quotumbeheer inschakelen” in om een schijfquota te gebruiken. Als u deze optie heeft ingeschakeld kunt u het configureren.
Schijfquota beheren
Zo kunt u de optie “Schijfruimte weigeren aan gebruikers boven quotumlimiet” inschakelen om een quotumlimiet in te stellen. Hierna kunt u geen, of een maximum aan schijfruimte instellen voor elke gebruiker. Hieronder ziet u een voorbeeld.
Als u wilt, kunt u nog een aantal gebeurtenissen laten opnemen in het quotumlogboek door de opties in te schakelen. Als u alles heeft ingesteld dan klikt u op toepassen. Hierna krijgt u de melding:
Schakel het quotumsysteem alleen in als u quota wilt gebruiken op dit schijfvolume. Als u het quotumsysteem inschakelt, wordt het volume opnieuw gecontroleerd om de statistieken voor het schijfgebruik bij te werken. Dit kan enkele minuten duren.
Het is goed om te weten dat een schijfquota per schijf ingesteld moet worden. Heeft u dus meerdere schijven met verschillende schijfletters, dan herhaalt u dit proces.
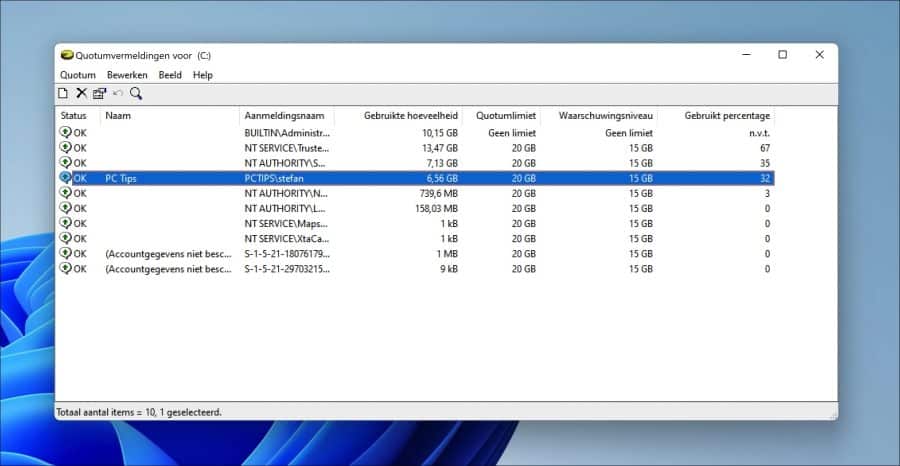
Als u de statistieken voor de quota per gebruikt wilt inzien, dan klikt u in de quotuminstellingen op de knop “Quotumvermeldingen”. Hier ziet u een lijst met alle gebruikersaccounts op de PC.
U ziet de status van het quota, de naam van het gebruikersaccount, de aanmeldingsnaam voor het account, de gebruikte hoeveelheid schijfruimte, het ingestelde quotumlimiet, het waarschuwingsniveau en het gebruikt percentage van het quota.
Ik hoop u hiermee geholpen te hebben. Bedankt voor het lezen!
Help mee
Mijn computertips zijn gratis en bedoeld om andere mensen te helpen. Door deze pc-tip te delen op een website of social media, helpt u mij meer mensen te bereiken.Overzicht met computertips
Bekijk ook mijn uitgebreide overzicht met praktische computertips, overzichtelijk gesorteerd per categorie.Computerhulp nodig?
Loopt u vast met uw pc, laptop of software? Stel uw vraag op ons computerforum en krijg gratis computerhulp van ervaren leden en experts.