
Als u problemen ondervindt met systeemherstel in Windows 11 of 10, dan kunt u mogelijk geen herstelpunt maken of een herstelpunt terugzetten.
Gelukkig zijn alle problemen op te lossen, zo ook die met systeemherstel. Systeemherstel is een functie in Windows die het mogelijk maakt om systeembestand terug te zetten naar een herstelpunt dat eerder door de gebruiker of door het systeem is aangemaakt.
Zo maakt systeemherstel bijvoorbeeld automatisch een herstelpunt aan bij het installeren van bepaalde stuurprogramma’s, het installeren van een Windows-update, het wijzigen van hardware of het installeren of verwijderen van software.
Systeemherstel werkt niet in Windows 11 of 10
Er kunnen verschillende redenen zijn waarom systeemherstel niet werkt. We gaan daarom ook een aantal oplossingen doorlopen om het probleem op te lossen.
Kies een ander herstelpunt
Wanneer u een herstelpunt probeert terug te zetten, maar dit lukt niet. Probeer dan een ander herstelpunt. Soms raakt een herstelpunt corrupt en werkt een eerder of later herstelpunt wel.
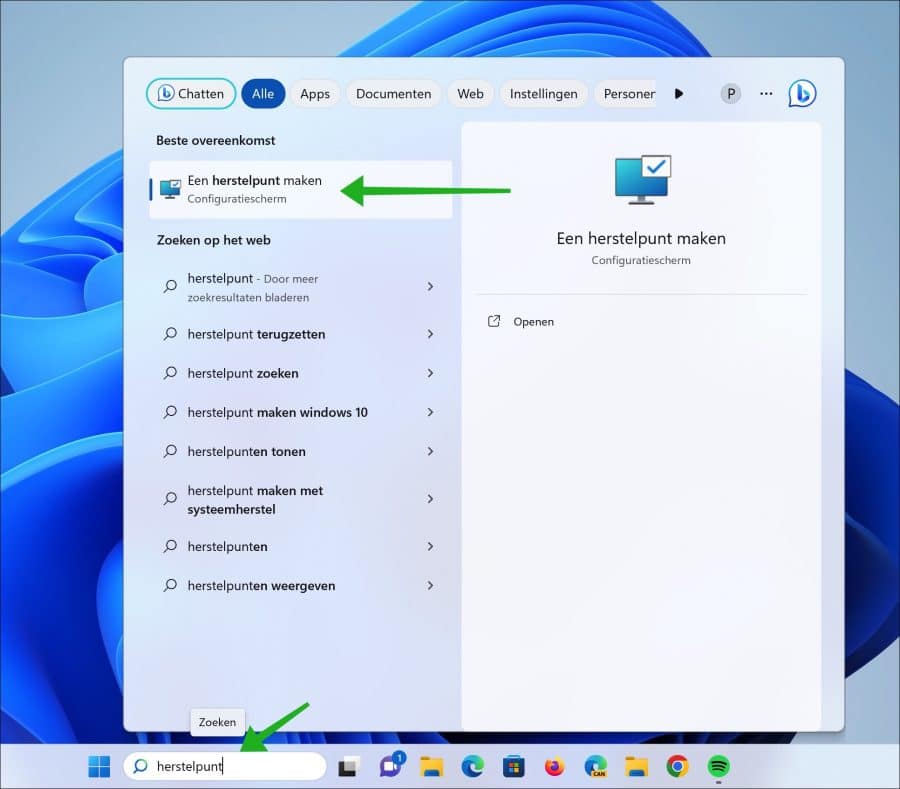
Klik op Zoeken in de taakbalk. Zoek vervolgens op “herstelpunt” en klik op “Een herstelpunt maken”.
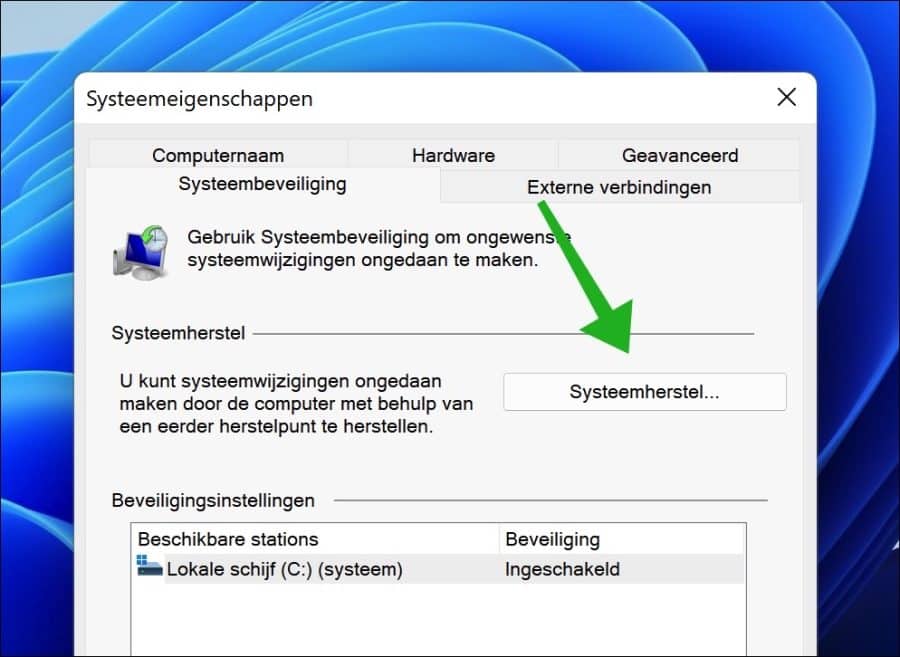
In de systeemherstelopties klikt op de knop “Systeemherstel”.
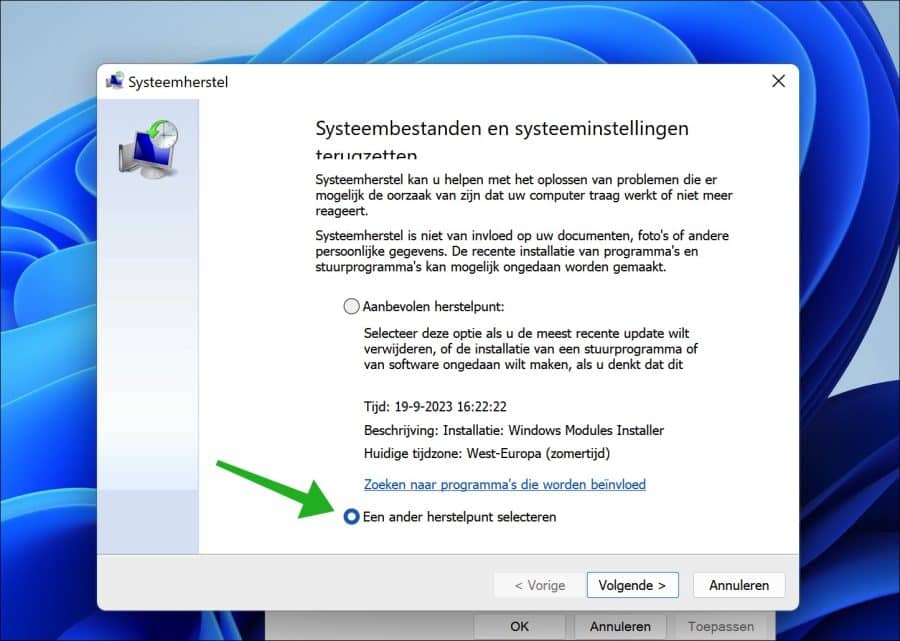
In de systeemherstelopties klikt u op “Een ander herstelpunt selecteren”. Klik op volgende.
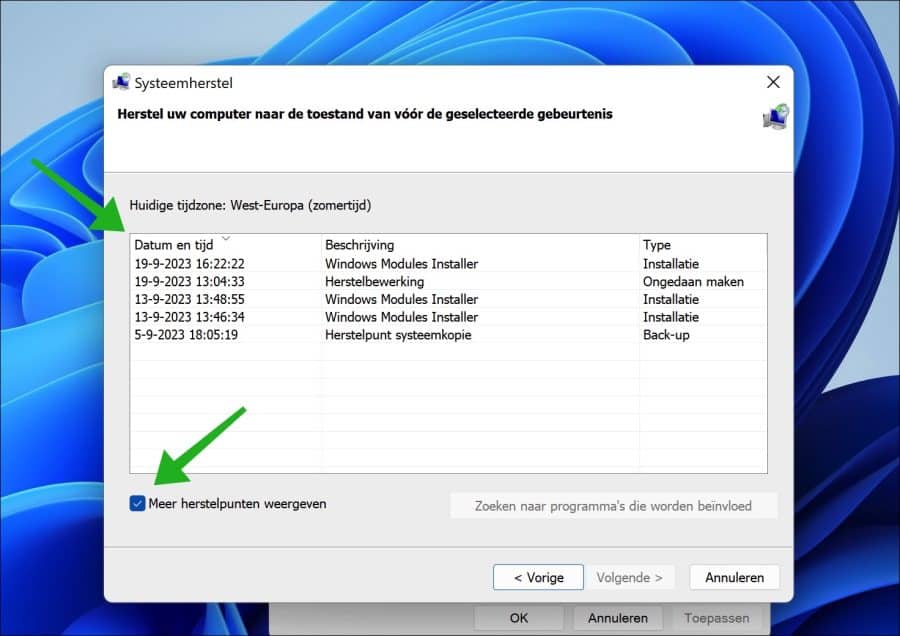
In de systeemherstelopties klikt u onderin op “meer herstelpunten weergeven”. U ziet nu een lijst met alle herstelpunten.
Deze herstelpunten zijn gesorteerd op datum en tijd. Selecteer nu het gewenste systeemherstelpunt. Kies niet de eerste want dit is waarschijnlijk het herstelpunt dat niet werkt. Klik nu op volgende en doorloop het herstelproces.
Zorg dat systeemherstel is ingeschakeld
Wanneer systeemherstel niet is ingeschakeld, kunt u ook geen systeemherstelpunt maken en kunt u de herstelopties niet openen. Controleer dus of systeemherstel is ingeschakeld.
Klik op Zoeken in de taakbalk. Zoek vervolgens op “herstelpunt” en klik op “Een herstelpunt maken”.
Klik nu op de “Configureren” knop. Schakel hierna de optie “Systeembeveiliging inschakelen” in en klik onderin op “toepassen” om te bevestigen.
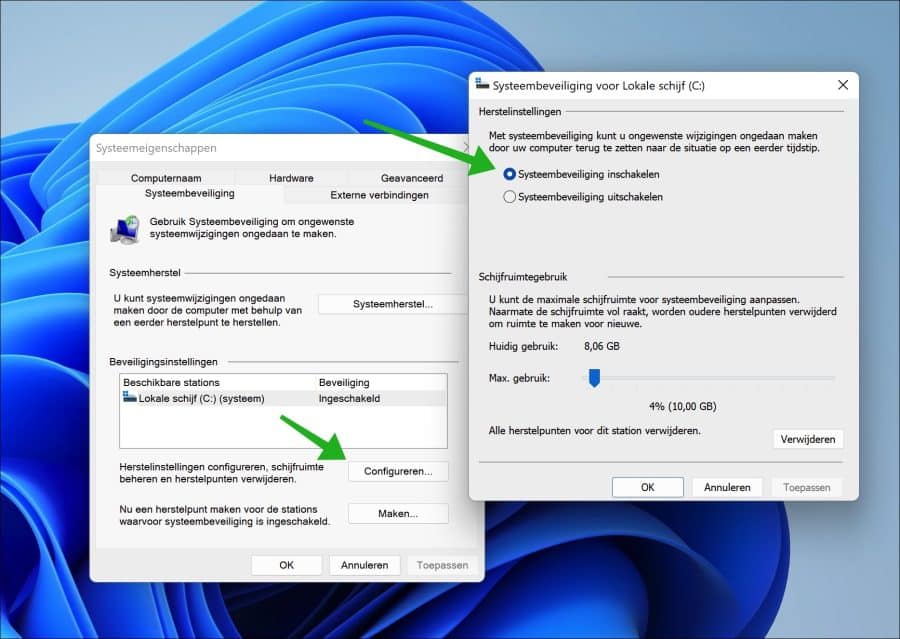
U heeft nu systeemherstel ingeschakeld en u kunt een herstelpunt aanmaken. Als u systeemherstel net heeft ingeschakeld kunt u nog geen herstelpunten terugzetten als u die nog niet heeft aangemaakt.
Start de “Microsoft Software Shadow Copy Provider” service
De service genaamd “Microsoft Software Shadow Copy Provider” is een service die gerelateerd is aan Windows back-up als aan systeemherstel. Het is een onderdeel dat zorgt voor het correct functioneren van de Volume Shadow Copy-service (VSS).
Wanneer een systeemherstelpunt wordt gecreëerd, maakt het gebruik van de Volume Shadow Copy-service om een snapshot te maken van de huidige staat van de systeembestanden, registerinstellingen en andere systeemcomponenten. De “Microsoft Software Shadow Copy Provider” service faciliteert dit proces, en zorgt ervoor dat alles correct functioneert.
Wanneer er iets mis is met deze service of de service staat uit, dan werkt systeemherstel niet. Zorg dus dat de “Microsoft Software Shadow Copy Provider” correct functioneert.
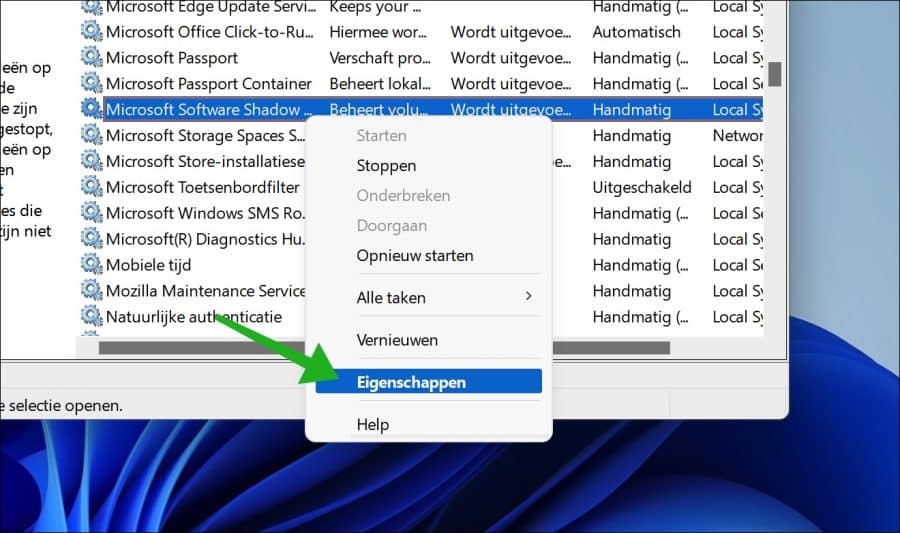
Open de services. Zoek in de lijst van services naar “Microsoft Software Shadow Copy Provider”. Klik erop met de rechtermuisknop en klik op “Eigenschappen” in het menu.
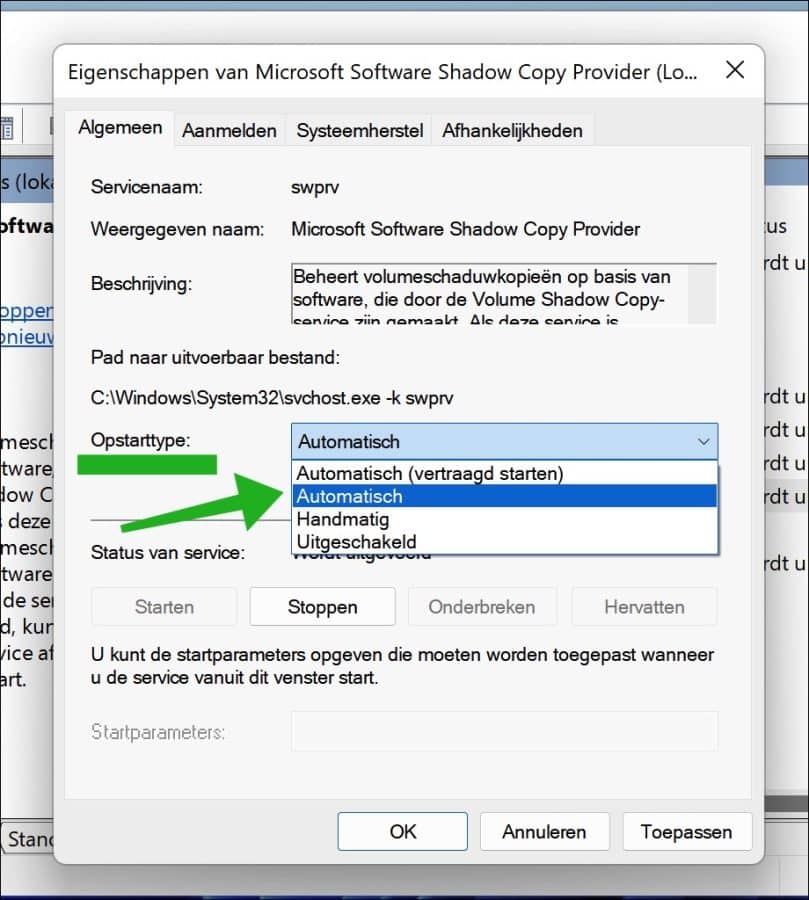
Wijzig het “Opstarttype” naar “Automatisch”. Klik op “Toepassen” en hierna op “OK”.
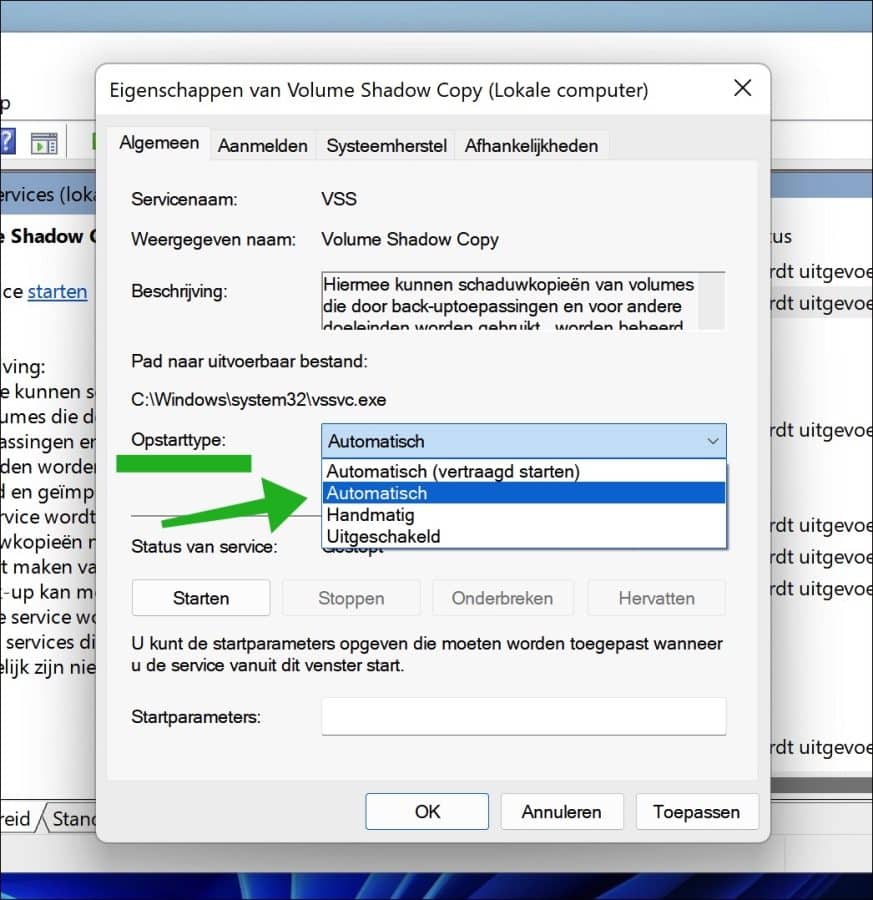
Zoek nu naar de “Volume Shadow Copy” service. Klik erop met de rechtermuisknop en klik op “eigenschappen” in het menu.
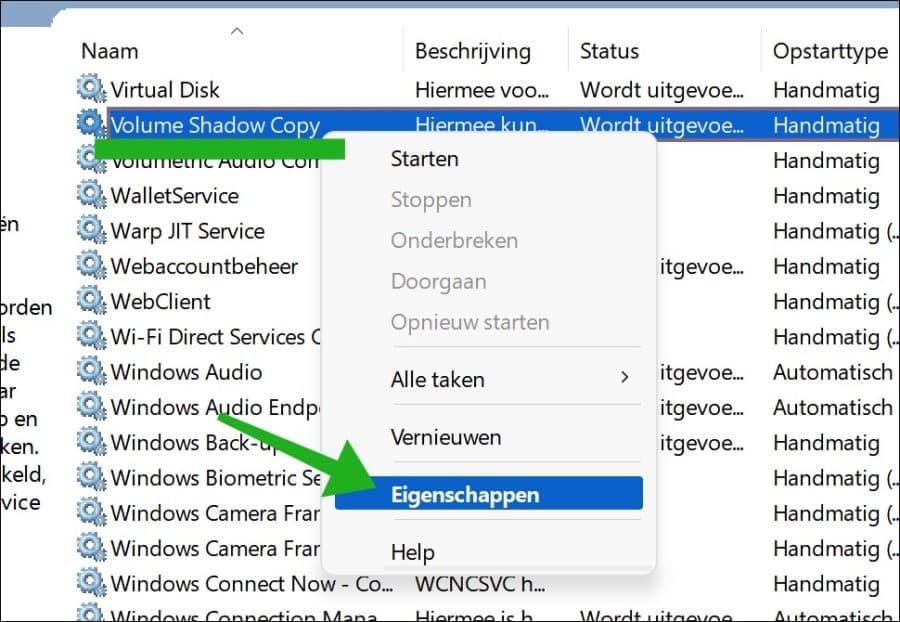
Wijzig het “Opstarttype” naar “Automatisch”. Klik vervolgens op “Toepassen” en hierna op “OK”.
Controleer nu of een herstelpunt wel werkt.
Voer een schijfcontrole uit
Het is mogelijk dat uw computer een probleem heeft met de schijf, hiervoor kunt u Chkdsk gebruiken. Dit is een schijfcontrole die de integriteit van bestandssystemen en schijfvolumes op fouten controleert en, indien mogelijk, deze fouten te automatisch herstelt.
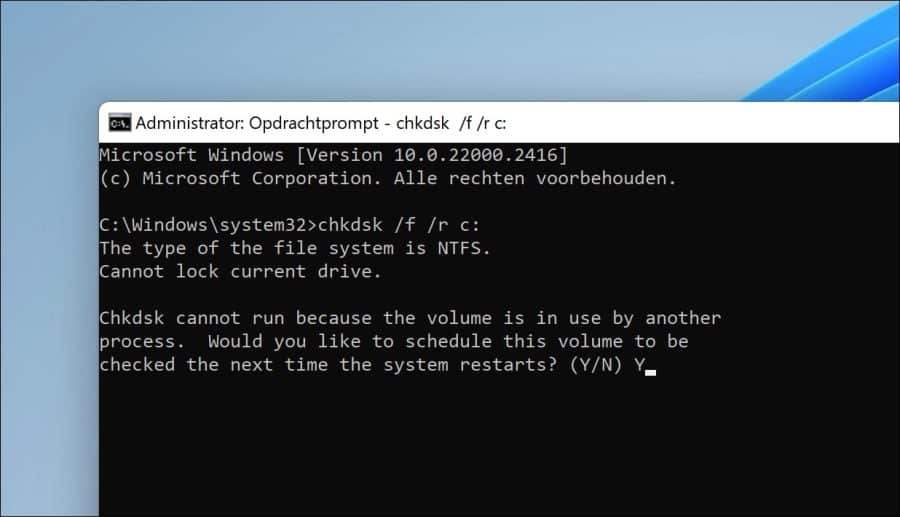
Open een Opdrachtprompt als administrator. In het Opdrachtprompt type:
chkdsk /f /r c:
U dient nu de computer te herstarten. Druk op “Y” om te bevestigen. Zorg dat u niet opgeslagen werk eerst opslaat.
Voer DISM uit
DISM (“Deployment Image Servicing and Management”) is een hulpmiddel in Windows 11 en 10 waarmee systeembestanden kunnen worden gerepareerd. Het is aan te raden DISM uit te voeren om eventueel foutieve systeembestanden die gerelateerd zijn aan systeemherstel automatisch te repareren.
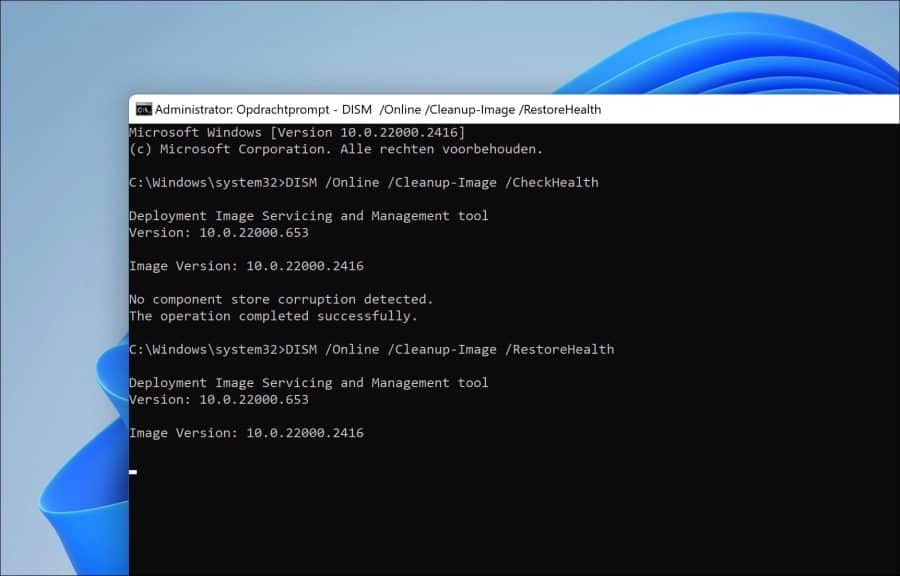
Om te beginnen opent u een Opdrachtprompt als administrator. In het Opdrachtprompt type:
DISM /Online /Cleanup-Image /CheckHealth
en hierna typt u:
DISM /Online /Cleanup-Image /RestoreHealth
Wanneer deze opdracht wordt uitgevoerd, zal DISM proberen om de beschadigde bestanden te herstellen door goede kopieën van die bestanden te halen uit het lokale herstelimage of, indien nodig, via Windows Update.
SFC uitvoeren
Wanneer er systeembestanden zijn beschadigd, dan kan dit de reden zijn waarom systeemherstel niet werkt. U kunt hiervoor SFC gebruiken. SFC staat voor “System File Checker” en is een hulpmiddel in Windows dat kopieën van eventueel beschadigde systeembestanden terughaalt uit de lokale cache van uw computer. Het vervangt dus beschadigde systeembestanden door goede lokale kopieën.
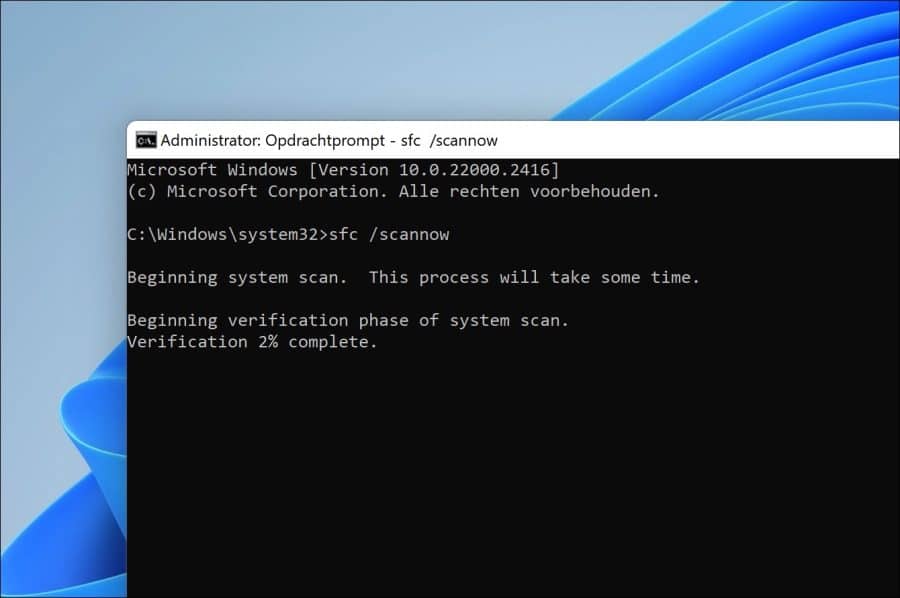
Om te beginnen opent u een Opdrachtprompt als administrator. In het Opdrachtprompt type:
SFC /scannow
Antivirussoftware verwijderen
In enkele gevallen wil antivirussoftware het herstelproces via systeemherstel blokkeren. In dat geval is het aan te raden om uw antivirussoftware of volledig uit te schakelen of helemaal te verwijderen.
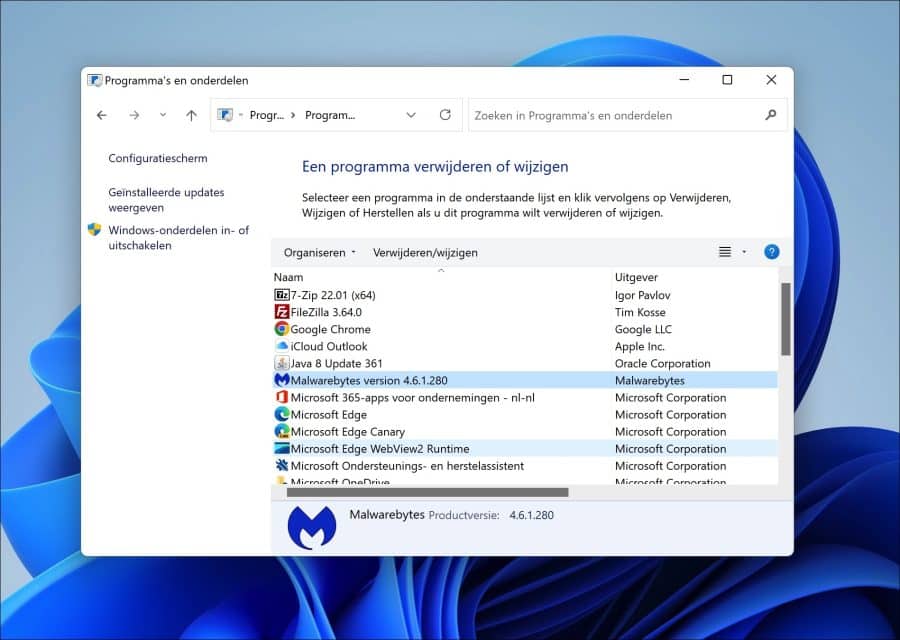
Open het configuratiescherm. Klik vervolgens op “een programma verwijderen”. Selecteer uw antivirussoftware en klik op de verwijderen/wijzigen knop.
Herstelpunt terugzetten via geavanceerde opties
Wanneer software conflicten ontstaan met het herstelproces dan kunt u natuurlijk precies gaan uitzoeken welke software, maar het kan ook makkelijker door een herstelpunt terug te zetten via de geavanceerde opties.
Door uw computer of laptop op te starten naar de geavanceerde opstartopties kunt u ook een herstelpunt terugzetten. Dit voorkomt dat software van derden wordt gestart en sluit eventuele conflicten dus uit.
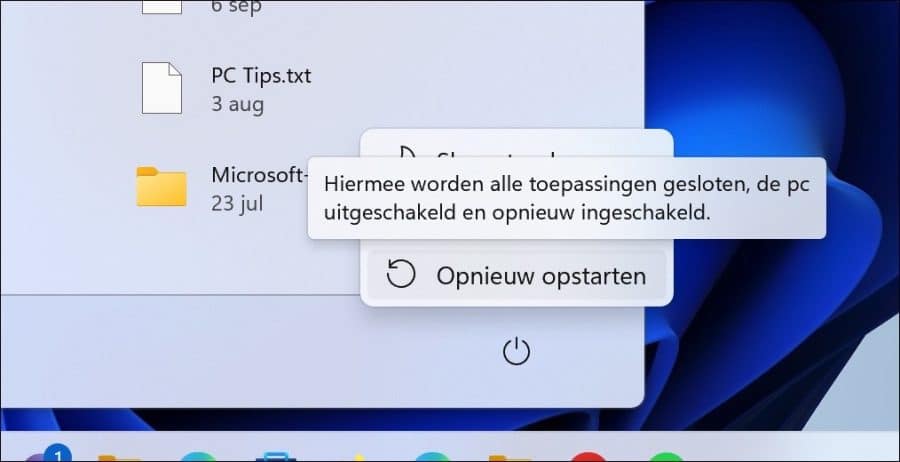
Open het Startmenu. Houdt de SHIFT knop ingedrukt terwijl u op de aan/uit knop klikt. Klik vervolgens met de SHIFT knop nog ingedrukt op “Opnieuw opstarten”.
U komt nu in de geavanceerde opstartopties. Hier kunt een herstelpunt terugzetten, lees meer in deze gids.
Ik hoop u hiermee geholpen te hebben. Bedankt voor het lezen!
❤️ Help mee en deel
Voordat u verdergaat, zou ik het waarderen als u overweegt mijn werk te steunen. In tegenstelling tot veel grote websites is er op PC Tips geen betaalmuur die lezers blokkeert, maar daardoor is uw steun des te belangrijker.Als u onafhankelijke initiatieven zoals deze waardeert, overweeg dan alstublieft om mij te steunen, zodat ik kan blijven doen wat ik met plezier doe. Deel mijn website PC Tips op andere websites, social media of binnen uw eigen netwerk. Hartelijk dank.
🙂 Overzicht met computertips
Bekijk ook mijn uitgebreide overzicht met praktische computertips, overzichtelijk gesorteerd per categorie.