

Windows 11 and Windows 10 give users the option to fix apps and programs that are not working properly.
When an app or program is repaired, its settings, configurations, and other app data are refreshed, and in most cases, apps/programs then begin to function normally again.
During the repair process, Windows also backups app settings, preferences, etc., changes you made to the apps. Windows will automatically restore the saved settings to the app when the repair is complete.
However, this repair option is not available in every app or program. Usually the repair option is only available for pre-installed apps in Windows or apps developed by Microsoft.
Furthermore, you should keep in mind that during the repair, you may lose certain settings and changes you made in the app.
Repair or reset apps in Windows 11 or Windows 10
To repair or reset apps, you need to open the app settings.
Repair or reset application in Windows 11
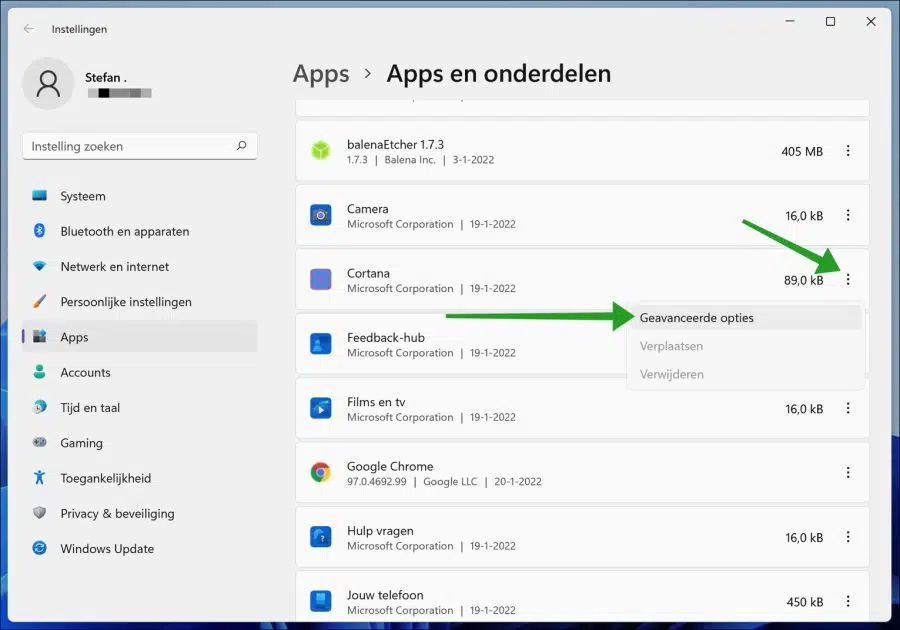
Right-click on the Start button. Click on Settings in the menu. Then click on Apps & features on the left.
Find the app you want to restore in the list of installed apps and click the three dots to the right of the app name. In the menu, click Advanced Options.
If Advanced Options is missing then you can use the do not repair or restore app via the settings.
In the app settings you have two options to reset the app. The first option allows you to reset the app while retaining data. To do this, click on the restore button.
The second option also allows you to reset the application, also called resetting without retaining application data. To do this, click on the reset button.
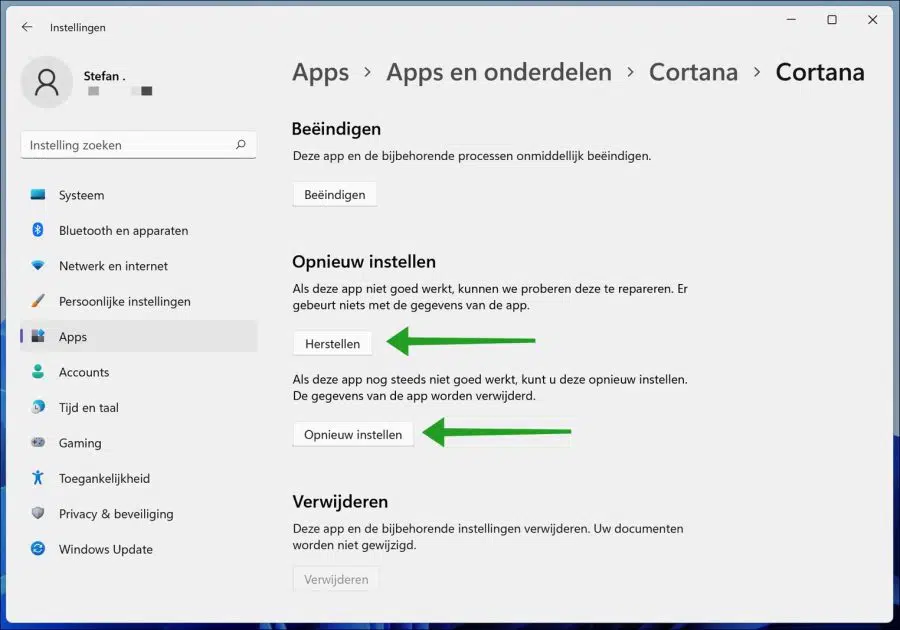
You will then see the software reset and a check mark appear behind the software name when the process is complete. Then open the software again.
Repair or reset application in Windows 10
Repairing an application in Windows 10 works in a similar way to Windows 11. The difference is only the settings look slightly different than in Windows 11.
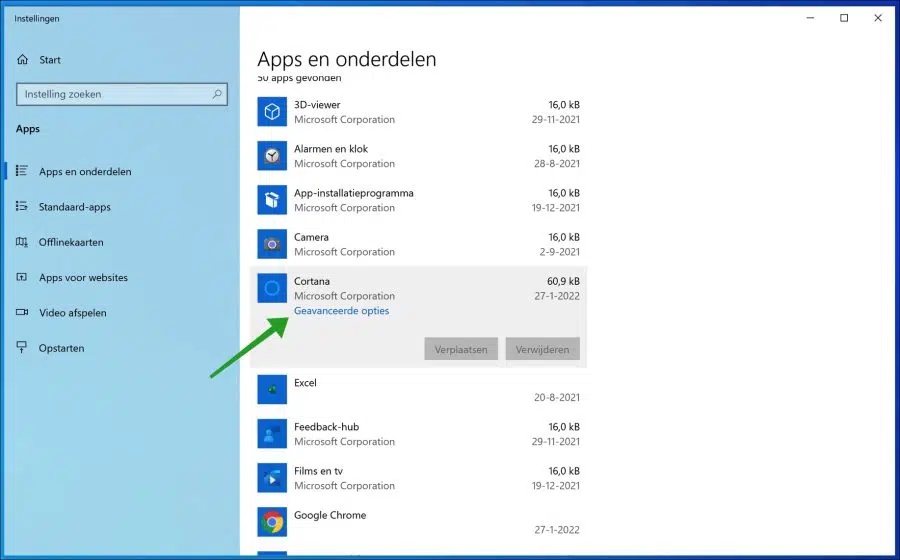
Right-click on the Start button. Click on Apps & features at the very top. Then find the app in the list of installed apps that you wish to repair or reset.
Then click on the name of the application and click on the Advanced Options link. If you do not see these Advanced options, you cannot repair or reset the application through the settings.
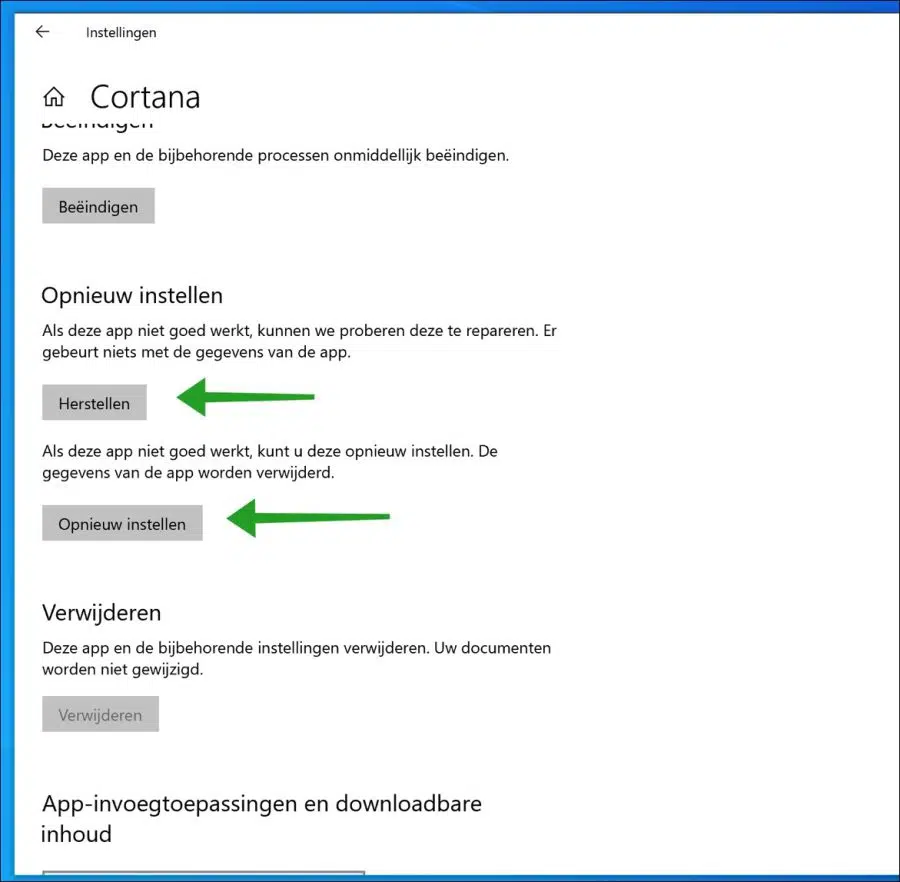
In the advanced options you have two options to reset the app. The first option allows you to reset the app while retaining data. To do this, click on the restore button.
The second option also allows you to reset the application, also called resetting or restoring without retaining application data. To do this, click on the reset button.
I hope this has resolved the issue with an application by repairing or restoring the software application to default values.
Also read:
- Use Scandisk to troubleshoot disk problems.
- Reset Windows update in Windows 11 or Windows 10.
- Windows 11/10 stuck in infinite reboot.
- Boot Windows 11 in safe mode.
- 3 tips to solve a problem in Windows.
I hope this helped you. Thank you for reading!