

We often use the Webcam for attending video calls and meetings through our Windows 11 PC. It can be frustrating if the webcam doesn't work at that moment, especially before an important meeting.
If a webcam does not work in Windows 11, it may be the built-in or external webcam, usually you can encountering problems with the webcam due to hardware errors or problems with third party drivers or software.
When the webcam is not working in your Windows 11 PC, you may see a black screen, the camera light is off, nothing happens when you open the camera or something else.
Several users report that after upgrade to Windows 11 the webcam does not work at all, or no longer works properly.
It doesn't matter what problem you are having with the webcam on a Windows 11 PC. In this article we will go through a number of steps to solve the problem with the webcam identify and resolve.
Webcam not working in Windows 11
Camera troubleshooter
The first thing we will do to solve the webcam problem is to use the Camera troubleshooter. Windows 11 includes a number of troubleshooters by default that can identify problems and fix them immediately.
Right-click on the Start button. Click on settings in the menu. Then click on System on the left and click on troubleshooting. In the troubleshooting settings then click on other troubleshooters.

An additional window will now open that will ask you a number of questions, answer the questions and follow the steps to resolve the camera problem.
Check camera permissions
In Windows 11 you can determine whether there is access to the webcam or camera and which app has access to it. It is therefore advisable to check whether the webcam or camera permissions are enabled.
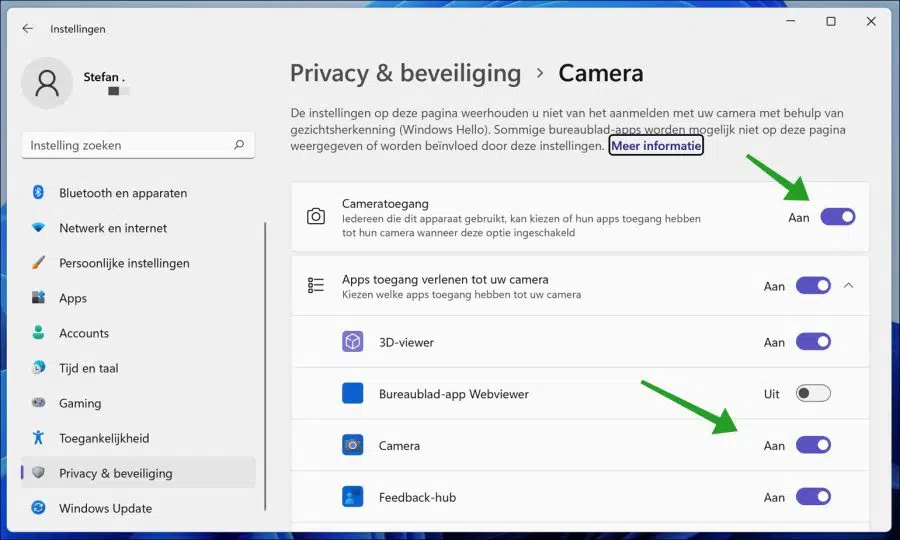
Right-click on the Start button. Click on settings in the menu. Click on privacy and security on the left. Navigate down until you get to app permissions and click on Camera.
Make sure Camera Access is enabled and Camera is also enabled for apps. If the webcam is not working in a particular app, find that app in this list and make sure camera access is enabled for that app.
Switch the webcam off and on again
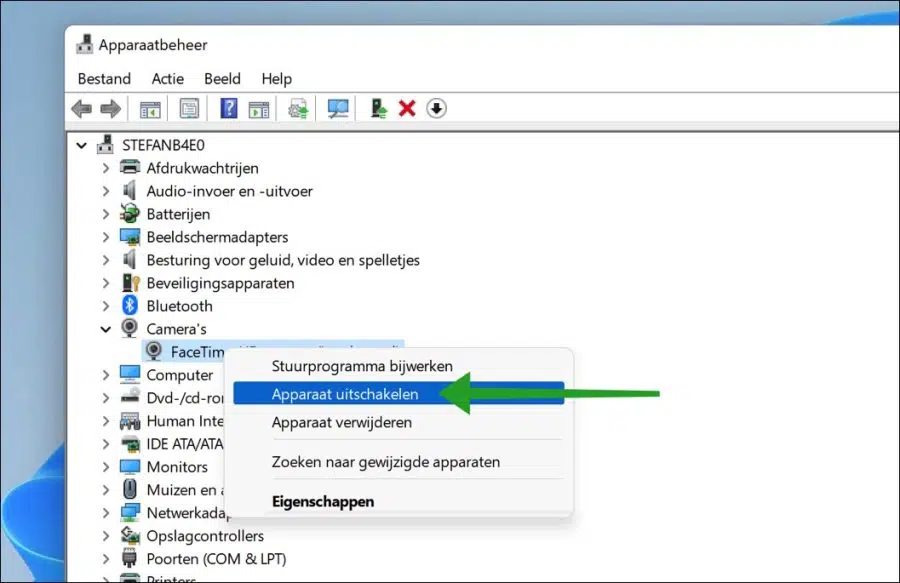
If the webcam is installed correctly, but is not working properly, you can disable and re-enable the camera via Device Manager. This method of switching off and on can sometimes solve webcam problems.
Open device manager. Click Cameras and then right-click the installed webcam. In the menu, click on Disable device. Do the same again and click Enable Device.
Reinstall webcam drivers
A webcam or camera needs drivers to communicate with Windows and vice versa. If the correct drivers are not installed, the webcam will either not function or not be recognized at all by Windows 11.
Whether drivers need to be installed depends entirely on the brand and model of webcam. I recommend that you search the internet for the brand and model of webcam you are using and see if drivers - also called drivers - need to be downloaded and installed.
You can check whether the webcam is not working and whether drivers are installed in the following way.
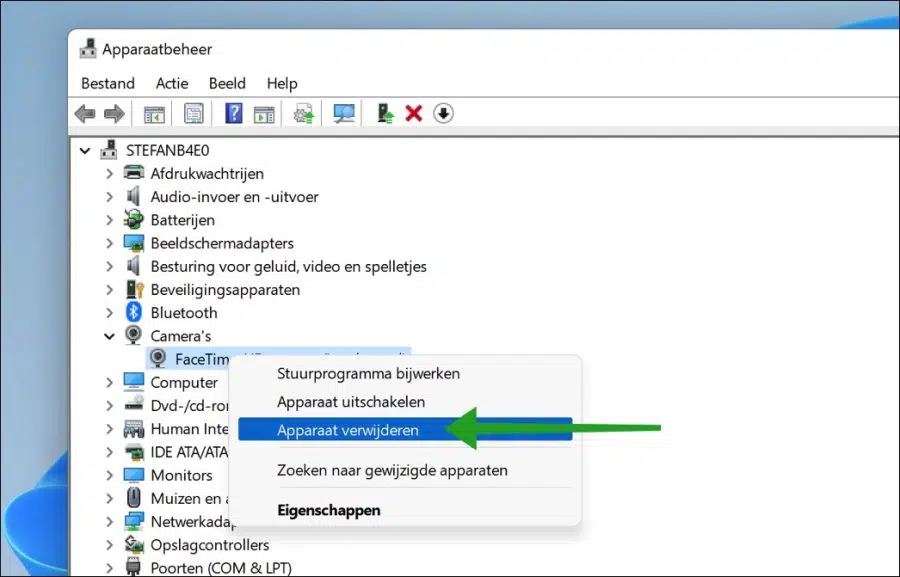
Open device manager. Click on Cameras and see if there is an exclamation mark next to the webcam model. If there is no exclamation mark then there is one driver installed and Windows 11 has found the webcam. This does not mean that the correct driver has been installed. You can try the following to see if you can still get the webcam working.
Right-click on the webcam and click Remove device.
If you have uninstalled the webcam, click on Action in the menu and then on Scan for changed devices.
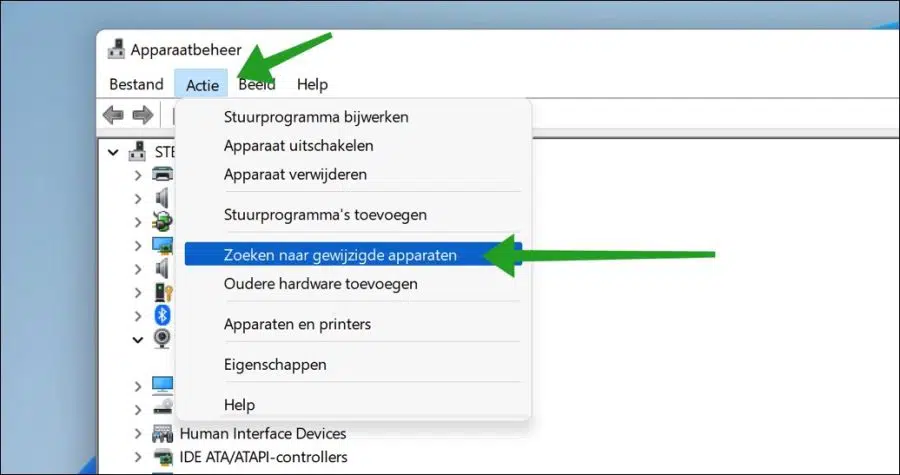
If the webcam needs drivers, reinstall them. If Windows 11 itself already has drivers, Windows 11 will reinstall the webcam.
Reset camera app in Windows 11
Windows 11 uses the Camera app. This is an app specifically designed to communicate with the webcam. It is advisable to reset this app to see whether a connection with the webcam is possible afterwards.
Right-click on the Start button. Click on settings in the menu. Click on Apps on the left and then on Apps & features.
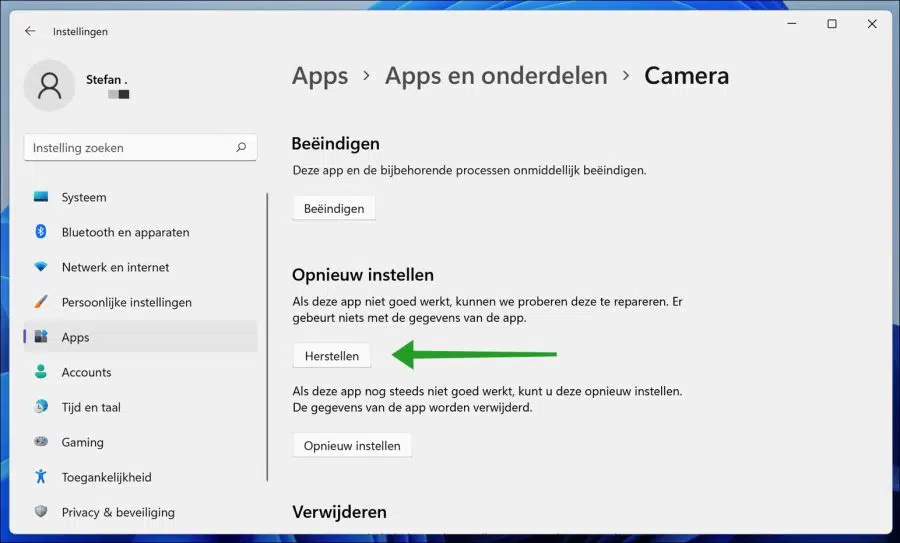
Search for the Camera app and click on the three vertical dots to the right of the camera app. In the menu, click Advanced Options.
Navigate to Reset and click the Reset button. This way you reset the Camera app.
It sounds obvious, but also check all connections from the webcam to the computer. Is the webcam on? Is there a light on? Isn't there a cover for the lens that closes the webcam? Does the webcam have power?
In this article: Camera not working in Windows 10 read some additional tips.
I hope this helped you. Thank you for reading!