
Windows 10 installeren vanaf USB is de snelste en makkelijkste manier om Windows 10 te installeren. Een Windows 10 USB aanmaken via een hulpmiddel van Microsoft helpt u direct om Windows 10 makkelijk te installeren.
Om het Windows 10 besturingssysteem op een computer te installeren, heeft u een opstartbaar USB stick nodig, bijvoorbeeld een USB stick.
Omdat de meeste moderne computers tegenwoordig geen cd- of dvd-station meer hebben, is het installeren van een besturingssysteem met behulp van een optische schijf niet mogelijk.
Alle moderne computers hebben echter minstens één USB ingang, dus u kunt Windows 10 gemakkelijk op uw computer installeren via deze ingang en een USB-stick.
Als u een USB-stick hebt, hoeft u geen duur extern CD/DVD-station aan te schaffen. Bovendien kunt u een USB-stick gebruiken om uw gegevens op te slaan als u die nodig hebt.
Om een 32-bits Windows 10-besturingssysteem te installeren, heeft u minstens een USB-stick van 8 GB nodig, terwijl u voor Windows 10 64-bits minstens een USB-stick van 16 GB nodig hebt.
Nu u een USB-stick hebt, hebt u een computer nodig om uw opstartbare USB-stick voor te bereiden. Als u klaar bent, verwijdert u de USB-stick uit die computer en plaatst u het in de computer waarop u Windows 10 wilt installeren.
De computer waarop u Windows 10 wilt installeren via USB heeft een processor nodig van 1Ghz of sneller. Minimaal 1GB voor Windows 10 32-bit en minimaal 2GB aan intern geheugen voor Windows 10 64-bit. Ongeveer 20GB aan vrije schijfruimte en ondersteuning voor DirectX versie 9.
Windows 10 installeren vanaf USB
Windows 10 installeren op USB via Media Creation Tool
Om te beginnen plaatst u de USB-stick in een computer waarop al Windows is geïnstalleerd. Dit heeft u nodig om de Windows 10 installatiemedia op USB aan te maken.
Open de browser en ga naar: Download Windows 10 (microsoft.com). Klik daarna op de link: Hulpprogramma nu downloaden.

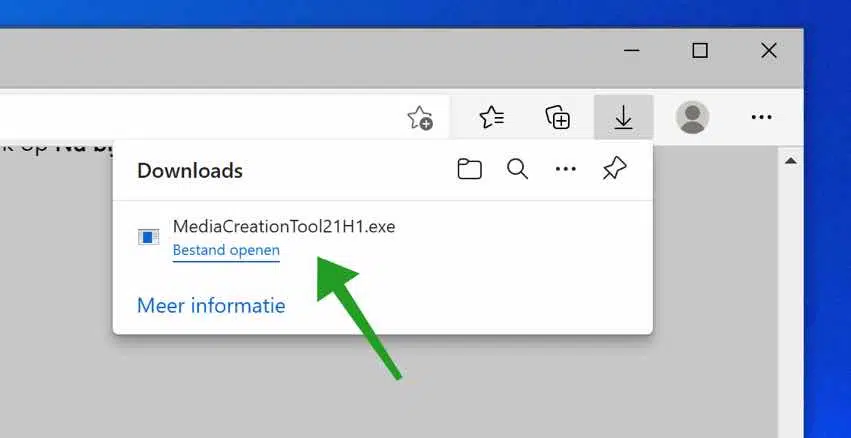
Open het bestand wat wordt gedownload. Dit is de media creation tool. Dit hulpmiddel helpt u om Windows 10 installatie bestanden op de USB weg te schrijven.
Er worden een paar dingen voorbereid als u de media creation tool heeft geopend. Accepteer de voorwaarde.

Selecteer de optie: Installatiemedia (USB-stick, DVD of ISO-bestand) voor een andere pc maken. Klik op volgende.

Selecteer de taal, versie en architectuur voor de computer waarop u Windows 10 gaat installeren. Houdt hier dus rekening met de computer waarop Windows 10 geïnstalleerd gaat worden en niet met de computer waarop u deze Windows 10 USB installatiemedia aanmaakt. Klik op volgende.

Klik op “USB-stick”. Er moet minstens 8GB vrij zijn op het USB-stick. Klik op volgende.

Als u het USB-stick nog niet in de computer had geplaatst dan doet u dit nu. Klik daarna op Stationslijst vernieuwen. Selecteer het gevonden USB-stick en klik op volgende.

Windows 10 wordt gedownload naar uw computer. Na het downloaden van Windows 10 wordt de installatiemedia geverifieerd en wordt de media aangemaakt voor Windows 10.

De Windows 10 installatiemedia via USB wordt aangemaakt. Dit kan even duren.

Als het aanmaken van de Windows 10 installatiemedia is afgerond dan klikt u op voltooien.

Plaats de opstartbare USB-stick in de PC waarop u Windows 10 wilt installeren en stel de opstartvolgorde in op de USB-stick, zodat de computer het Windows 10 installatieproces ervan start.
Ga daarvoor naar het opstarten in het opstartmenu. Druk tijdens het opstarten van de computer op de juiste toets om de BIOS- of UEFI-besturing te openen. Over het algemeen zou dit de F11, F12, DEL, of ESC toetsen moeten zijn. Zo niet, raadpleeg dan de handleiding van uw computer of moederbord.
Nadat u in het opstartmenu bent gekomen, selecteert u de USB-stick en slaat u de instellingen op. Nu zal uw PC opnieuw opstarten vanaf de USB-stick en u vragen een willekeurige toets in te drukken om de installatie van het Windows 10 installatieproces te starten. Druk op een toets, bijvoorbeeld de spatiebalk, om de Windows installatie vanaf het externe medium te starten.
Lees meer Windows 11 terugzetten naar Windows 10.
Windows 10 installeren op USB via RUFUS
Om te beginnen download u Rufus naar uw computer. Plaats vervolgens de USB-stick in uw computer.
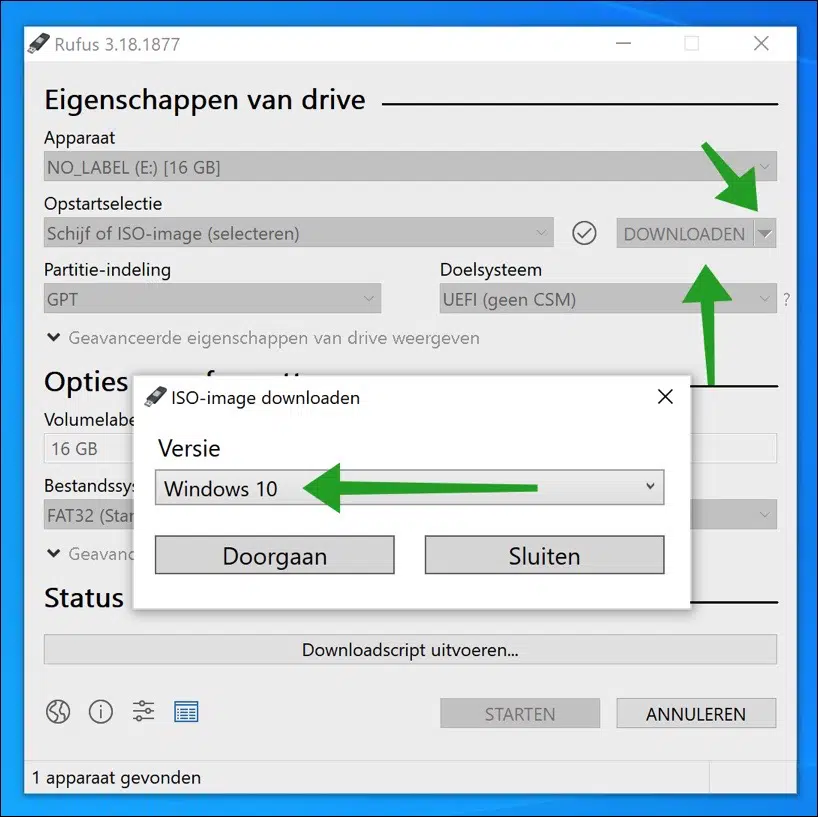
Zorg ervoor dat de USB-stick zichtbaar is in het “Apparaat” gedeelte bovenaan. Klik vervolgens op het pijltje en wijzig de optie in “Downloaden”, klik daarna op de “Downloaden” knop.
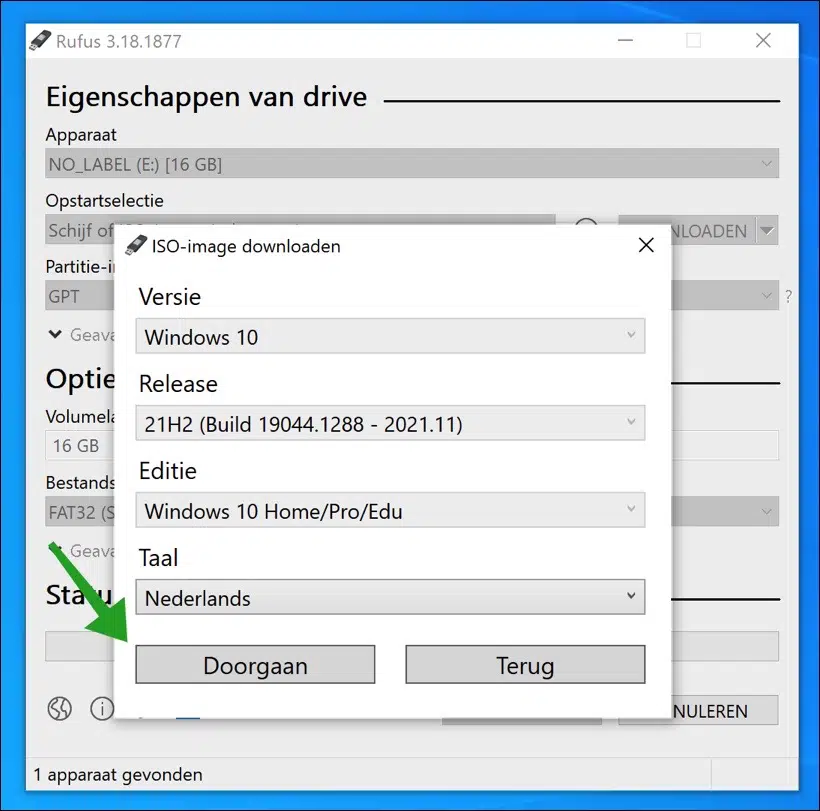
U krijgt nu de vraag welk ISO-bestand u wilt downloaden. Selecteer het “Windows 10” ISO bestand en klik op Doorgaan.
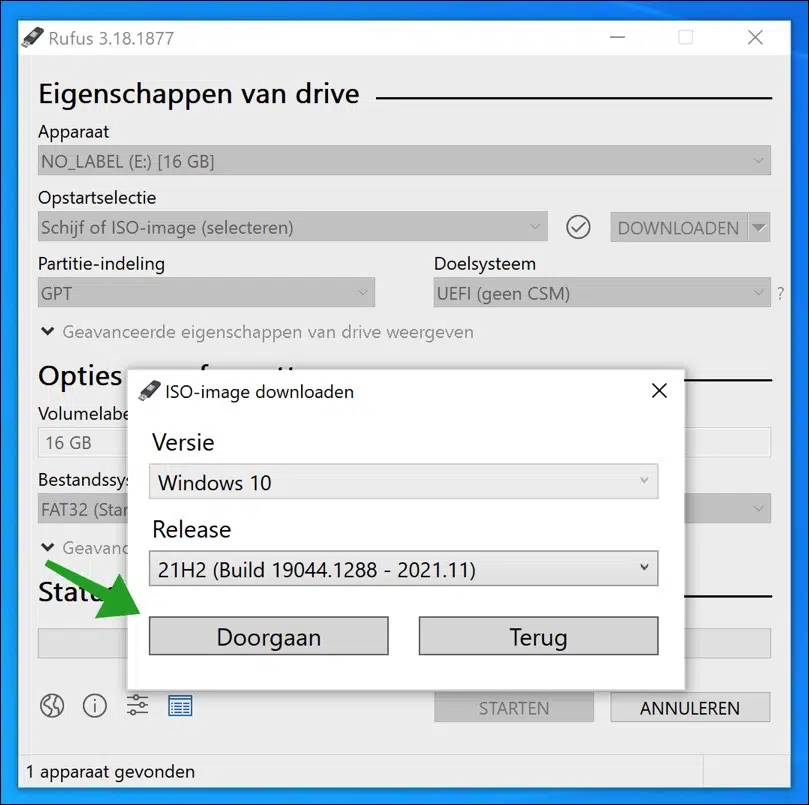
Selecteer vervolgens de release die u wilt installeren. Standaard is de laatste release geselecteerd. Klik op Doorgaan.
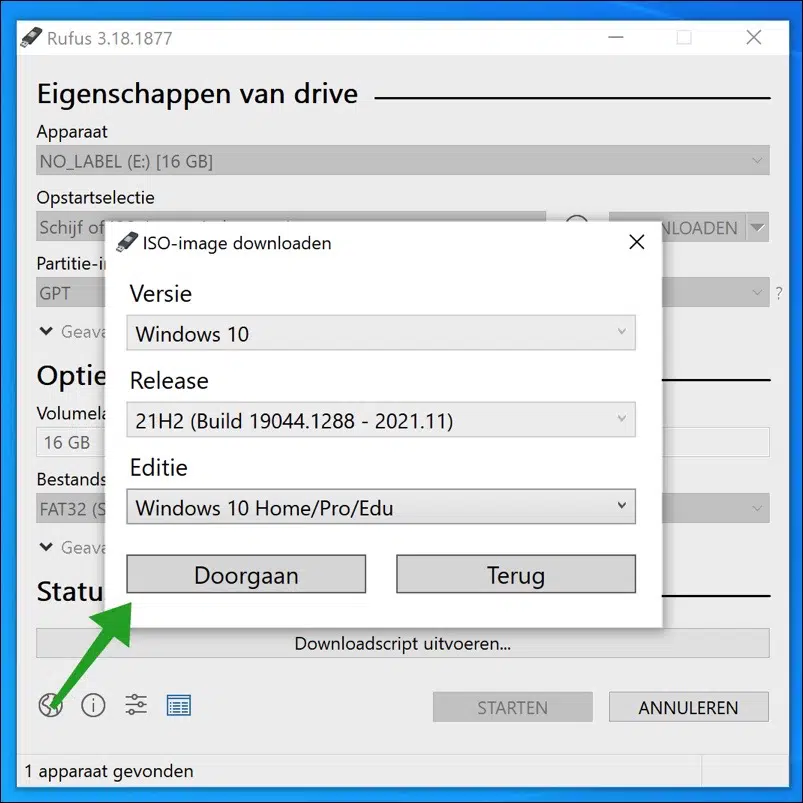
Selecteer daarna de editie van Windows 10 die u wilt installeren via USB. Klik op Doorgaan.
U kunt nu een taal selecteren voor de Windows 10 installatie. Standaard staat Nederlands geselecteerd, mocht u een andere taal willen installeren, selecteer dan de gewenste taal. Klik vervolgens op Doorgaan.
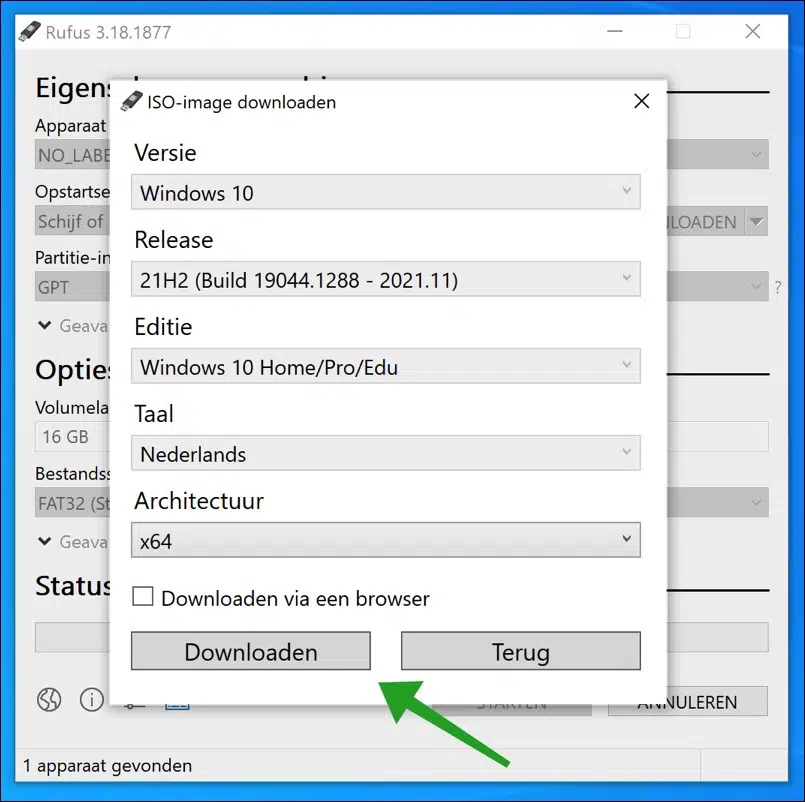
Als laatste wordt er gevraagd welke architectuur u wilt downloaden. U kunt kiezen uit x64 of 32bit. De meeste computers zijn tegenwoordig x64 (64bit). Klik op Downloaden om het ISO-bestand van Windows 10 op te slaan naar uw computer.
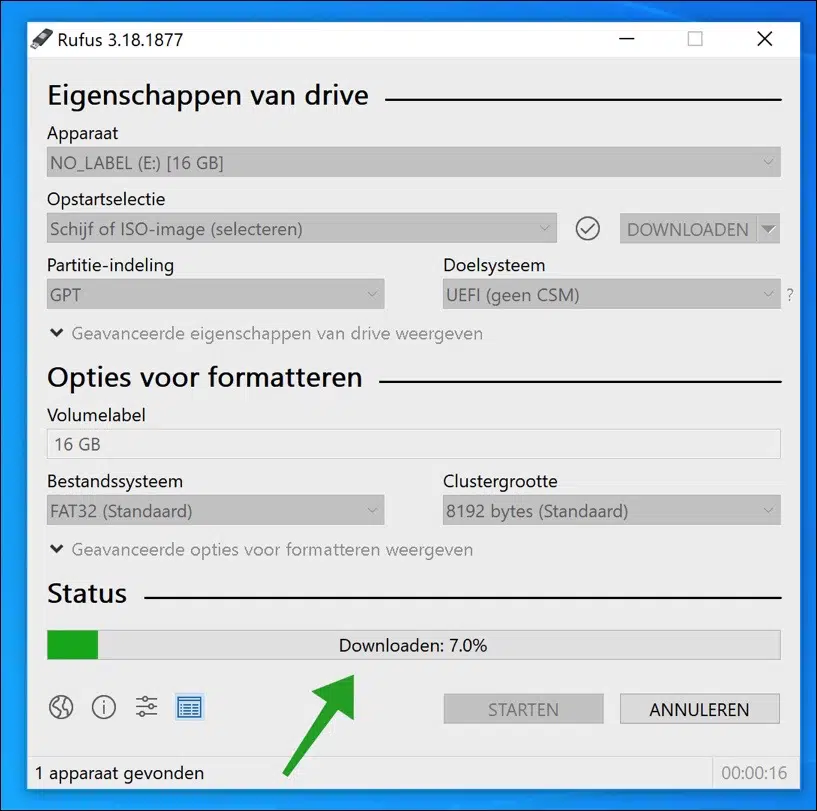
Selecteer de gewenste locatie voor het Windows 10 ISO-bestand. Dit bestand hebben we straks nodig om Windows 10 te installeren op de USB-stick.

Het Windows 10 ISO-bestand wordt nu gedownload. Dit kan even duren.
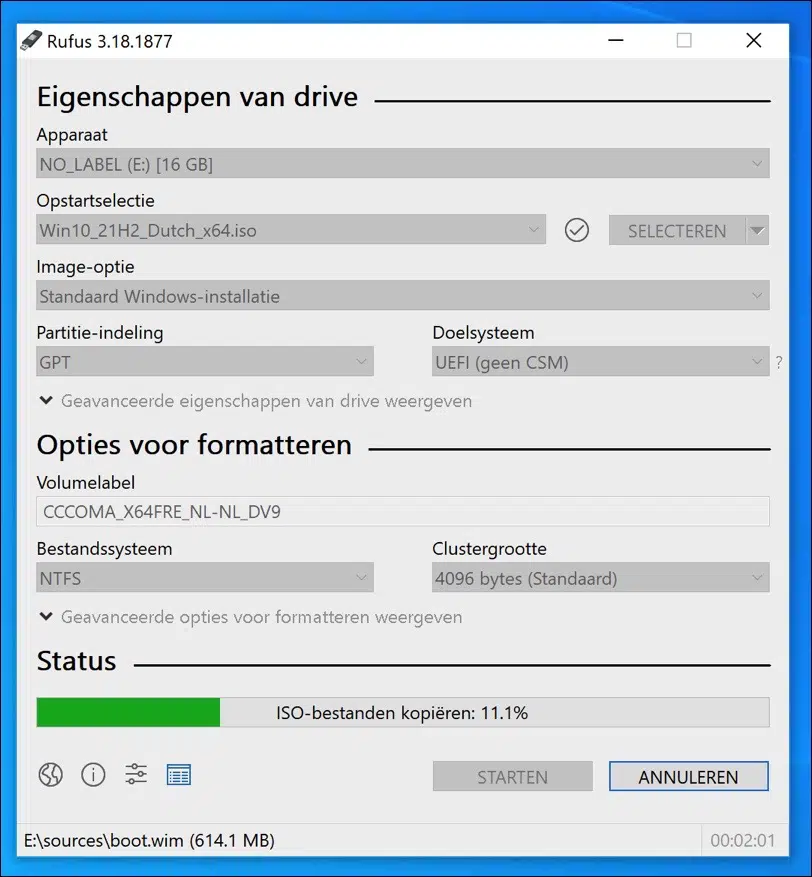
Als het downloaden van het Windows 10 ISO-bestand klaar is, dan klikt u op de “STARTEN” knop onderin. Alle gegevens zijn verder al correct voor ingesteld. Accepteer dat de huidige data op de USB-stick verloren gaat en klik op OK.

De USB met Windows 10 wordt nu aangemaakt. Als het klaar is kunt u met deze USB-stick Windows 10 installeren op een computer.
Lees ook: Windows 11 installeren vanaf USB.
Ik hoop u hiermee geholpen te hebben. Bedankt voor het lezen!
Waar kan ik de installatie sleutel terug vinden van offiche 2019 op mijn harde schijf om deze terug te kunnen installeren.
Ik heb een nieuwe pc code verloren.
Hallo,
hiermee moet het lukken om de licentie sleutel van office 2019 te vinden: https://www.pc-tips.info/tips/windows-tips/windows-office-licentie-opzoeken/
Succes! Groet, Stefan.