
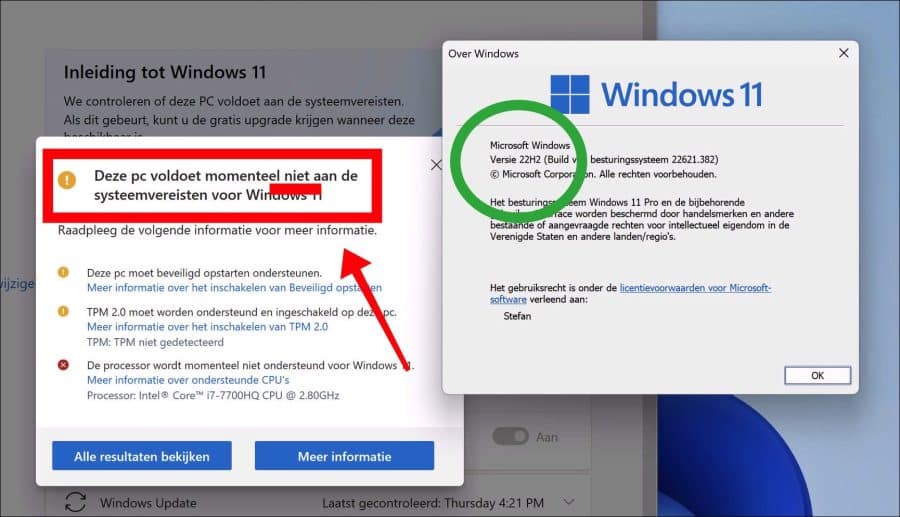
Als u de Windows 11 22H2 update probeert te installeren op een computer die niet voldoet aan de minimale systeemvereisten voor Windows 11, dan krijgt u een foutmelding.
De foutmelding die u ziet, geeft weer dat de PC niet voldoet aan de vereisten om de 22H2 update te kunnen installeren. Het kan zijn dat de PC geen TPM chip heeft, beveiligd opstarten niet ondersteunt of dat er geen geschikte processor is gevonden. Er zijn veel gebruikers die Windows 11 hebben geïnstalleerd op een computer die niet voldoet aan deze gestelde systeemvereisten.
Windows 11 22H2 kan worden geïnstalleerd via USB, via Windows update of via de installatie assistent. Er zijn dus meerdere manieren. Als uw PC niet wordt ondersteunt omdat deze niet voldoet aan de eisen die gesteld worden voor Windows 11 22H2, dan werkt er standaard geen enkele van deze installatie methodes.
Meld u dan aan voor onze nieuwsbrief.
In dit artikel leest u hoe u de systeemvereisten voor het installeren van Windows 11 22H2 via een script kunt omzeilen. Door het omzeilen van vereisten kunt u op een PC die eigenlijk geen Windows 11 ondersteunt toch de 22H2 update installeren.
Windows 11 22H2 installeren op niet ondersteunde computer
Windows 11 22H2 installeren op niet ondersteunde PC via software
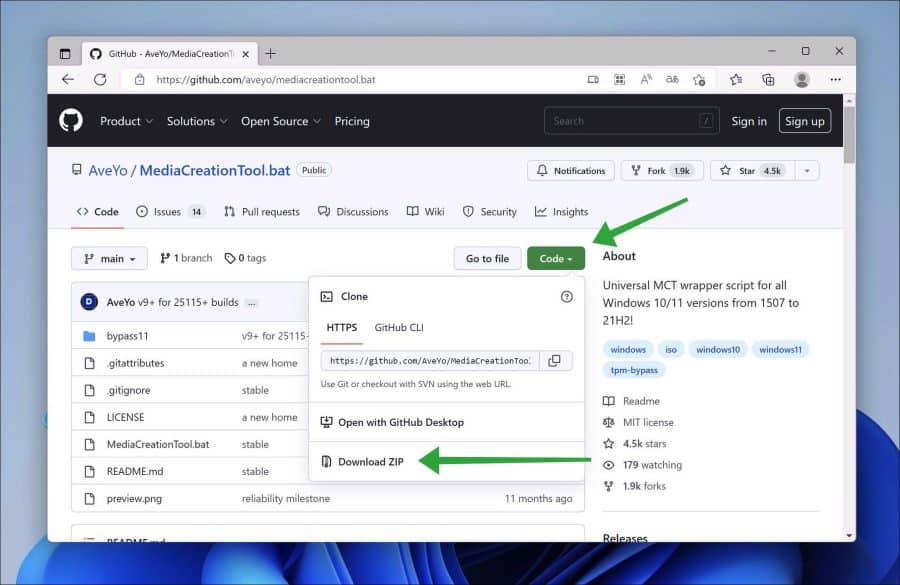
Om te beginnen dient u het hulpmiddel om de systeemvereisten van Windows 11 22H2 te omzeilen te downloaden via Github.
Klik op “Code” en daarna op “Download ZIP”.
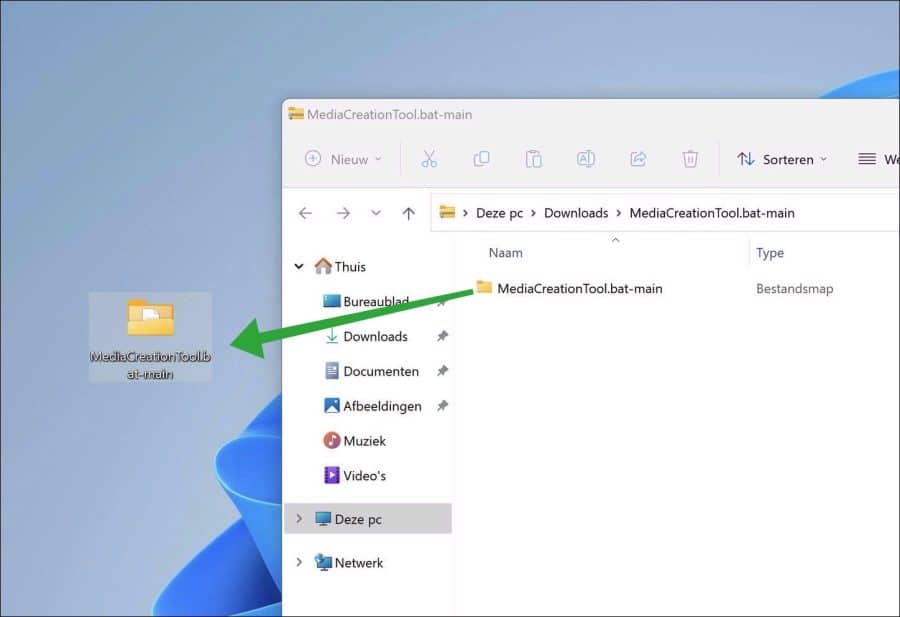
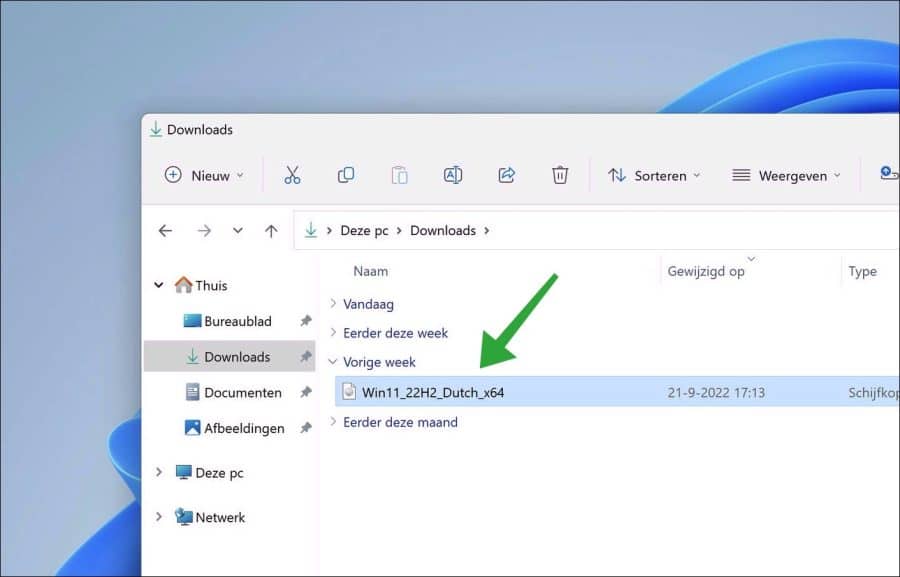
Sleep de inhoud van “MediaCreationTool.bat-main.zip” naar het bureaublad. U moet de inhoud van het ZIP bestand dus eerst uitpakken.
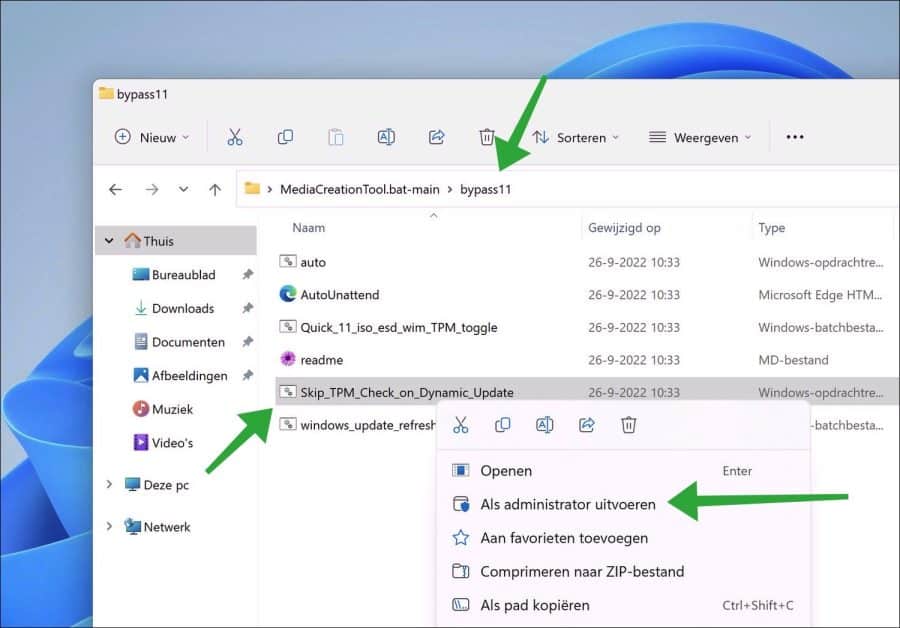
Open vervolgens de map “bypass11” en klik met de rechtermuisknop op het “Skip_TPM_Check_on_Dynamic_Update” bestand. In het menu klik vervolgens op “Als Administrator uitvoeren“.
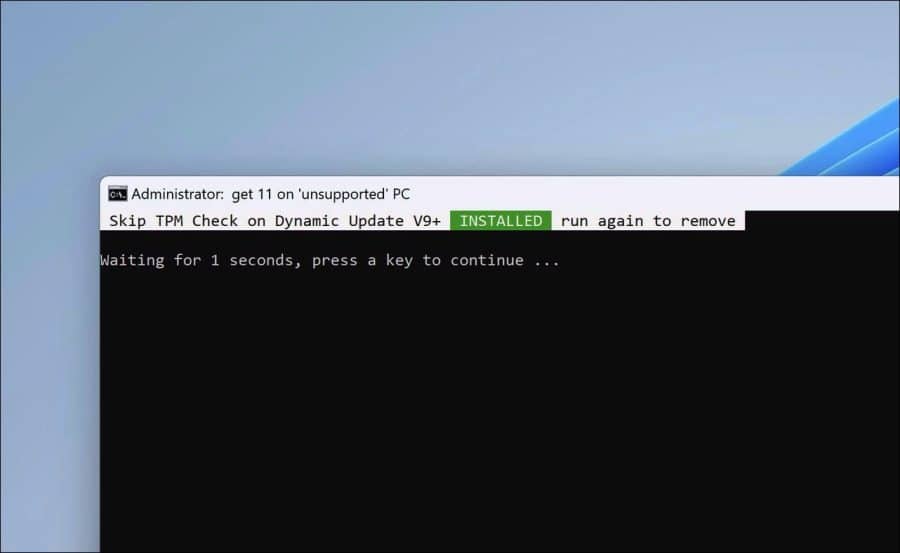
Het script wordt nu uitgevoerd. U start het script éénmaal om de systeemvereisten voor 22H2 te omzeilen. Als er een fout wordt weergegeven gaat er iets mis. Onderstaande afbeelding is hoe het script uitgevoerd moet worden.
Ga verder met de stappen in dit artikel: Windows 22H2 installeren via ISO. Keer na het downloaden van het ISO-bestand terug naar dit artikel en ga verder met onderstaande stappen.
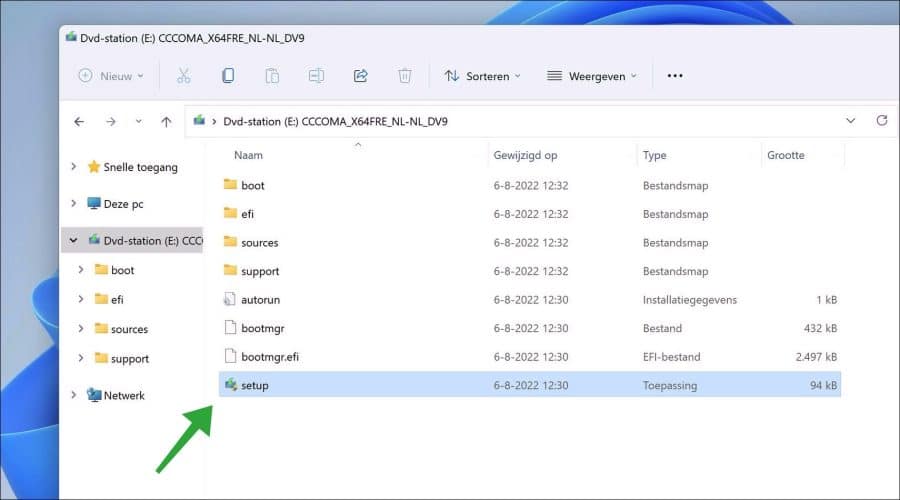
Dubbelklik op het ISO-bestand om de inhoud te openen.
Klik vervolgens dubbel op “Setup.exe” om het installatieproces te starten.
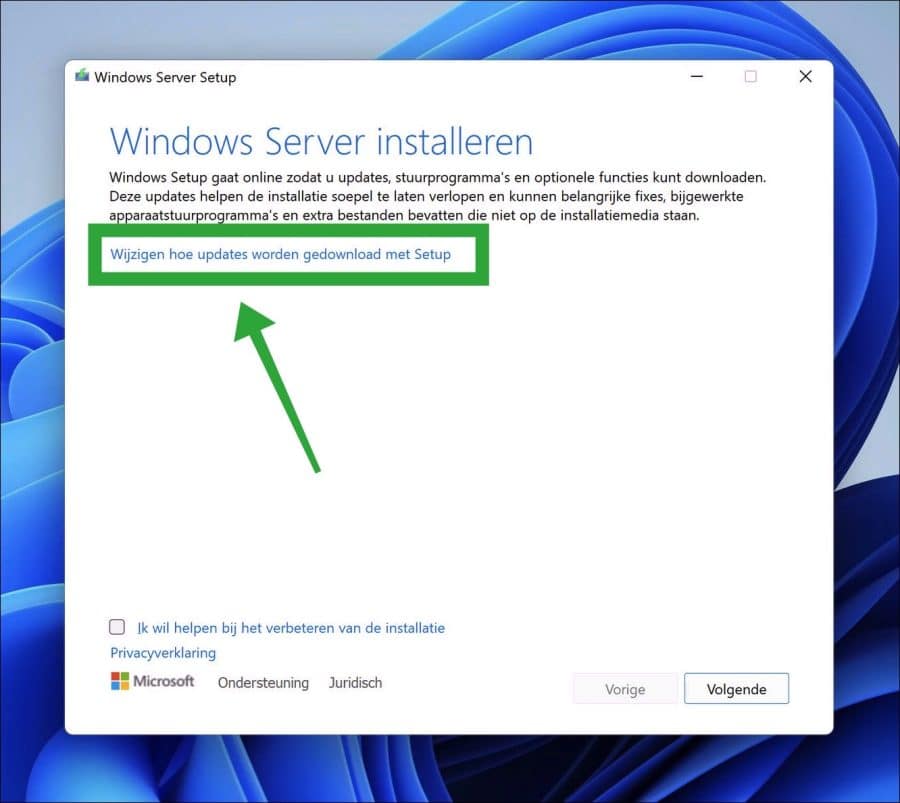
Klik in de installatie op “Wijzigen hoe updates worden gedownload met Setup”.
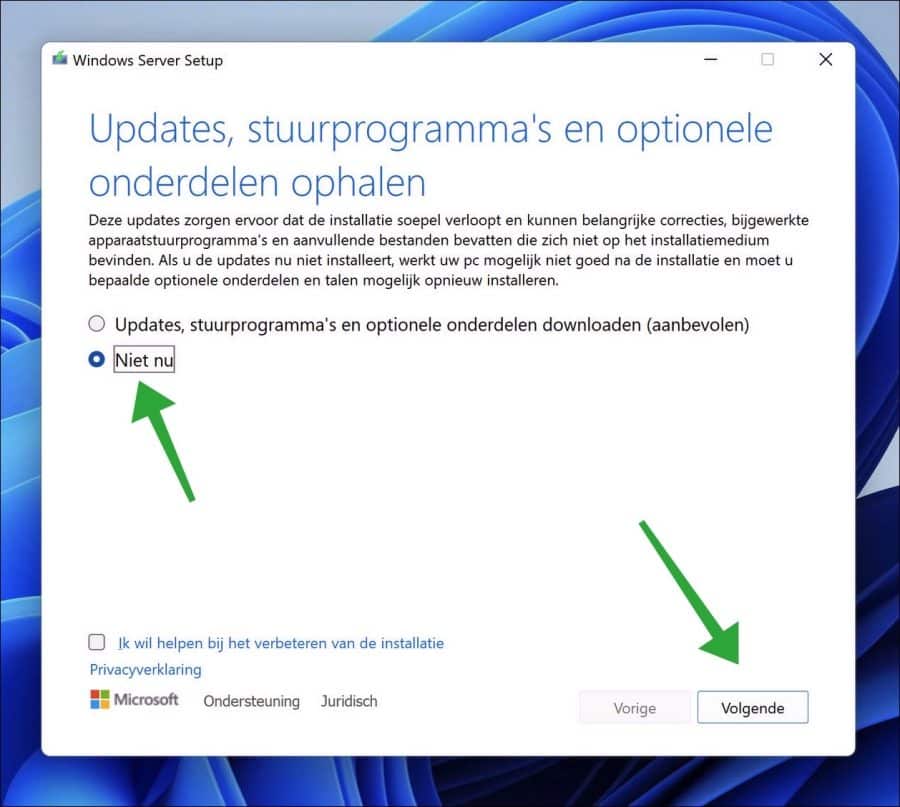
Klik op “Niet nu” en daarna op volgende.
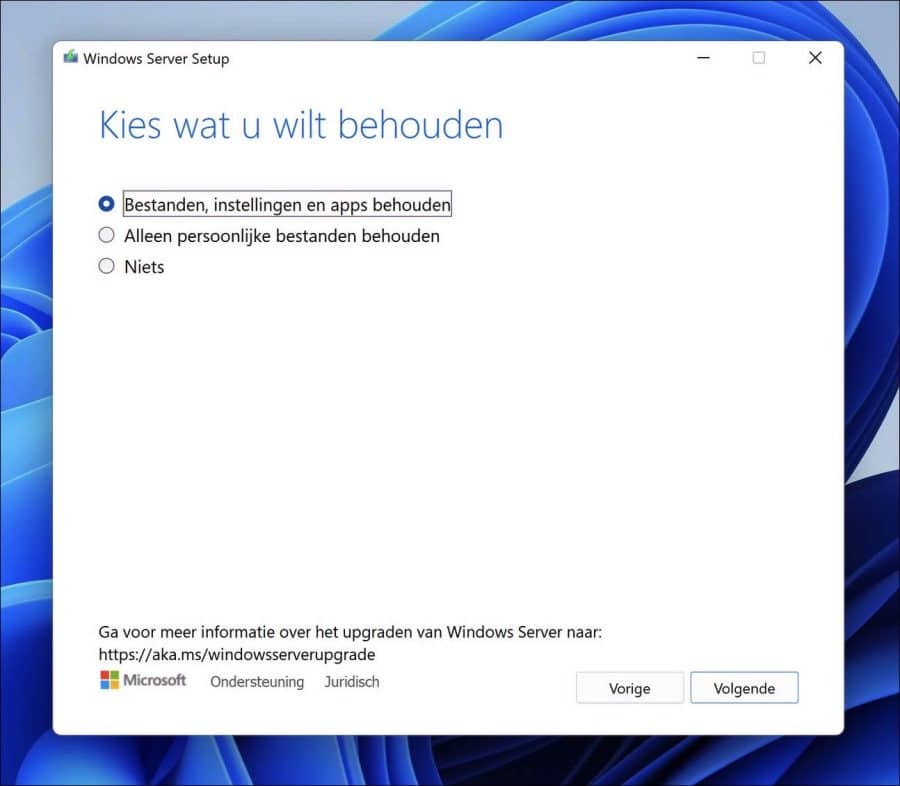
Accepteer de voorwaarde en kies vervolgens wat u wilt behouden. De standaard optie is alles behouden. Klik op volgende.
Om de 22H2 update te installeren klikt u op de “Installeren” knop. De installatie wordt nu uitgevoerd.
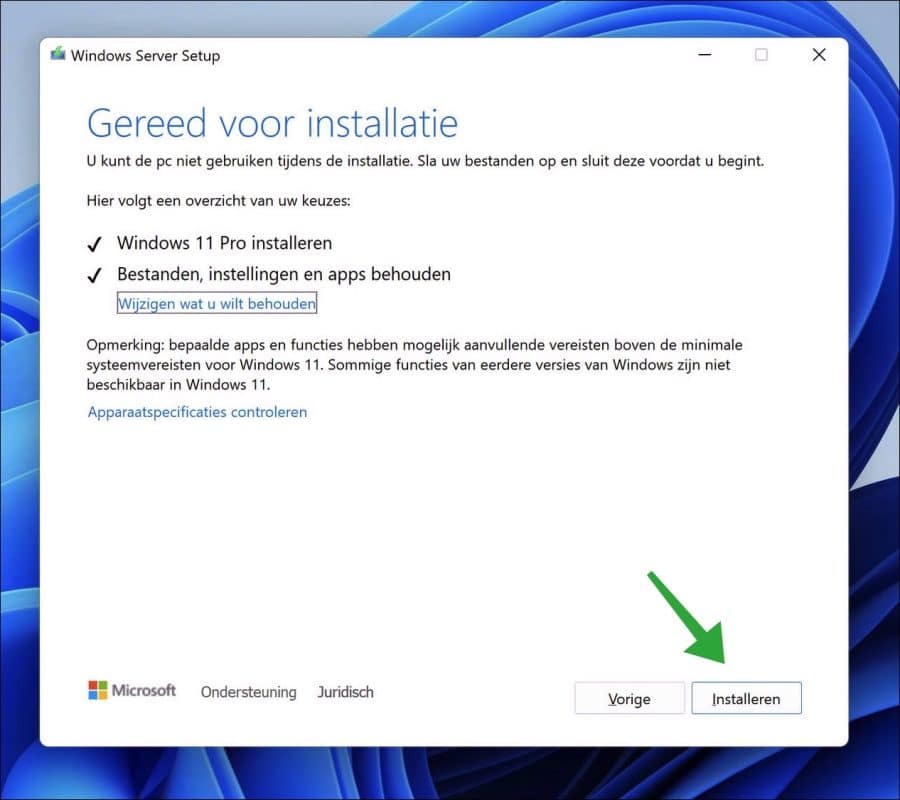
De PC wordt verschillende keren herstart. Windows 11 22H2 wordt nu alsnog geïnstalleerd op een niet ondersteunde PC.
Windows 11 22H2 installeren op niet ondersteunde PC via USB
Ook kunt u Windows 11 22H2 installeren op een USB stick. Deze USB kunt u daarna opstarten door de opstartinstellingen te wijzigen. Hierna kunt u de installatie van de 22H2 update starten zonder TPM en Secure Boot vereisten. Hoe dit werkt leest u in dit artikel:
Ik hoop u hiermee geholpen te hebben. Bedankt voor het lezen!
Beste Stefan,
Kun je wanneer Windows versie 21H2 is geïnstalleerd gelijk updaten naar Windows 23H2?
Het beterft een pac waar windows 11 op is geïnstaleerd welke daar eigenlijk niet voor geschikt is.
Alvast bedankt voor je reactie
Hallo, ja dat kan. Daarvoor kunt u deze gids gebruiken:
https://www.pc-tips.info/tips/windows-tips/23h2-update-voor-windows-11-installeren-op-oude-pc/
Succes!
Beste Stefan,
Allereerst bedankt voor alle nuttige informatie!
Weet je misschien waar ik ISO van Windows 11 22H2 kan downloaden?
Dus niet 23H2
Hallo, dit kan met RUFUS. Lees meer: https://www.pc-tips.info/tips/windows-tips/windows-11-of-windows-10-downloaden-met-rufus-software/
Succes! 🙂
Hallo Stefan
Misschien is mijn vraag hier beter geplaatst
Heb dus op deze methode 11 pro en de 22h2 update geinstalleerd en draait goed
Kan ik nu gewoon de 23h2 update installeren op de zelfde methode
Mvg:sjaak
Hallo Sjaak, fijn dat het is gelukt. Hoe u 23H2 installeert leest u hier:
https://www.pc-tips.info/tips/windows-tips/23h2-update-voor-windows-11-installeren-op-oude-pc/
Succes!
Mijne heren,
Ik heb een Acer spin3 51N met Windows 11 Home 21H2, ik zit al een tijd dat de update naar 22H2 niet lukt maar de pc blijft wel steeds zeggen dat er een update beschikbaar is.
Wat is er niet goed aan mijn pc waardoor hij niet update?
De prosessor is : 11th Gen Intel(R) Core(TM) i3-1115G4 @ 3.00GHz 3.00 GHz.
Vriendelijke groet,
H. Ferwerda
Hallo, deze processor is ondersteund. Staat Secure Boot en TPM aan in de BIOS?
https://www.pc-tips.info/tips/windows-tips/windows-11-tpm-2-0-secure-boot-inschakelen-bios/
Is er genoeg schijfruimte beschikbaar?
https://www.pc-tips.info/tips/windows-tips/schijfruimte-vrijmaken-in-windows-11/
Geprobeerd 22H2 zoals aangegeven in de instructie te installeren?
Succes!
ik gebruik gewoon rufus v 3.18 van een bestaande versie maak een opstart usb van
Werkt prima inderdaad. Hoe dit werkt leest u hier:
https://www.pc-tips.info/tips/windows-tips/windows-11-22h2-installeren-via-usb-zonder-beperkingen/
Hallo Stefan,
Geen vraag, geen bemerking, alleen maar een bedankje en felicitaties met uw prachtig initiatief!
Vriendelijke groeten,
Jan
Dank! 🙂
Bedank voor de info.
Heb de Link gelezen , maar vind het een risico , want ik wil geen schade aanrichten.
Bovendien vind ik vreemd dat het nu bij 22H2 een probleem is en bij 21H2 heb ik geen problemen gehah bij het installeren
Nogmaals bedankt
Gert
Goede middag. Op mijn desktop met Windows 11 kan ik 22H2 niet te installeren.
De PC voldoet aan de Windows 11 eisen en ik heb voldoende ruimte[ 360GB]
De tests SFC en Disk geven geen problemen , maar op de normale wijzen installeren geeft een fout 0x8007001 en via assistenten wizard krijg ik de fout melding. (Windows 11 setup. We kunnen niet bepalen of uw pc voldoende ruimte heeft om Windows 11 te blijven installeren. Start setup opnieuw)
Verschillende pogingen gedaan , maar niets helpt
Ook via usb-optie handmatig te installeren helpt ook niet met dezelfde melding van te weinig ruimte
Heeft u een goede oplossing
b.v.d. en groet Gert
Hallo, dat is een probleem met dynamische schijven. Hier staat in het Engels meer informatie en een mogelijke oplossing. Zo ver mij bekend is er officieel nog geen oplossing vanuit Microsoft, een directe oplossing heb ik dus niet.
https://answers.microsoft.com/en-us/windows/forum/all/windows-11-installation-we-cant-tell-if-your-pc/6d485a86-30ea-407d-9e3a-cab50b6f81cf
Succes!
Deze usb-optie levert dezelfde fout op (bij de Nederlandstalige iso, maar dat mag toch niets uitmaken?): extractiefout bij de iso….
Heb de softwareoptie nog niet geprobeerd.
Hallo, er zit iets fout in uw computer. U opent de ISO met Rufus, dat vermoed ik dat u dat doet vanwege de “extractiefout”. Zorg dat de ISO lokaal staat, niet op een netwerk, externe harde schijf, USB of gedeelde share. De informatie in dit artikel werkt gewoon, ook de vorige informatie waar u op gereageerd had. Probeer de oplossing te vinden waarom de ISO bij u niet goed opent. Succes!
Beste Stephan, dank voor de snelle reactie. De iso stond gewoon op de lokale harde schrijf…
Heb inmiddels de Github-optie geprobeerd en het is gelukt!!! Zeer bedankt!
Hallo, ik heb de nieuwste versie erop gekregen met de iso usb stick methode waarvoor dank, echter bij windows update blijft de waarschuwing staan dat de laptop geüpdatet moet worden naar windows 22H2, als je dan op downloaden drukt dan gaat ie een paar seconden en breekt het meteen af dus de melding blijft staan met een geel uitroepteken, heb de laptop opnieuw opgestart maar dat helpt niets, is daar ook nog een oplossing voor.
p.s. ik heb bij systeeminfo gekeken en de 22H2 staat er echt op.
Mvg. Ton van Dongen
Hallo, u kunt controleren of 22H2 erop staat door met de rechtermuisknop op de Startknop te klikken. In het menu klik op “uitvoeren”. In het uitvoeren venster type: winver.
Als er “Versie 22H2” staat in deze geïnstalleerd. Als het probleem zich blijft voordoen, dan raad ik aan de Windows update probleemoplosser uit te voeren:
https://support.microsoft.com/nl-nl/windows/windows-update-probleemoplosser-19bc41ca-ad72-ae67-af3c-89ce169755dd
Succes!
Beste pc tips, mijn probleem is dat ik alles kan doen om de 22H2 te installeren tot mij pc terug moet opstarten, dan krijg ik de foutmelding 0XC1900101-0x20017, SAFE_OS , opstarten.
Is daar een oplossing voor AUB?
Suzy Cools
Hallo, er zijn meerdere redenen waarom deze foutmelding ontstaat. Hier leest u enkele oplossingen geadviseerd door Microsoft: https://answers.microsoft.com/en-us/windows/forum/all/0xc1900101-0x20017-installation-failed-during-safe/cb3c7697-e125-4557-9042-fa5933b6ac0b
Succes!
Beste Stefan, Wanneeer ik het script toepas krijg ik de melding:
De syntaxis van de bestandsnaam, mapnaam of volumenaam is onjuist.
Het systeem kan het opgegeven pad niet vinden.
Het systeem kan het opgegeven pad niet vinden.
Het systeem kan het opgegeven pad niet vinden.
Waiting for 6 seconds, press a key to continue …
Heeft u hier wat aan?
Hallo, u moet de inhoud van het ZIP bestand uitpakken, naar het bureaublad. Klik met de rechtermuisknop op het script in de bypass11 folder en klik op “Als Administrator uitvoeren”. Als u een foutmelding krijgt, heeft u of beperkte rechten op het systeem, of beveiligingssoftware blokkeert een deel van het script. Het moet uitvoeren zonder foutmeldingen.
Ik heb het artikel aangepast. Het is nu duidelijk welke stappen er uitgevoerd moeten worden om 22H2 op een niet ondersteunde PC te installeren.
Succes!
Allereerst bedankt voor alle goede tips!
Vraag: ik wil graag de nieuwste Windows 11 versie (22H2) installeren.
Op dit moment heb ik Windows 11 versie 21H2.
Ik heb dit geprobeerd volgens de door u geboden oplossing en krijg toch de melding dat de Pc niet voldoet aan de gestelde eisen. Heeft u hiervoor een oplossing?
U geeft aan dat er enkele foutmeldingen ontstonden. Zoals aangegeven dit zijn beperkingen op uw systeem. Het script werkt en iedereen kan via deze stappen 22H2 installeren in Windows 11 op een PC die eigenlijk Windows 11 niet ondersteunt.