
Standaard geeft Windows de systeemtijd weer in een 24-uurs militair notatie. Sommige mensen geven er de voorkeur aan hun klok af te lezen in een 12-uurs formaat, in plaats van de standaard 24-uurs.
Als u een van deze mensen bent die graag de 12-uurs tijdnotatie wil zien, dan laten de stappen hieronder u zien hoe u dit kunt veranderen zodat u kunt beginnen met het aflezen van klokken in Windows 11.
Hoe u de tijdsnotatie ook wijzigt, deze verschijnt op de Taakbalk in de rechterbenedenhoek. Het kan ook worden weergegeven in apps en documenten die u maakt, maar niet als u het formaat in afzonderlijke programma’s wijzigt.
Meld u dan aan voor onze nieuwsbrief.
Klok format notatie wijzigen in Windows 11
Tijdnotatie wijzigen in Windows 11
Klik met de rechtermuisknop op de Startknop. Klik op Instellingen in het menu. Klik links op Tijd & taal. Klik door Taal & regio en daarna op Taalinstellingen voor beheerders.
Klik op tabblad Notaties en wijzig de Notatie naar het specifieke land waarvan u de tijd notatie wilt zien. Als u de tijd in de rechter beneden hoek wenst aan te passen wijzigt u de “Korte tijdnotatie” naar de notatie van uw keuze.
U heeft in de notatie-instellingen ook de keuze om de datumnotatie, de lange tijdnotatie en de eerste dag van de week aan te passen. Helemaal onderin ziet u direct de voorbeelden van hoe de notaties eruit komen te zien.
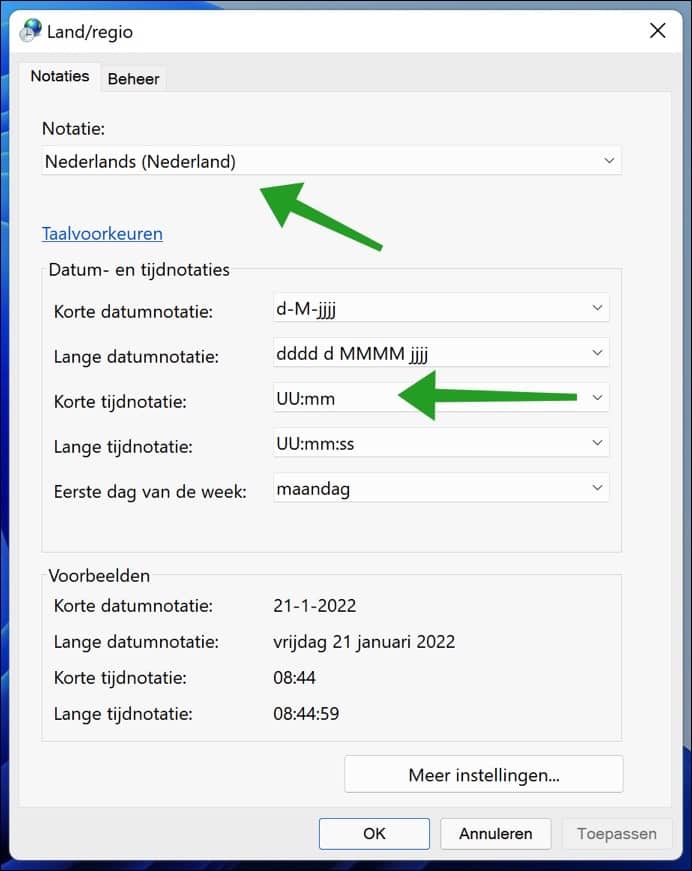
Klik vervolgens op de “Meer instellingen” knop om de indelingen aan te passen.
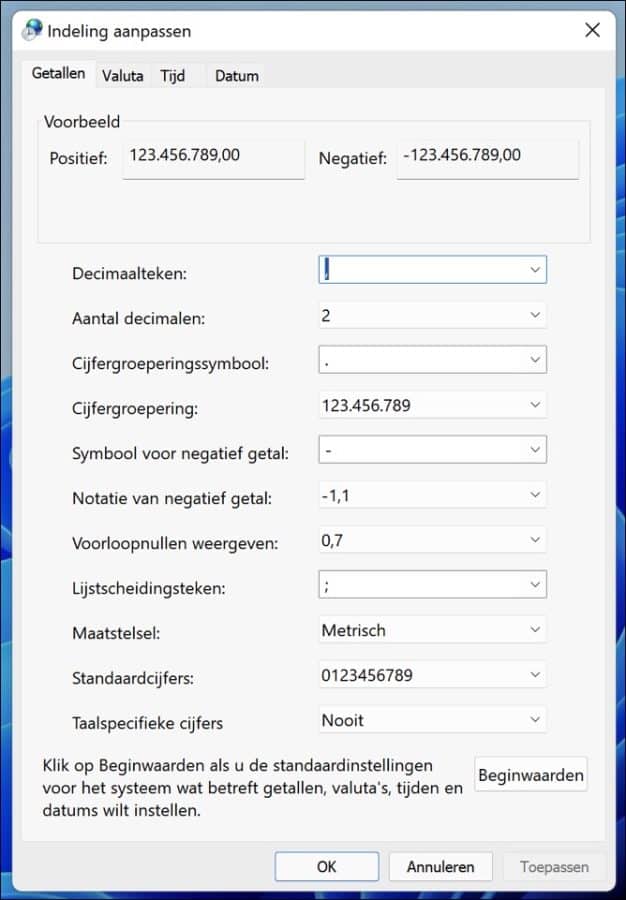
Overige indelingen wijzigen in Windows 11
Hier kunt u decimalen, cijfergroeperingssymbool en taalspecifieke cijfers aanpassen. Door bovenin de tabbladen te navigeren kunt u nog het standaard valuta teken aanpassen, het decimaal teken aanpassen en het aantal decimalen aanpassen.
Lees ook:
- Extra klok op de taakbalk in alle beeldschermen toevoegen in Windows 11.
- Extra klok toevoegen in Windows 11.
- Focussessies in Windows 11 gebruiken.
- Tijdzone wijzigen in Windows 11.
Ik hoop u hiermee geholpen te hebben. Bedankt voor het lezen!
Help mee
Mijn computertips zijn gratis en bedoeld om andere mensen te helpen. Door deze pc-tip te delen op een website of social media, helpt u mij meer mensen te bereiken.Overzicht met computertips
Bekijk ook mijn uitgebreide overzicht met praktische computertips, overzichtelijk gesorteerd per categorie.Computerhulp nodig?
Loopt u vast met uw pc, laptop of software? Stel uw vraag op ons computerforum en krijg gratis computerhulp van ervaren leden en experts.