

There are regular problems reported when installing Windows updates. These problems can arise for various reasons in both Windows 10 and Windows 11.
If there are problems with updates, Windows can roll back updates with the error message “Undo changes to your computer”. This error message means that the specific update(s) cannot be installed and that Windows chooses to remove the update.
This error occurs not only when installing updates, but also when installing components. The reason why updates could not be installed varies. In this guide you can read generic solutions that can help you fix this error message. If the solutions don't work, I'll explain how to look up details of the error message.
Undoing changes on your computer error message
Step 1 – Repair Windows files
Windows uses different processes and services to install updates. If something goes wrong with this one system files or with the services, updates cannot be installed. The result may be that updates are repeatedly undone. So allowing system files and services to be restored automatically is the first thing I would recommend starting with. This can be done safely, by the way.
Click on search in the taskbar, search for “Command Prompt”. Right click on Command Prompt and click “Run as administrator”.
In the Command Prompt window type:
sfc /scannow
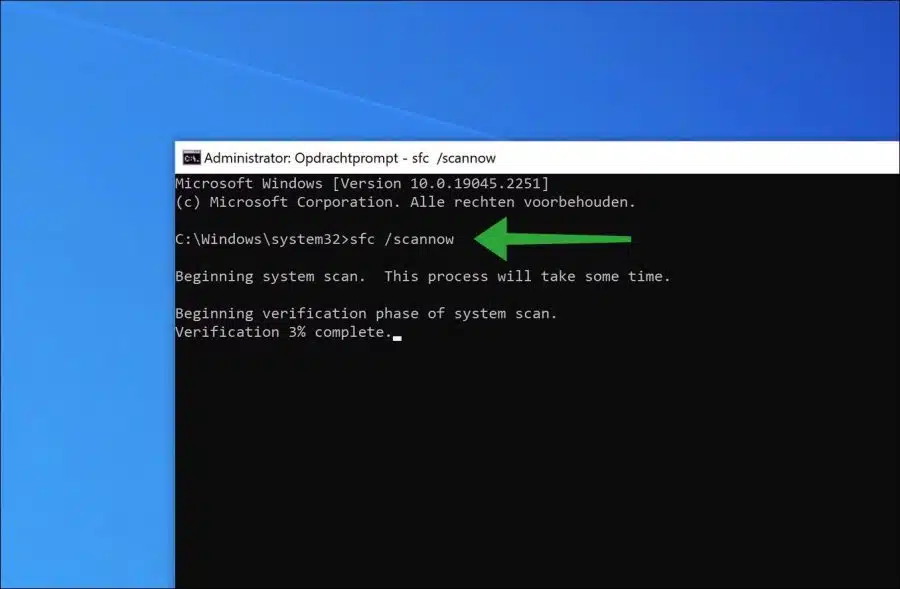
Your computer will now be searched for missing or incorrect system files. If these files are detected, Windows will restore these files itself.
Once SFC is done, I recommend running DISM. In the same Command Prompt window type:
DISM /Online /Cleanup-Image /RestoreHealth
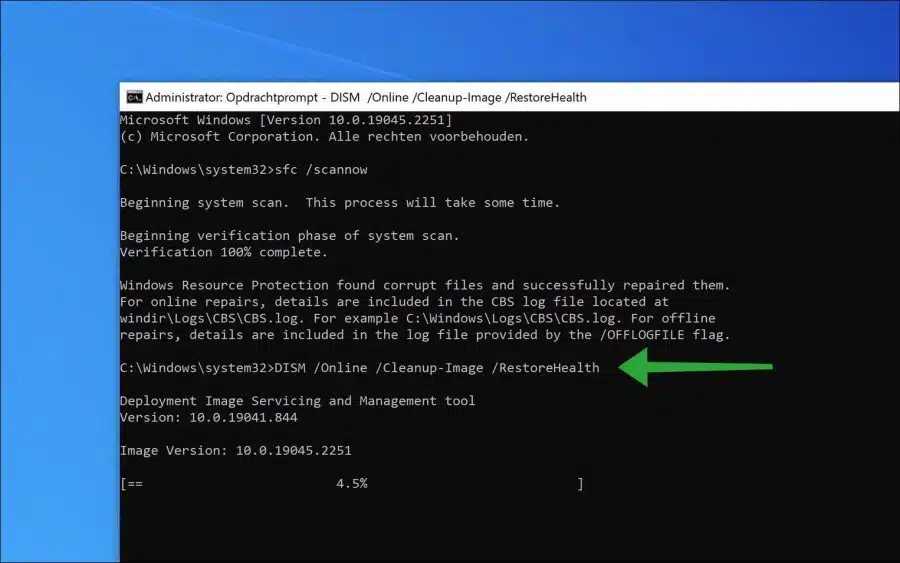
DISM performs cleanup and recovery operations on the running operating system. Even if problems are detected in the operating system via DISM based on the “online image”, they will be repaired automatically.
Step 2 – Delete Windows update files
In Windows, you can update delete files. If you delete the update files, they will then be downloaded and installed again. Sometimes updates are not downloaded correctly or certain software prevents the updates from installing. By forcefully deleting the update files and having them downloaded again, the updates may be installed properly.
To start with, we are going to stop the Windows update service. Stopping this service interrupts running or pending update processes in Windows and helps us to delete the temporary files.
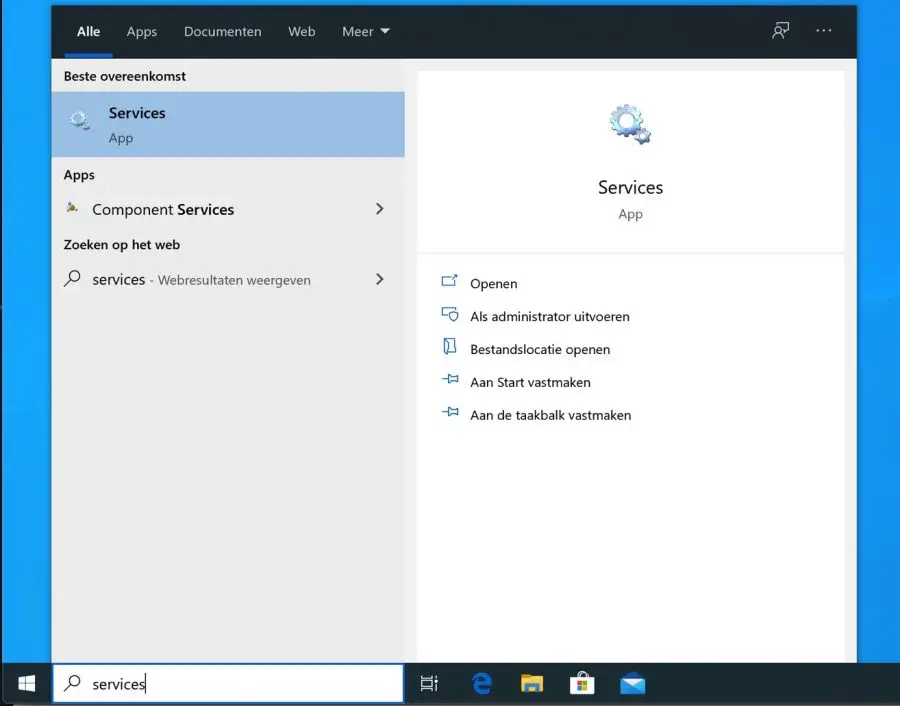
In the search box at the bottom of the Windows taskbar, search for: services.msc. Open the services result.
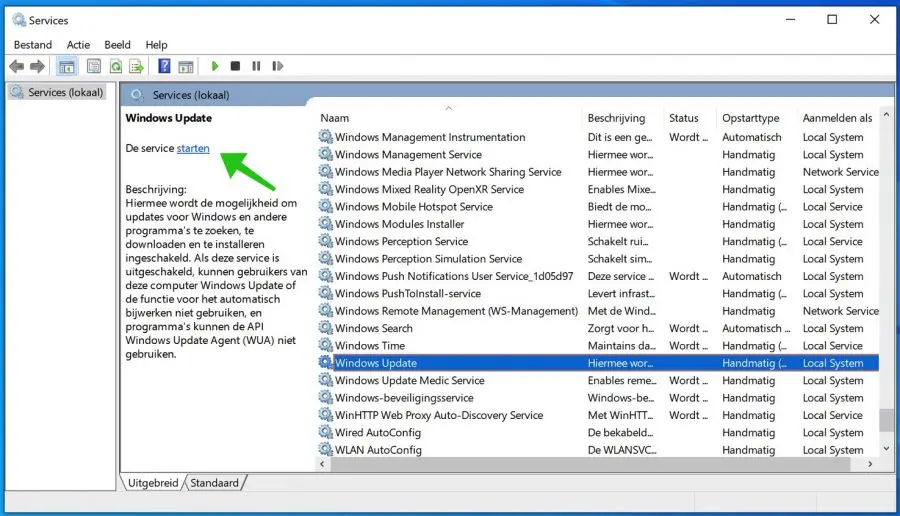
In the Windows service window look for the service: Windows update. Click on the result and click Stop the service at the top left.
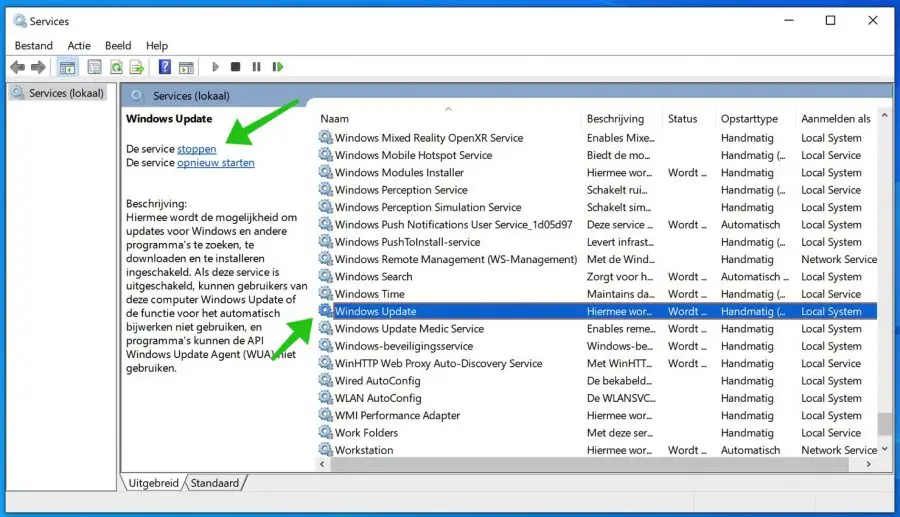
Leave the Services window open. When we are done, the Windows update service must be restarted.
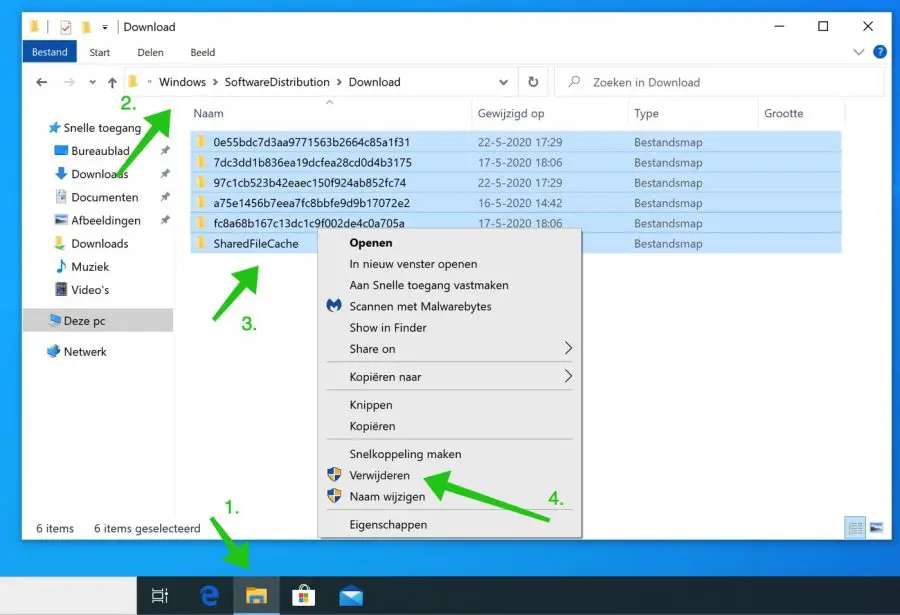
Open Windows Explorer (1) and open the following folder (2): C:\Windows\SoftwareDistribution\Download\ then select all files and folders in the Download folder with CTRL+A (3) and delete the files and folders with the remove button (4).
Now go back to the Services application. Click on the Windows update service and click on Start the service at the top left.
Close all windows. In the Windows settings, go to Windows update and check and reinstall the updates.
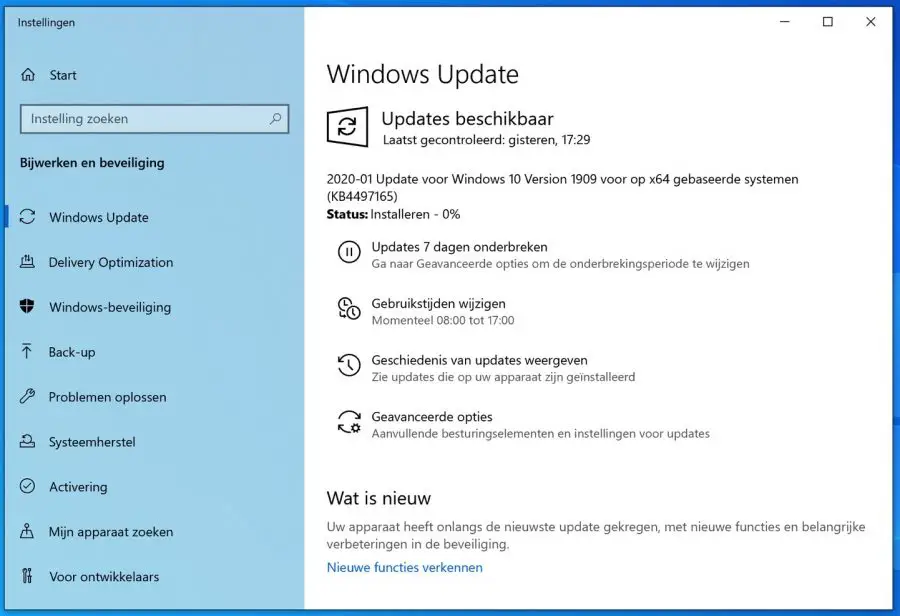
If all goes well, the update files that were not installed previously will now be installed.
Step 3 – Windows Update Troubleshooter
There are some troubleshooting tools available in Windows. There also is a problem solver available for Windows update. This troubleshooter can itself detect problems with various parts of the update process. If any problems are then detected, this troubleshooter can fix them himself.
Search for “troubleshooting” in the taskbar. Click on “Fix other problems”. In the “Additional troubleshooters” click on “Windows update” and then “Run the troubleshooter”.

If this didn't help, I recommend Windows update reset.
Step 4 – Other solutions
Being unable to install updates does not always have to do with the update process or the update itself. Sometimes certain drivers prevent installation of updates or software such as a virus scanner.
- Make sure you are not connected to a VPN or proxy. This prevents problems when downloading and installing updates.
- Disable your antivirus completely or, if necessary, temporarily uninstall the antivirus software from your computer.
- Do you have hardware connected to your PC? An external hard drive, a special keyboard, mouse or other peripherals? Then disconnect it and try to install the update again.
- Have you ever restarted the computer?
Step 5 – Use log files to identify the Windows update problem
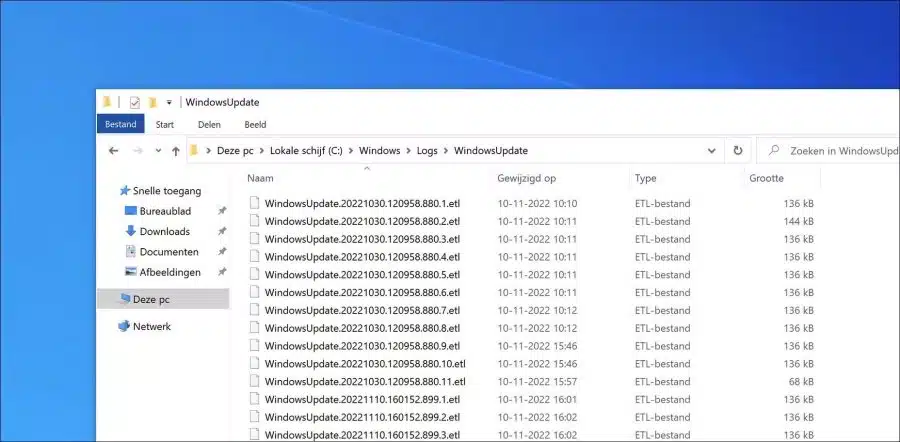
If you get an error message when you run Windows Update, you can use the information in the Windowsupdate.log log file to troubleshoot the problem. You can find this file at the following location:
C:\Windows\Logs\WindowsUpdate
Here you will find all ETL files. You must open these files with PerfView. Some technical knowledge required to use these trace files.
When you see that the updates are available but the download does not start.
When updates are downloaded but installation does not start.
When updates are installed but no restart occurs.
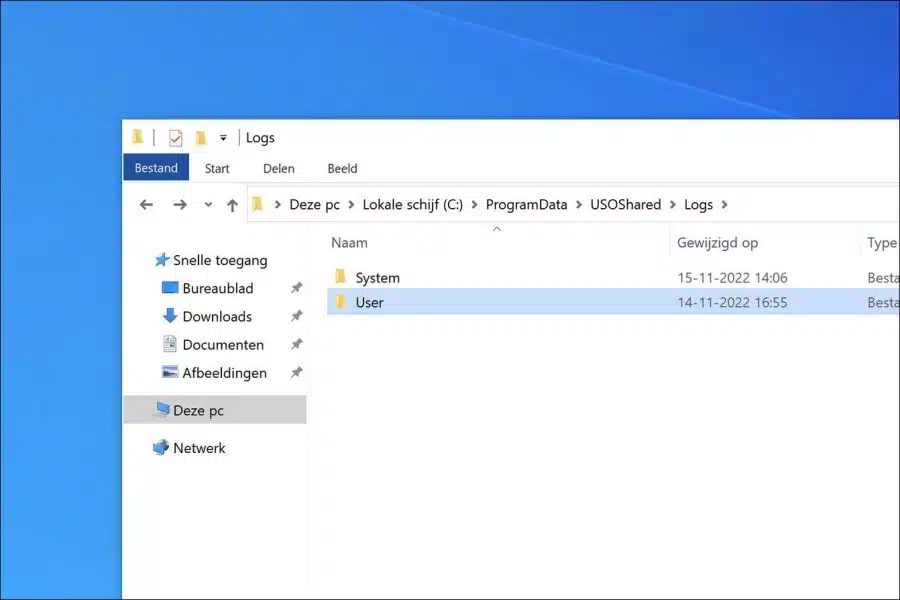
C:\ProgramData\USOShared\Logs
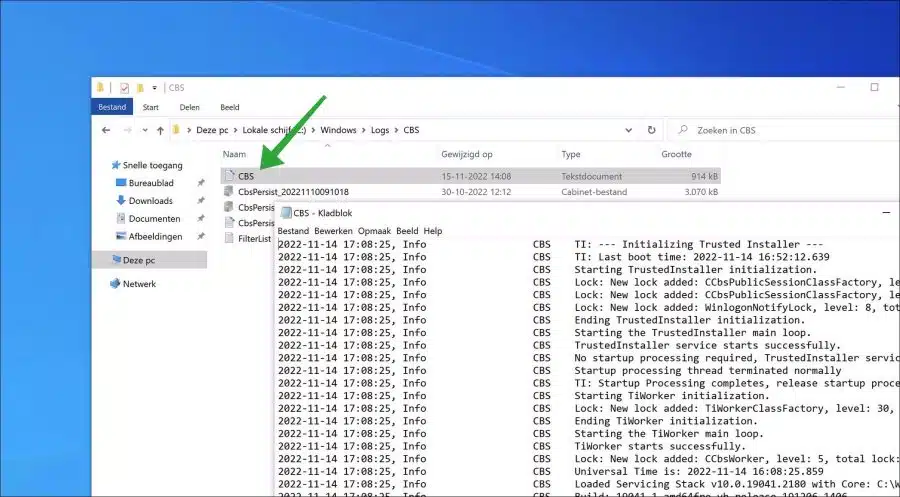
Troubleshoot Windows Update installation problems. For this you can analyze the “CBS.log” file, found in:
%systemroot%\Logs\CBS
Read more about these log files here.
https://learn.microsoft.com/nl-nl/windows/deployment/update/windows-update-logs
Step 6 – Remove Latest Feature Update (Optional)
Windows installs a feature update approximately twice a year. This update contains many changes, especially visual changes and new features. These updates can sometimes cause problems, especially in the beginning. Uninstalling the latest feature update may resolve the problem. Make sure you do not reinstall the component update again.
Read here how you can subsequently block updates. Make use of Windows Update mini tool to block the component update.
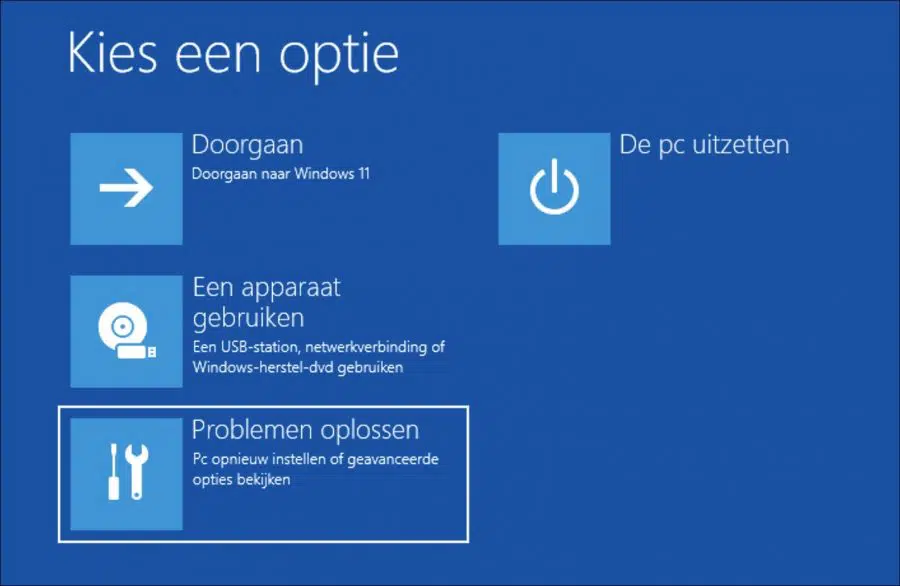
Start your computer in the advanced boot options. You can do this by using installation media to start up. Then click on “solve problems” at the bottom left.
De advanced boot options are displayed, click Troubleshoot.
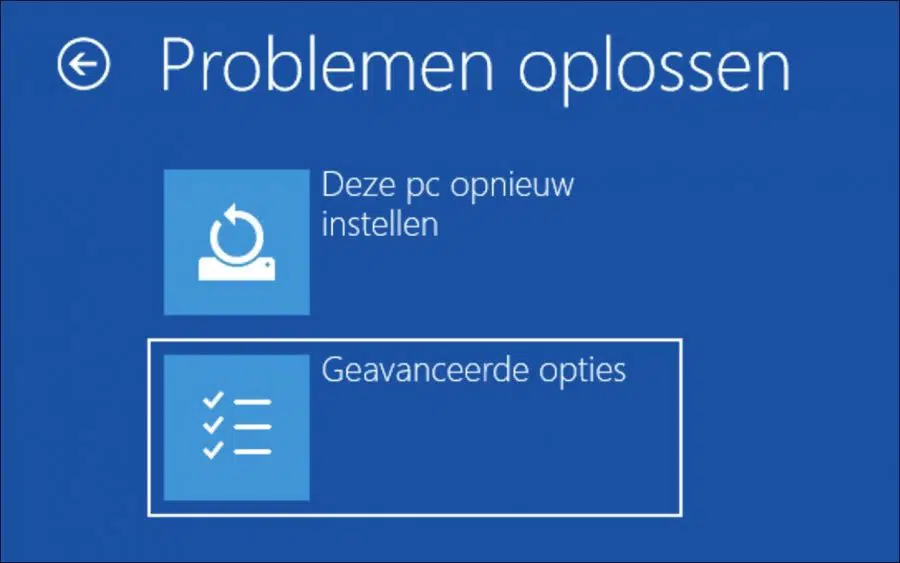
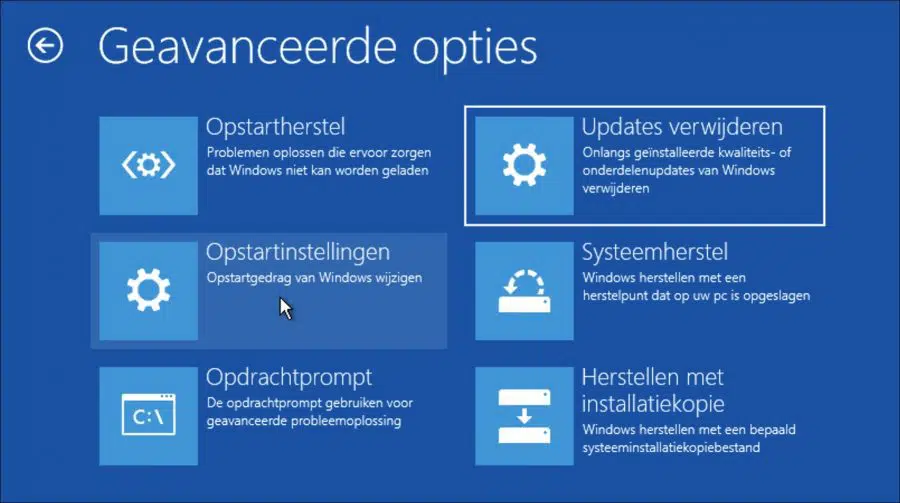
Click Advanced Options.
Click Uninstall update.
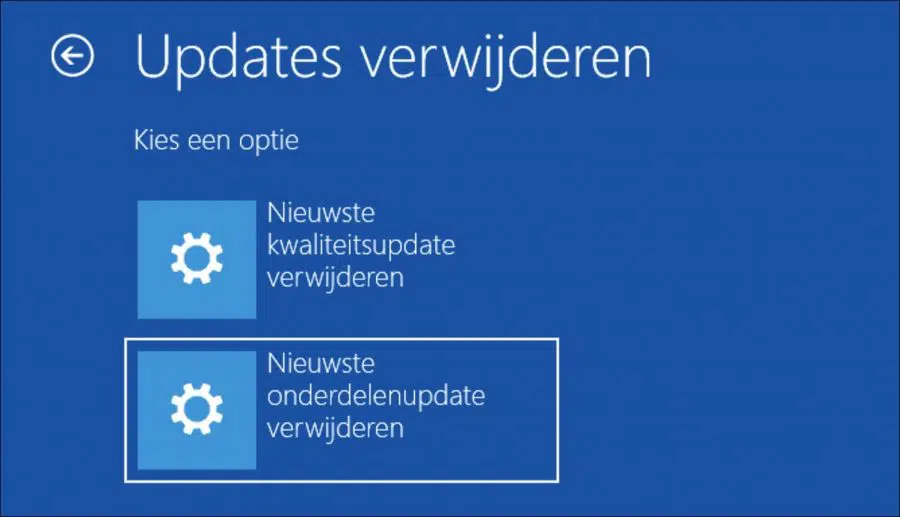
Click on the option you want to remove. You can choose from “Remove Latest Quality Update” and “Remove Latest Feature Update”. If you have no idea, start from the first, check if the problem is solved. If not, restart the advanced options and uninstall the other update.
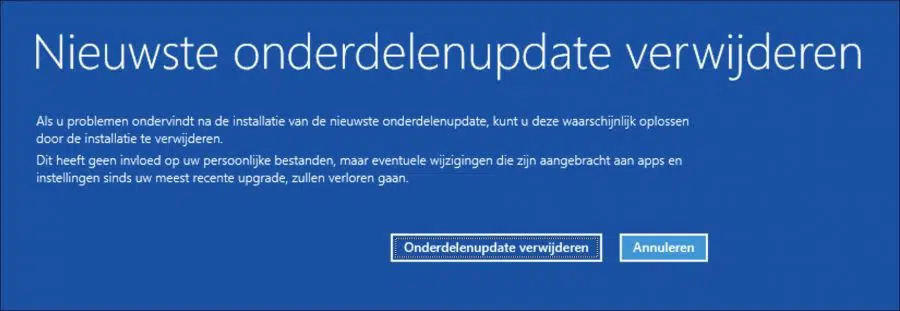
If you experience problems after installing the latest feature update, you can probably resolve them by uninstalling the installation. This won't affect your personal files, but any changes made to apps and settings since your most recent update will be lost.
Click Remove Feature Update or Quality Update.
You can then use the block specific Windows update.
I hope this has helped you resolve the “Undo Changes” error when installing Windows update. Thank you for reading!