
Als u een PC koopt of samen laat stellen, dan zijn er vaak één of mogelijk twee standaard partities aanwezig. In de meeste gevallen betreft dit een C en D partitie.
Als u alleen een C schijf heeft en geen D of u wilt meerdere partities aanmaken in Windows 11, dan kunt u dit eenvoudig uitvoeren via schijfbeheer.
Na het aanmaken van de partitie dient u een schijfletter toe te wijzen aan de partitie. Hierna kan Windows 11 het gebruiken als extra partitie en kunt u het gebruiken om bestanden in op te slaan.
Meld u dan aan voor onze nieuwsbrief.
Partitie aanmaken in Windows 11
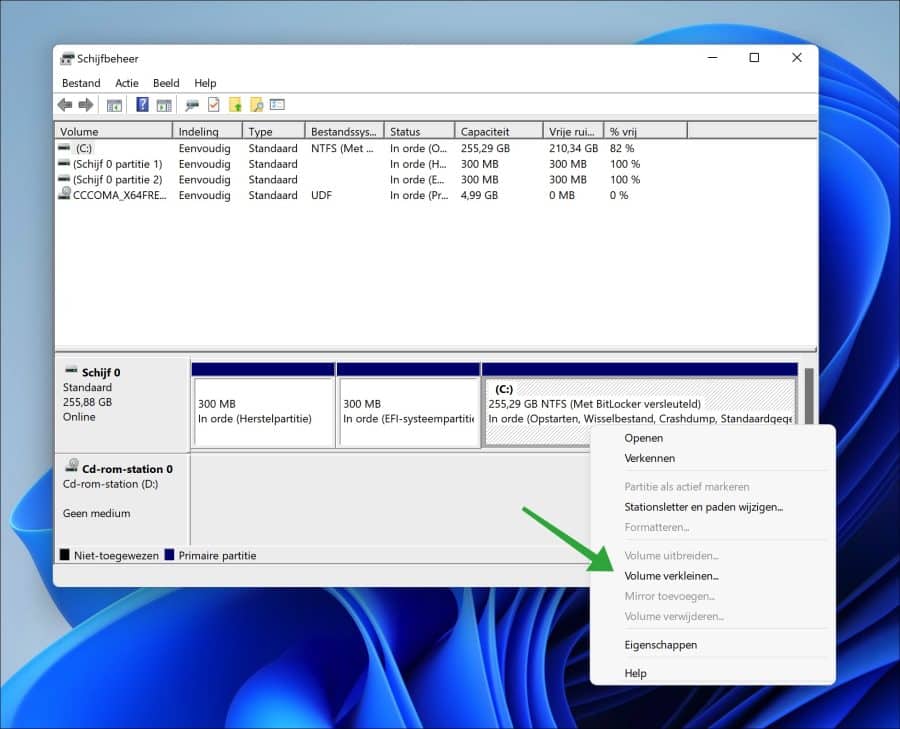
Om een partitie aan te maken opent u Schijfbeheer. In schijfbeheer ziet u alle schijven die Windows heeft herkend. Dit kunnen ook externe schijven zijn zoals een USB of externe harde schijf.
Om een partitie aan te maken op een bestaande schijf dient u eerst de schijf te verkleinen. Door de schijf te verkleinen maakt u ruimte vrij. Deze ruimte kunnen we dan als partitie gaan gebruiken.
Klik met de rechtermuisknop op de schijf waar u deel van wilt verkleinen om dit deel later te gebruiken als nieuwe partitie. Klik vervolgens op “Volume verkleinen”.
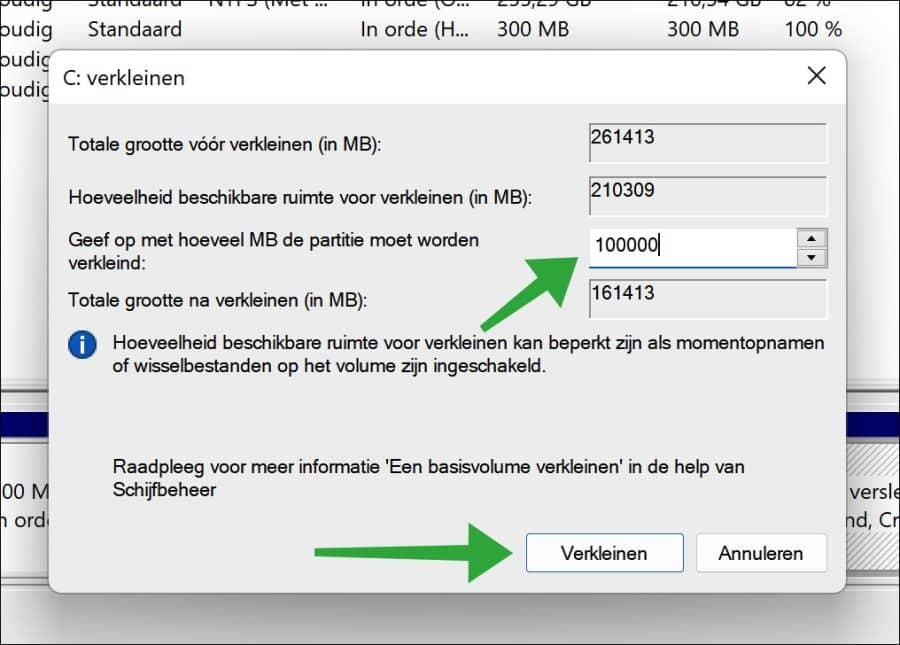
U geeft nu in met hoeveel MB u de huidige schijf wilt verkleinen. Dit deel wordt gebruikt als partitie. Als u dus om en nabij een partitie van 100 GB aan wilt maken dan geeft u in “100000” MB. Dit is geheel afhankelijk van met hoeveel MB de huidige schijf überhaupt verkleint kan worden.
Klik op “Verkleinen” om door te gaan.
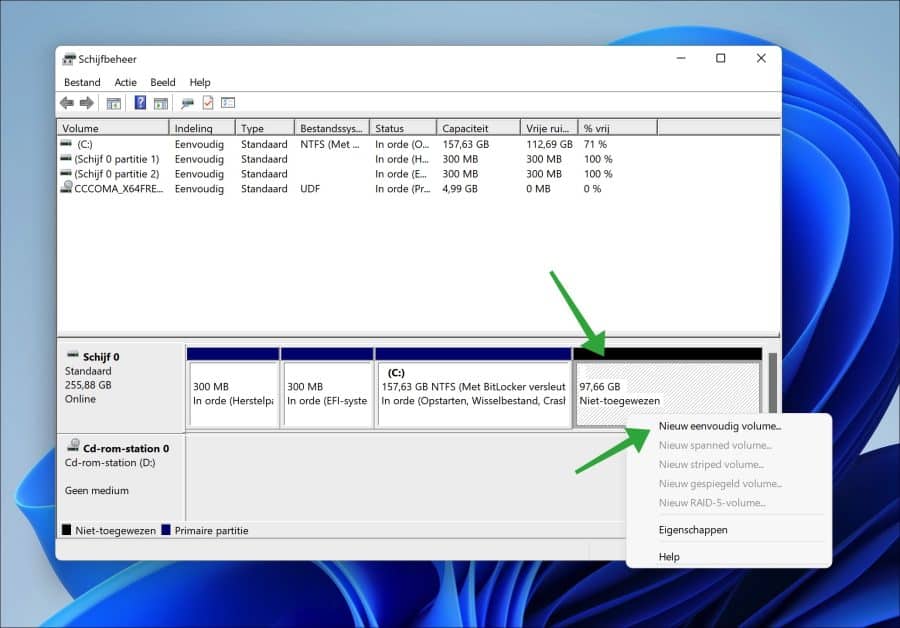
U ziet nu in de betreffende schijf een “Niet toegewezen” ruimte ontstaan. Als u met de rechtermuis op deze niet toegewezen ruimte klikt, dan klikt u op “Nieuw eenvoudig volume” om een nieuw volume aan te maken. Dit is de partitie.
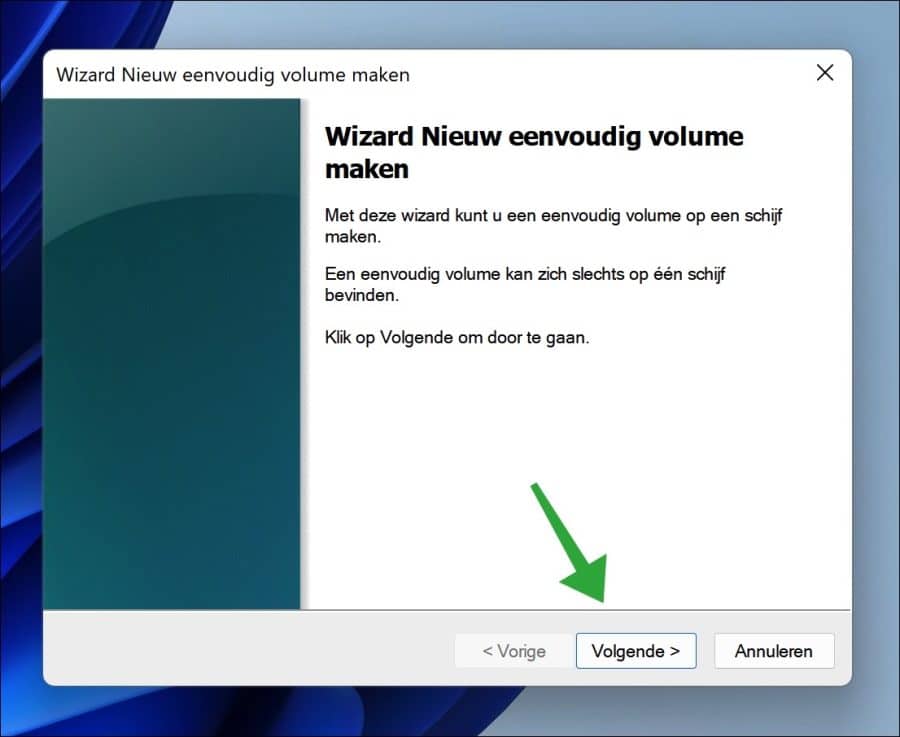
De wizard voor het aanmaken van een nieuw eenvoudig volume wordt gestart. Klik op “volgende” om door te gaan.
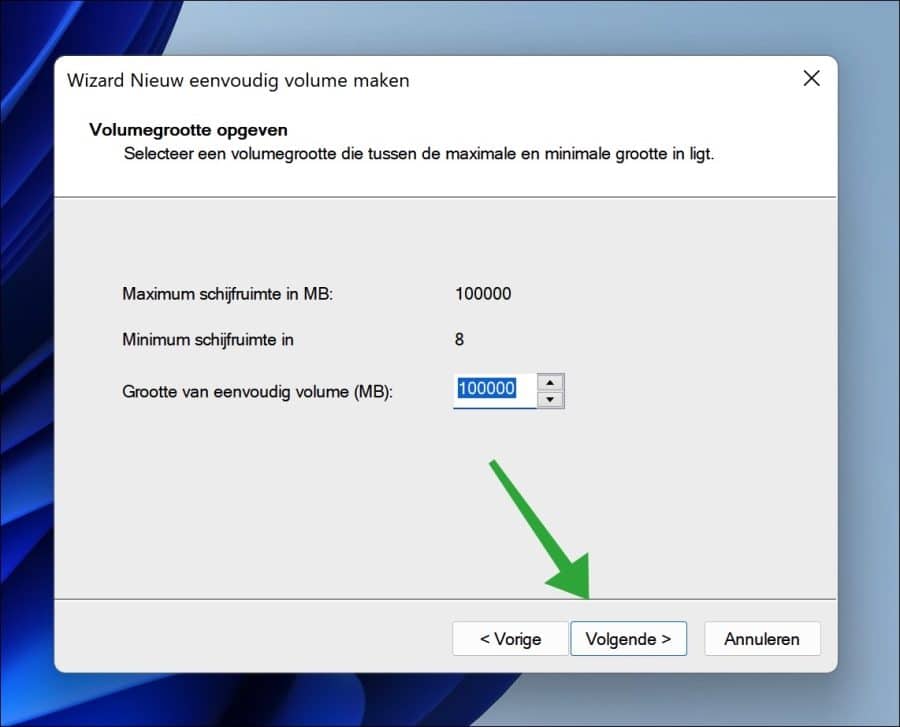
Standaard wordt de grootte ingevuld voor het eenvoudig volume. Als u één partitie voor dit volume wilt aanmaken dan laat u de standaard grootte ingevuld en klikt u op “volgende” om door te gaan.
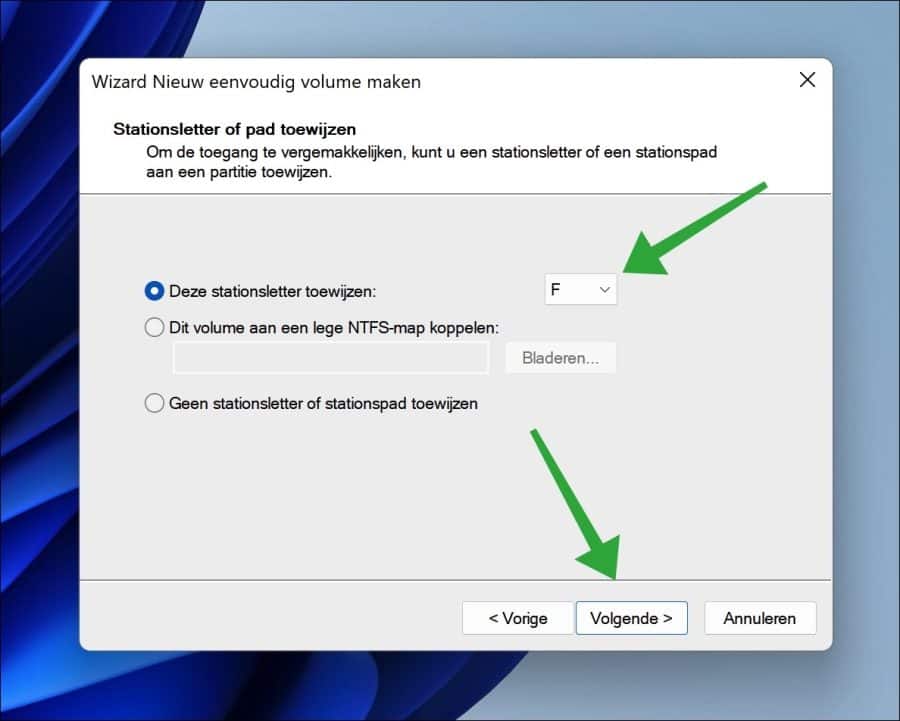
U kunt nu een stationsletter toewijzen aan het volume. Als u een stationspad wilt aanmaken dan selecteert u deze optie. U kunt het volume ook aan een lege NTFS map koppelen. Maak uw keuze en klik op “volgende”.
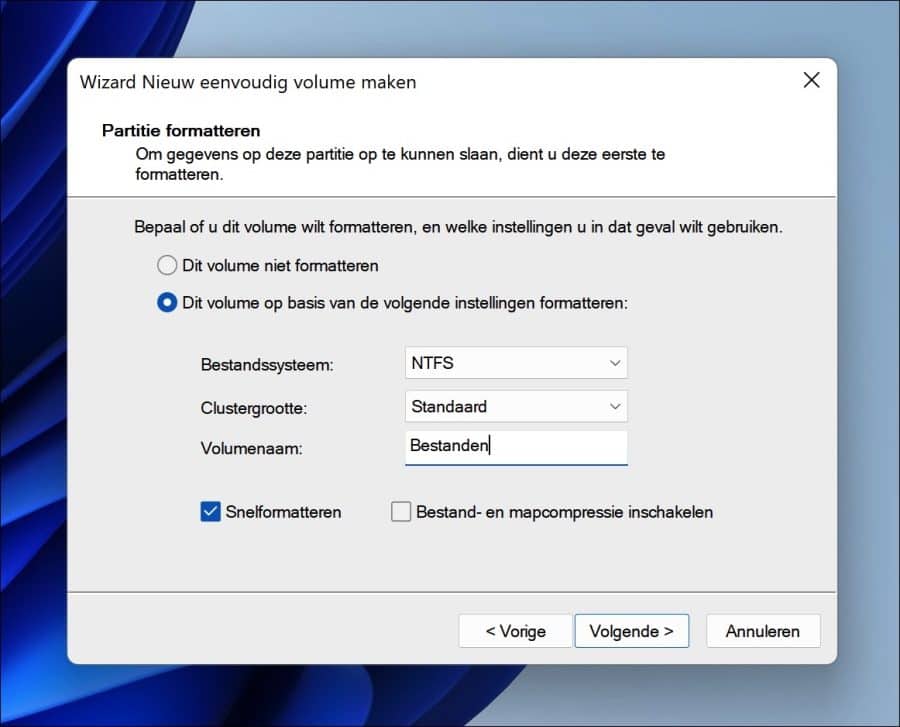
U kunt nu de partitie formatteren. Als u er in Windows gebruik van wilt maken raadt ik aan de standaard instelling “NTFS” aan te houden. Ook de standaard clustergrootte wordt ingesteld aan de hand van de totale grootte. Eventueel kunt u de volumenaam nog wijzigen zodat deze herkenbaar is in Windows als extra partitie.
Als u de format opties heeft ingesteld klikt u op “volgende” om door te gaan.
Om de partitie af te ronden klikt u nogmaals op “voltooien”.

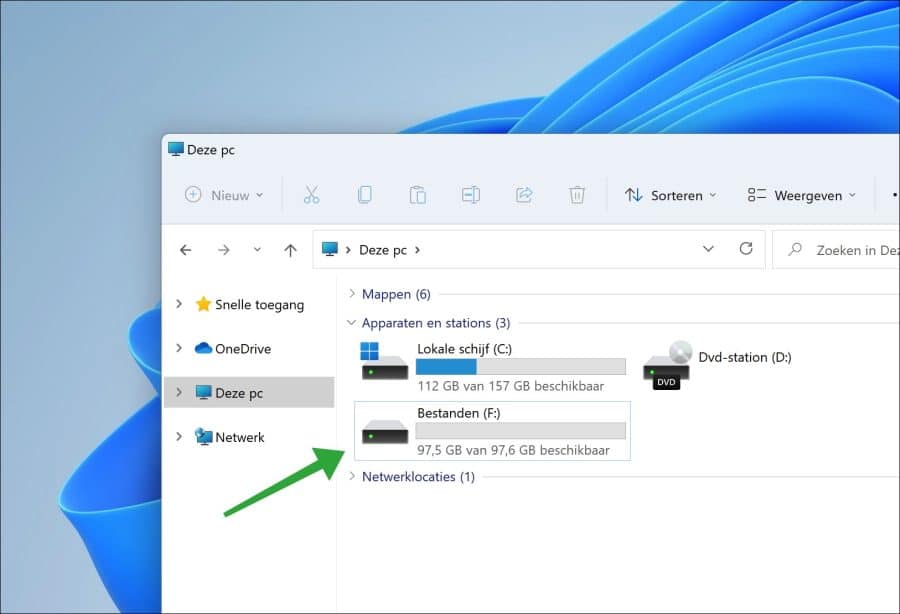
Als u nu in “Deze PC” kijkt via de Windows verkenner, dan ziet u hier de zojuist aangemaakte partitie met de toegewezen schijfletter, map of locatie.
Ik hoop u hiermee geholpen te hebben. Bedankt voor het lezen!
Lees meer over partitioneren:
Ik ben vanmorgen geweldig door Stefan geholpen en heb dankzij zijn tip en link het probleem kunnen oplossen. De partitie die ik nu heb aangemaakt is bedoeld voor Flightsimulator X, die ik eerder dit jaar heb verwijderd. Maar als ik die nu weer wil installeren weigert dat. In mijn configuratiescherm vind ik alleen nog FSX servicepack maar die weigert zich te laten verwijderen met de melding “Simobjects is no valid short name for a file”. Nu heb ik alle aan FSX gerelateerde files verwijderd (en nergens nog Simobjects kunnen vinden), ook in Gebruikers/Apps/Roaming en zoeken op de pc geeft op FSX of wat daar op lijkt geen resultaten. Ergo, alles van de oude installatie moet dus verwijderd zijn. Ik heb ook CCleaner laten draaien (ook registers) maar er schijnen nog steeds restanten van de oude FSX op de schijf te staan die ik nergens kan vinden. De handleidingen over “FSX grondig verwijderen” allemaal afgelopen en gecheckt, maar dus zonder resultaat. Weet iemand van jullie hoe ik de schijf echt volledig kan schoonmaken van alle aan FSX gerelateerde left-overs, want ik denk dat het probleem daarin zit. Opnieuw, hartstikke bedankt!
Ik heb een extra schijf ingebouwd voor games (gewoon een HDD). Deze bevat 2 partities, E en F. Beiden zijn leeg en geformatteerd. Als ik op E klik krijg ik een lijstje met opties, als ik op F klik krijg ik alleen “help”. Ik wil beide samenvoegen tot 1 grotere. Maar E kan ik niet verder vergroten en met F kan ik helemaal niets, dus ook niet verkleinen t.g.v. E. Hoe krijg ik deze nu samengevoegd? Bij voorbaat dank! (Windows 11 home)
Hallo, de partitie met schijfletter “F” zou een herstelpartitie kunnen zijn. Deze zijn normaal niet zichtbaar, maar in enkele uitzonderlijke gevallen dus wel.
Probeer de partitie eens op de volgende manier te verwijderen:
https://answers.microsoft.com/en-us/windows/forum/all/partition-is-not-accessible-and-cannot-be/b031e8cc-b1ac-4c93-a49c-6ecbf3232519Succes!
Reactie per e-mail:
Hartstikke bedankt! Via de link is het gelukt en ik heb nu een extra partitie om te gebruiken!
Fijn weekend en nogmaals bedankt!
Gerard
Heb veel hulp gehad van deze site m.b.t. configureren W11.
Dank
Fijn om te lezen dat mijn site u heeft geholpen. Bedankt voor uw reactie!