

Windows 11 requires an internet connection during installation. An internet connection is required to complete the installation since Windows 11 version 22557.
In the past, there was an option to skip the installation via the Internet and proceed with a local account, this option has disappeared. All you can do is click on a “Try Again” button that will ask you again to connect to the internet to complete the Windows 11 installation.
In this article you can read how You can still install Windows 11 without an active internet connection.
Install Windows 11 without an internet connection
To get started, I recommend that you start the installation via a Windows 11 USB Stick. You make this USB stick on, insert it into the computer and start the installation.
It is important to know that if you install Windows 11 via USB in this way, all current data will be erased. Windows 11 installs cleanly.
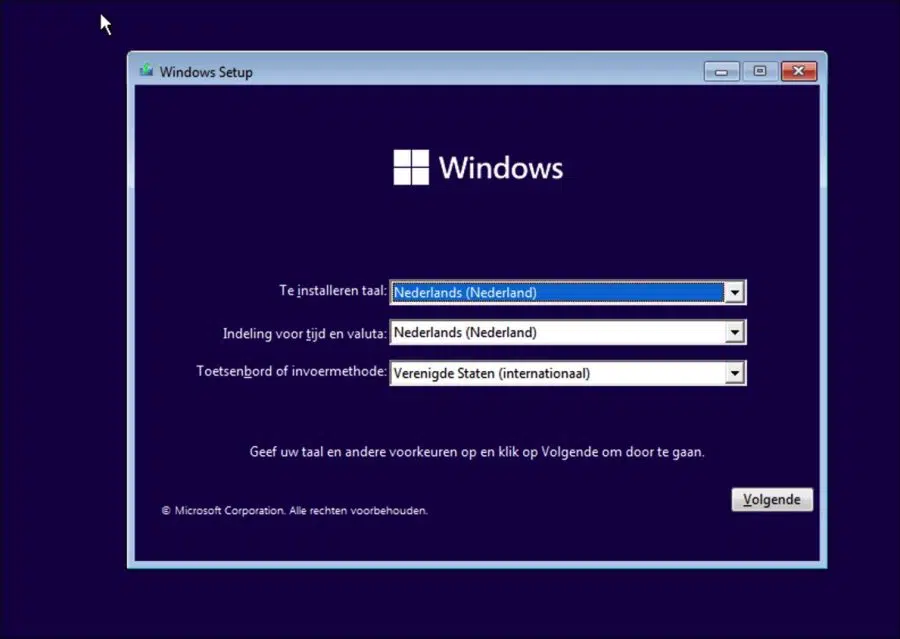
Select the correct one language to install Windows 11.
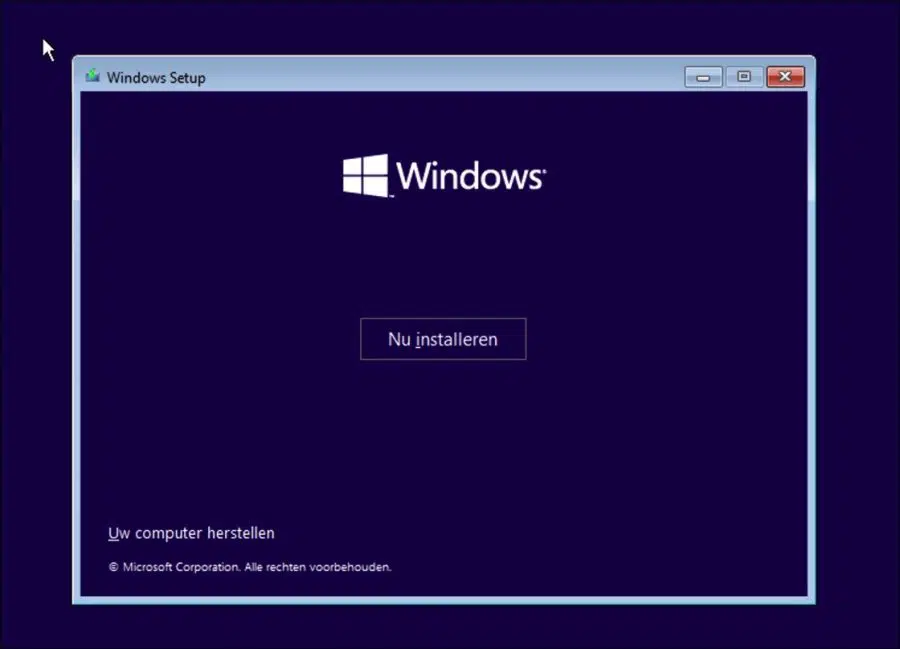
Click on the “Install Now” button.
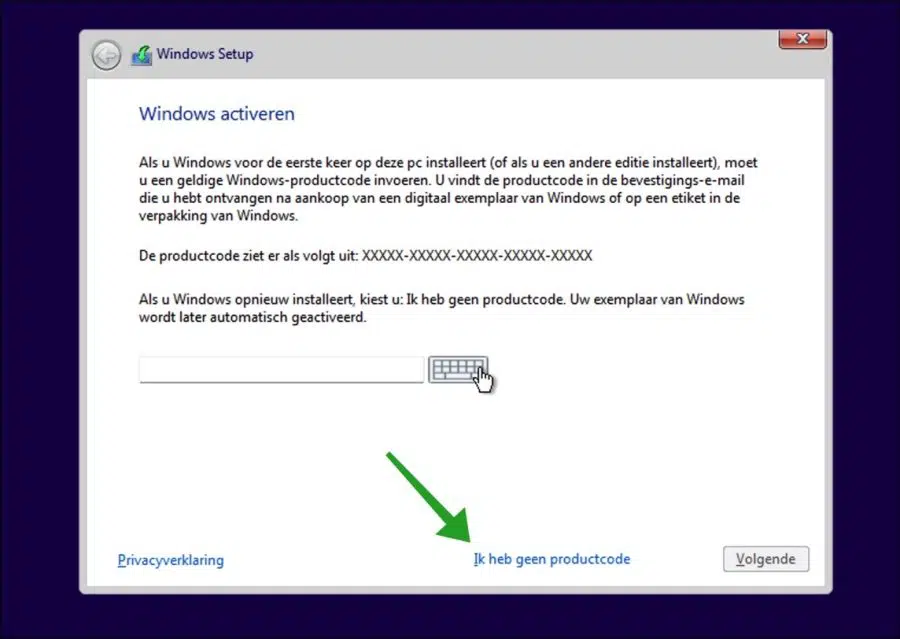
Then click on “I don't have a product key” at the bottom or fill in the product code and click next.
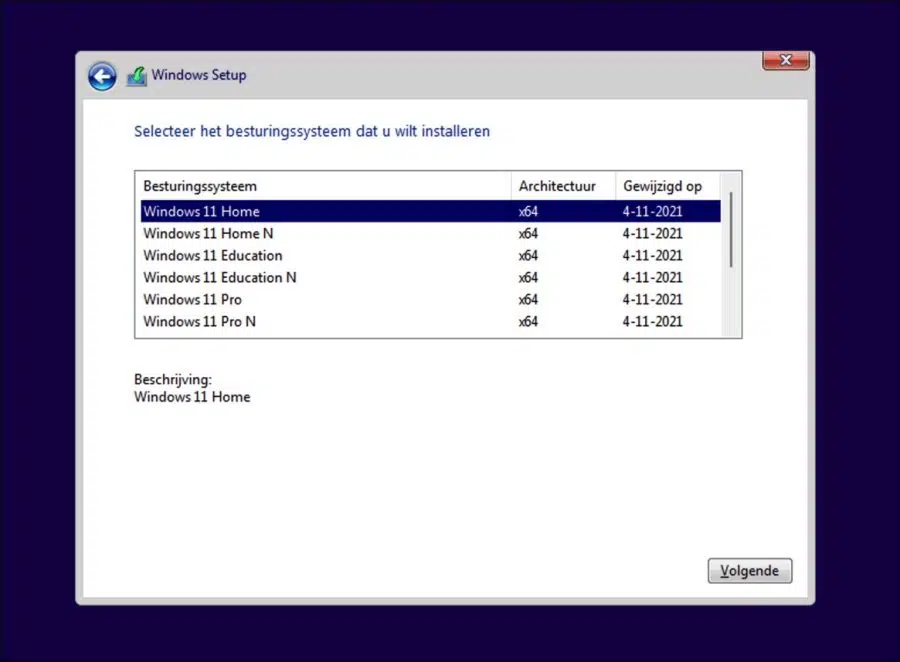
Choose the operating system you wish to install. It's about the version of Windows 11 that you want to install. If you use Windows 11 in a home environment, Windows 11 home is suitable. If you are more familiar with computers or use Windows 11 in a work environment, select Windows 11 pro.
Click next.
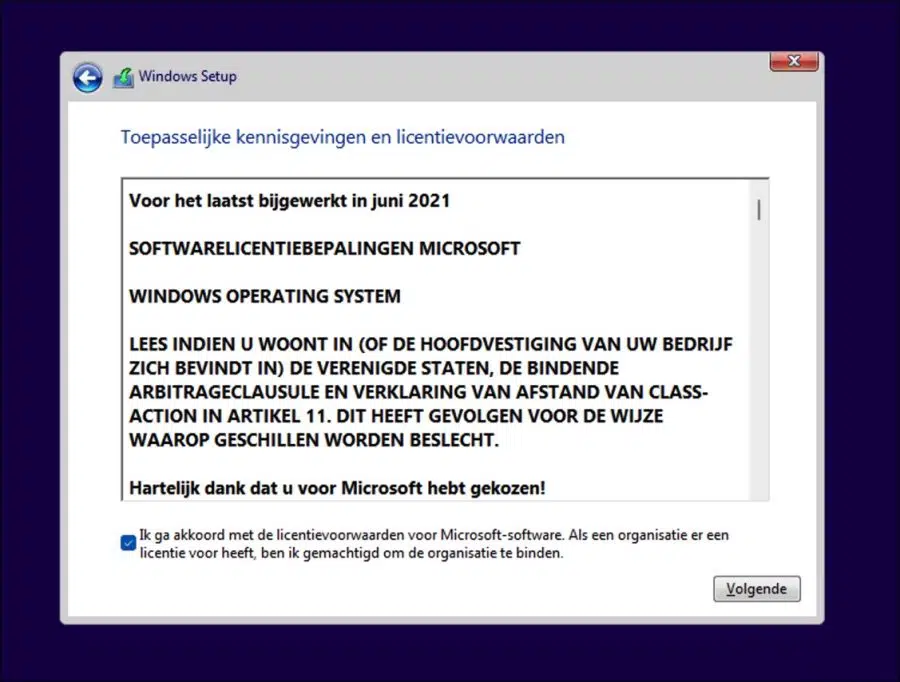
Accept the license terms and click next.
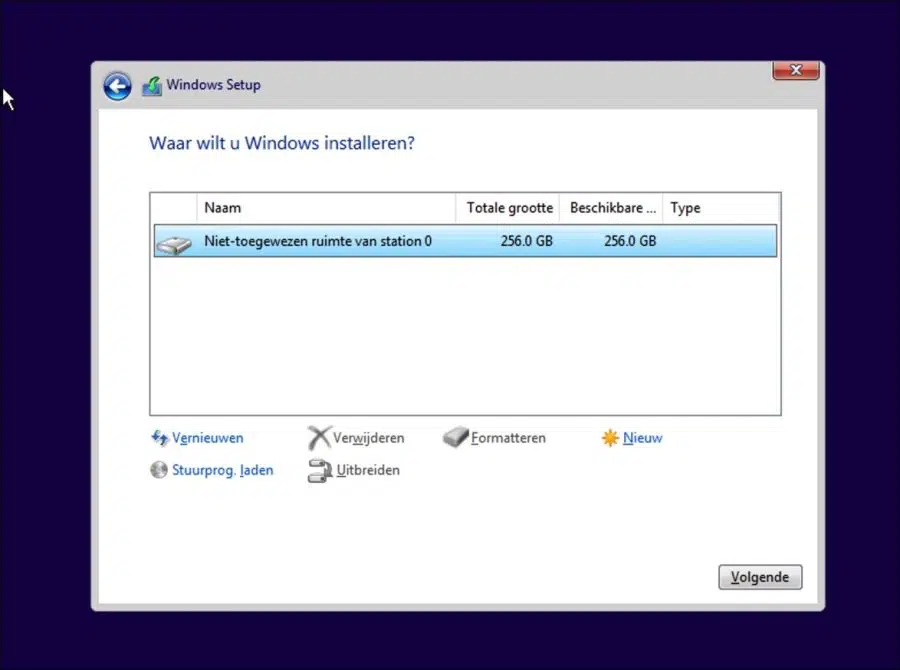
Select the “unallocated” disk space and click next. This screen may differ, you will need to free up disk space and/or partitions yourself to install Windows 11.
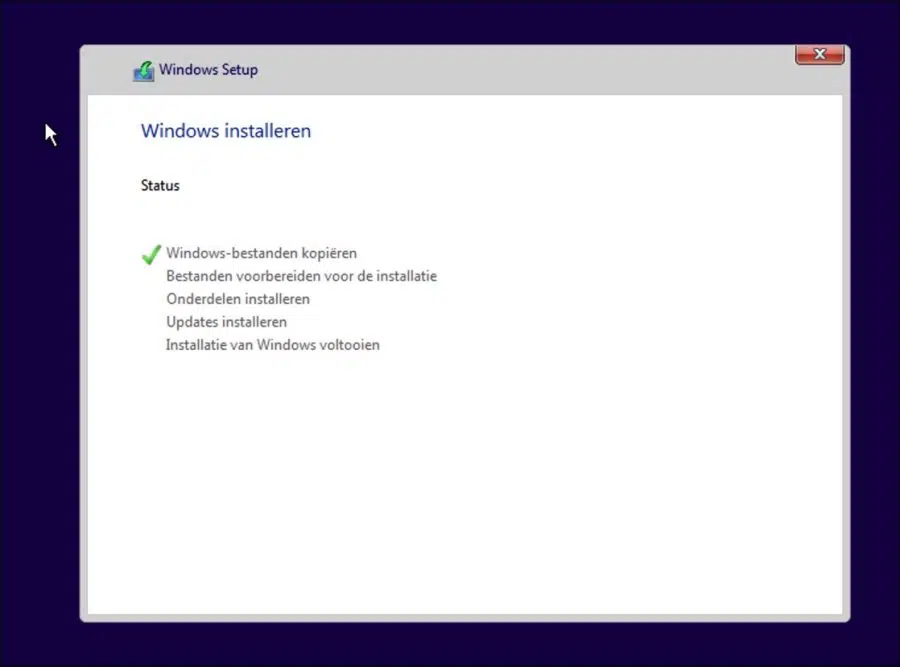
Windows 11 is being installed. After installation, we will customize Windows 11 so that you can complete the installation without an active internet connection.
When the installation is complete, you will see the Windows 11 configuration. Select the correct country and region.

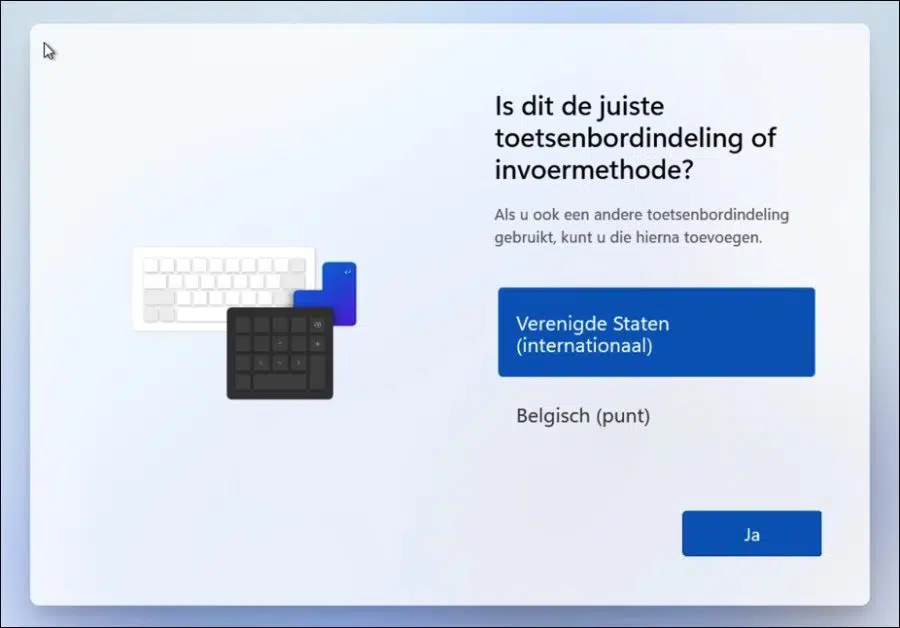
Choose the correct keyboard layout.
When you see the window “You are about to connect to a network”, press the following key combination on your keyboard.
SHIFT+F10

A command prompt window will open. In the command prompt window type the following command and confirm with the enter key:
OOBE\BYPASSNRO
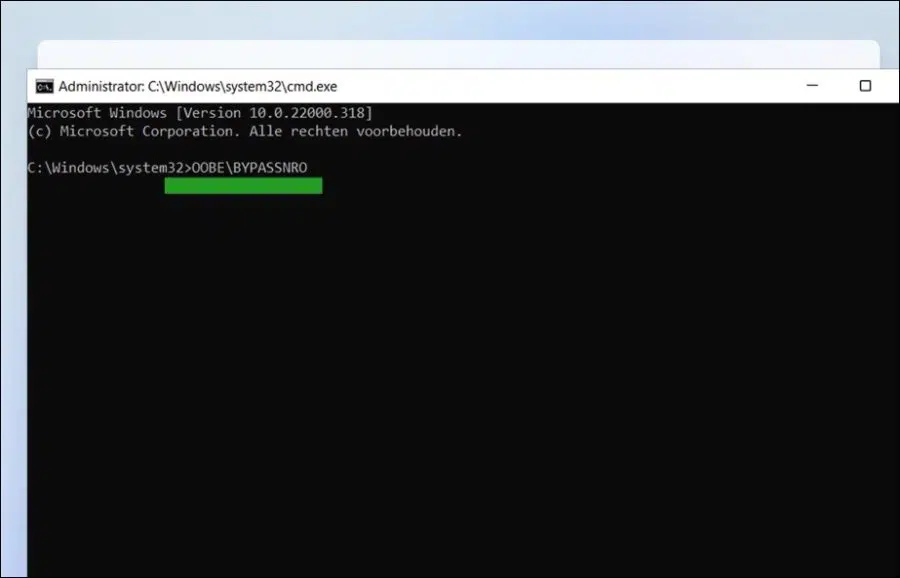
Your computer will now restart and return to its Windows 11 configuration.
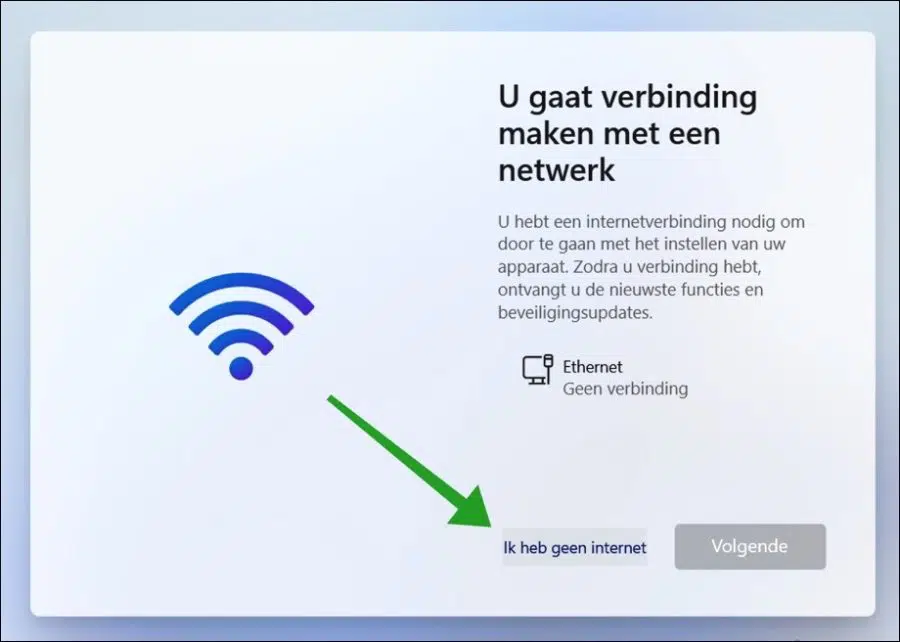
When the configuration has started again, click on “I have no internet”.
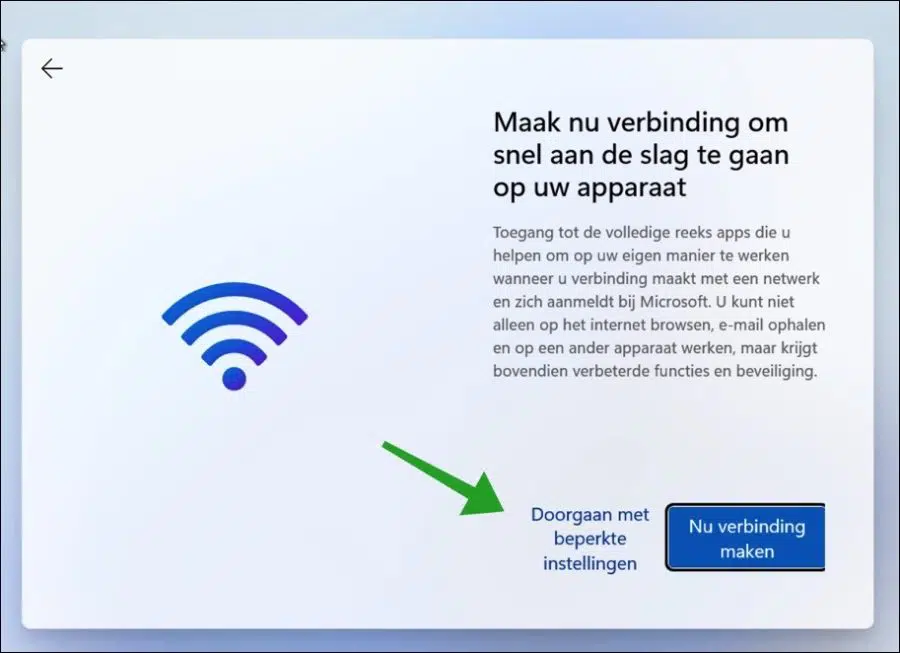
Then click on “Continue with restricted settings” at the bottom.
Then give one user name to log in with a local account. Click next.

You will now be asked a number of times for different settings, follow these questions. After it is completed, the Windows 11 installation will be completed.

Also read:
- Install Windows 11 in VirtualBox.
- Install Windows 11 on an unsupported PC.
- Install Windows 11 without TPM.
- Reinstall Windows 11 with file retention.
- 15 tips for Windows Explorer in Windows 11.
- Clean Windows 11 registry? This is how!
- 8 tips to make Windows 11 faster.
- Customize Windows 11 taskbar.
I hope this helped you. Thank you for reading!
Thanks for figuring out this procedure. Unfortunately I get the message that OOBE is already not recognized.
Pity
Hallo, I tested it right away and it still works. You may be doing something wrong, I have no idea what, but it still works.
The command is:
OOBE\BYPASSNRO(Note the correct Slash “\”)Success!
The command is not written correctly OOBE\BYPASSRNO
This is how OOBE\BYPASSNRO works
Dissolved! 🙂 Thank you
Dear Stefan, thank you very much for this tip and of course the entire initiative. This way I could now continue with the installation without an internet connection. Top
Thanks! Glad it worked out 🙂